| View previous topic :: View next topic |
| Author |
Message |
captmike
Novice
Joined: 01 May 2012
Posts: 27
Location: Elberton, Georgia
|
 Posted: Wed May 09, 2012 4:35 pm Post subject: Plumbing Posted: Wed May 09, 2012 4:35 pm Post subject: Plumbing |
 |
|
| A quick question on the type of plumbing I should use on my small rig (2.5 cfm pump, 5 gal air tank & big shop vac). The opening in the air tank looks to be 3/4" and the pump has an "L" fitting on it. Do I remove the "L" fitting and plumb it differently? I also plan to type in the shop vac to help initially and guess I'll have to do some "creative" engineering to hook that up. I started taking photos today and as soon as I get the basic details worked out I'll post a work along. |
|
| Back to top |
|
 |
jegner
Site Admin

Joined: 30 May 2003
Posts: 2144
Location: Texas, USA
|
| Posted: Thu May 10, 2012 12:41 pm Post subject: |
|
|
| Pictures would help. I'm having a hard time imagining your current set up. |
|
| Back to top |
|
|
captmike
Novice
Joined: 01 May 2012
Posts: 27
Location: Elberton, Georgia
|
| Posted: Thu May 10, 2012 2:40 pm Post subject: |
|
|
I'm working on photos & maybe can post some to-nite. I'm retired and work 5 days a week, 12 hours a day.....make sense? Anyway after the "honey Dew" list in the evenings, I don't have much time to work on this thing. Wednesdays I get a full day off and yesterday I got some things figured out and took a few photos.
Mike |
|
| Back to top |
|
|
captmike
Novice
Joined: 01 May 2012
Posts: 27
Location: Elberton, Georgia
|
| Posted: Thu May 10, 2012 7:02 pm Post subject: |
|
|
I don't know if I should start another thread with this, so if I should, please let me know. Here are a few photos of what I have so far:
I have deleted all the photos her as I could not get photobucket to play nice. I did take a few shots of the machine assembled:
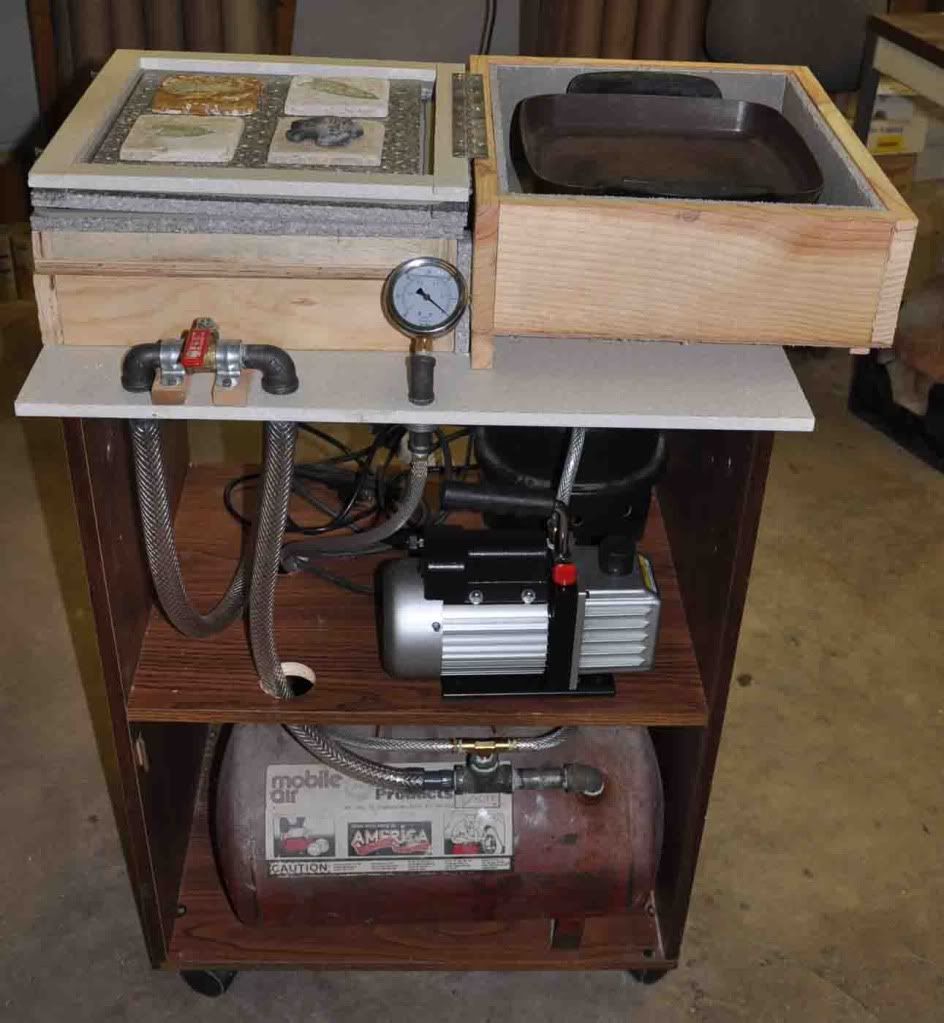
Front view
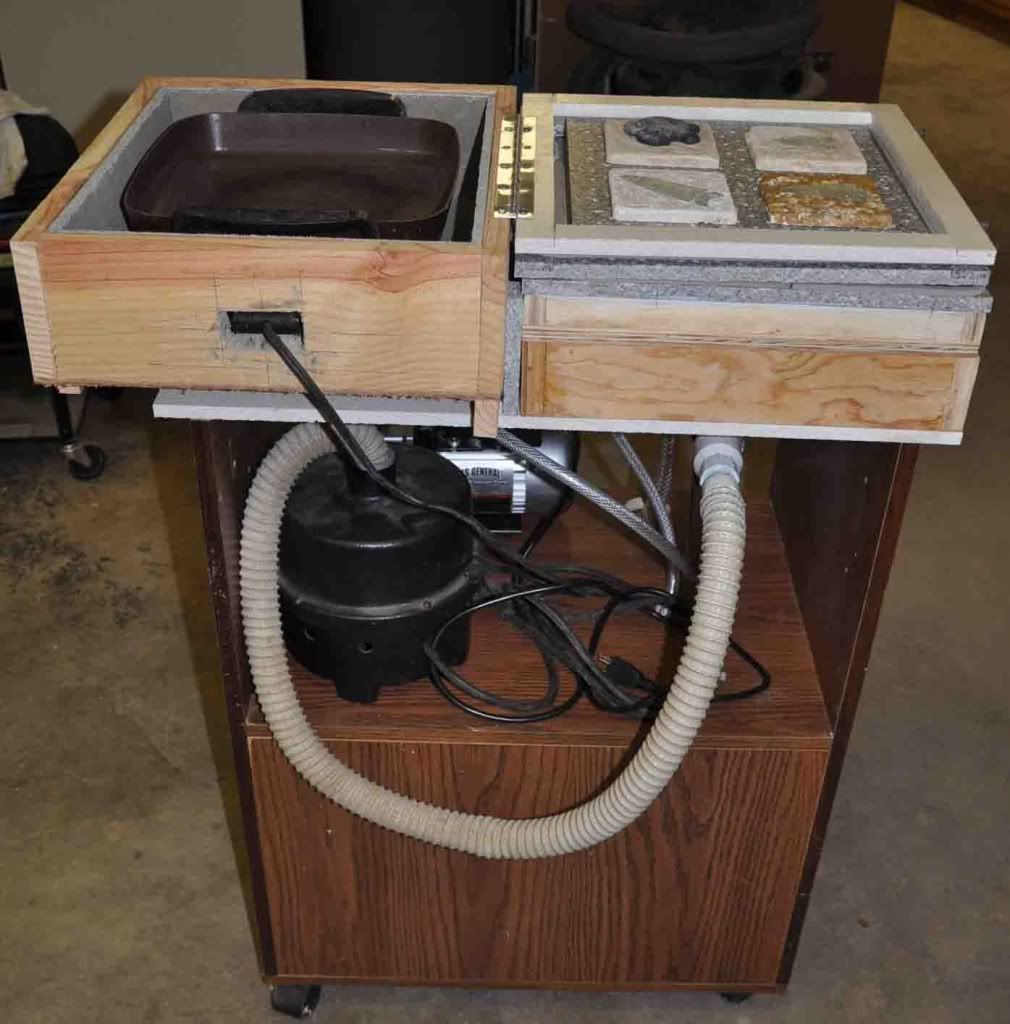
Back view
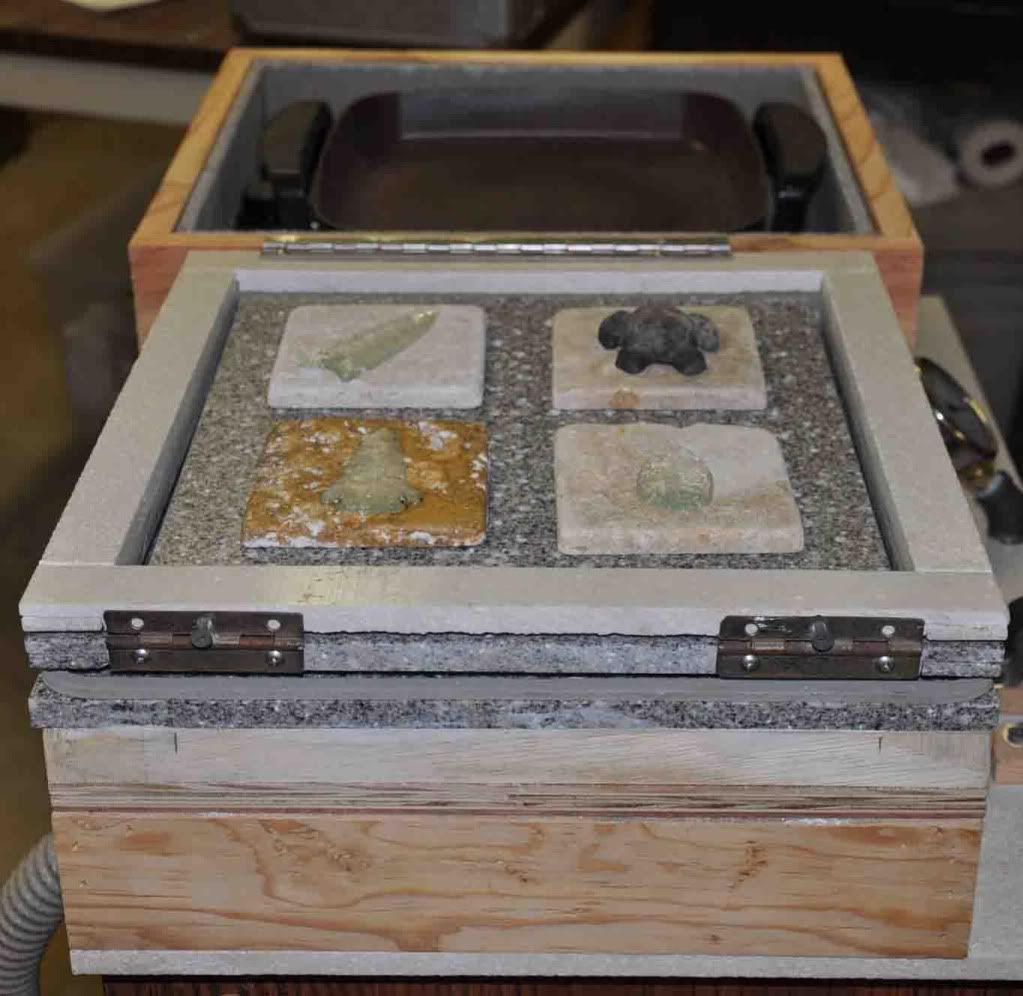
Top view
Last edited by captmike on Tue May 15, 2012 8:09 pm; edited 2 times in total |
|
| Back to top |
|
|
IMMark
Expert
Joined: 18 Nov 2010
Posts: 189
Location: Columbus, Ohio
|
| Posted: Fri May 11, 2012 6:35 am Post subject: |
|
|
Looks nice, I have never seen one made from Corian.
You might run into some cold spots (around the edges) looks like that is a circle heating unit. Might not be an issue for what you are doing, trial and error. The only other thing I notice, is your size choice? Most plastic is sold in 4x8 sheets, so a 12x12 plastic size gives you more bang for your buck. But perhaps you have a line on 14x14 pieces?
As for the plumbing, keep it simple. Short runs from tank to platen, also if you can put a valve in there, I find it useful to be able to apply the vacuum in a controlled manner.
Mark |
|
| Back to top |
|
|
captmike
Novice
Joined: 01 May 2012
Posts: 27
Location: Elberton, Georgia
|
| Posted: Fri May 11, 2012 9:58 am Post subject: |
|
|
Thanks Mark, I was originally trying for 12 x 12, but one of the molds I am trying to develop won't make it from a 12 x 12 sheet (counting the loss around the edges). The mold will be a circular one with a diameter of 10.5 inch and about 1 inch thick. Sorry about the photo sizes. I thought I had them sized correctly. Maybe I can go back and correct this.
Mike |
|
| Back to top |
|
|
captmike
Novice
Joined: 01 May 2012
Posts: 27
Location: Elberton, Georgia
|
| Posted: Sun May 13, 2012 10:10 am Post subject: |
|
|
This is the fitting on my vacuum pump, Should I replace it with a nipple or use one of the threaded parts shown?
[img] [/img] [/img] |
|
| Back to top |
|
|
IMMark
Expert
Joined: 18 Nov 2010
Posts: 189
Location: Columbus, Ohio
|
| Posted: Mon May 14, 2012 10:47 am Post subject: |
|
|
More air flow=better.
But if you set up will be to create vacuum in tank, then use tank to vacuum part...a smaller opening will only mean a slightly longer cycle time to create the vacuum level in the tank that you want.
Mark |
|
| Back to top |
|
|
captmike
Novice
Joined: 01 May 2012
Posts: 27
Location: Elberton, Georgia
|
| Posted: Mon May 14, 2012 8:08 pm Post subject: |
|
|
| I tried removing the fitting from the pump tonight without success. It looks like it might be installed with some kind of locktite. Tomorrow I will see if I can get a better grip on things and remove the fitting. I would like to replace it with a nipple with the same inside diameter as the one on my tank, a brass T, 1/4" I think). |
|
| Back to top |
|
|
Fredo
Master
Joined: 21 Mar 2007
Posts: 251
Location: Kingdom of Nye Area 51
|
| Posted: Tue May 15, 2012 8:30 am Post subject: |
|
|
You may be able pull the thinner plastic with the pump alone, without a tank. With the Corian you could have dispensed with the plywood box and used a solid piece of Corain for the bottom of the platen. The less air you have to remove the faster the pull.
On your pump, add to the fitting to get what you need, don't try to remove the existing one, you'll still have to replace it with something.
You need a heat source that heats with IR. In a pinch, you can heat your plastic in a regular kitchen oven to get you started, if you want... What you can't do is use just any type of heat source... If you can wade through this tech. manual you'll have a much better idea what's involved in in heating plastic. http://www.infraredheaters.com/page1.html It applies to all IR heat sources, not just Salamanders...It's all about the temperature of the emitter. Be it a hotplate, coiled nichrome, salamander emitter, or whatever you come up with. You need to be able control the temp of that emitter. The thicker the plastic, the more critical the heat control becomes. I'm not trying to discourage you, but the more you understand about what the plastic needs to get soft enough to form, the easier it will be for you to succeed. Once you get it dialed in it's fast and easy.......Fredo
PS Size your pics down so we don't have to scroll back and forth to read the posts....
_________________
If someone has a gun and is trying to kill you,
it would be reasonable to shoot back with your own gun...The Dalai Lama..Seattle 2001 |
|
| Back to top |
|
|
captmike
Novice
Joined: 01 May 2012
Posts: 27
Location: Elberton, Georgia
|
| Posted: Tue May 15, 2012 8:16 pm Post subject: |
|
|
| Thanks for the advise Fredo. I got everything together to-nite and did a quick trial run. Lots of vacuum seal problems around the platen, but I expected that. You are right about the heat source, but I think it will do for starters. maybe trouble around the edges, but we will see. The plastic I tried to use might not even be a type that can be formed. It is stuff I use for patterns and it's been around the shop for 20 years. I have some .060 I ordered the other day and it might be a little thick. I need .020 or .030 I think. I have tomorrow off so I plan to experiment a little. |
|
| Back to top |
|
|
jdougn
Guru
Joined: 18 Mar 2009
Posts: 714
Location: Louisville KY area
|
| Posted: Wed May 30, 2012 7:19 am Post subject: |
|
|
Good work and a good start. Don't know if you're actually doing the shop vac or not but with a vac pump and tank, the shop vac is a waste of time. Just add a valve in front of the tank to shut it off after your initial pull so that the vac pump only is pulling the platen. You'll get a lot better results with a lot less hassle.
_________________
DougN - Just in case you're wondering, I got my "rating" legitimately... by posting aimless drivel, useless advice, and pointless questions. |
|
| Back to top |
|
|
|

