| View previous topic :: View next topic |
| Author |
Message |
jdougn
Guru
Joined: 18 Mar 2009
Posts: 714
Location: Louisville KY area
|
 Posted: Tue Dec 02, 2014 8:31 am Post subject: Posted: Tue Dec 02, 2014 8:31 am Post subject: |
 |
|
Hey Gerald, welcome to the forum and thanks for creating a build thread for your Protoform! Always enjoy seeing new builds and the different skill sets people bring. Although, it might be cheating to have that nice of a shop available for building a vac former. Looked way too easy cutting the square tubing with a hole saw on a cnc milling machine. I'm looking forward to seeing where this goes for you!
DougN
_________________
DougN - Just in case you're wondering, I got my "rating" legitimately... by posting aimless drivel, useless advice, and pointless questions. |
|
| Back to top |
|
 |
Fredo
Master
Joined: 21 Mar 2007
Posts: 251
Location: Kingdom of Nye Area 51
|
| Posted: Wed Dec 03, 2014 12:00 pm Post subject: |
|
|
You'll probably need to build a drier for the abs.... ABS will absorb water just sitting around... Nasty little bubbles will form in the plastic when heated.... First time it happened to me, I thought the plastic was over heated...
_________________
If someone has a gun and is trying to kill you,
it would be reasonable to shoot back with your own gun...The Dalai Lama..Seattle 2001 |
|
| Back to top |
|
|
Hot_Wheels
Newbie
Joined: 19 Sep 2014
Posts: 22
|
| Posted: Fri Dec 05, 2014 6:20 pm Post subject: |
|
|
| How do you make a dryer? |
|
| Back to top |
|
|
jdougn
Guru
Joined: 18 Mar 2009
Posts: 714
Location: Louisville KY area
|
| Posted: Fri Dec 05, 2014 7:38 pm Post subject: |
|
|
| Hot_Wheels wrote: | | How do you make a dryer? |
Personally, I'd wait and see if the ABS you get needs to be dried. If they sell if fairly regularly, and you use it fairly quickly, then it won't need drying. I use ABS constantly and it never needs drying. However, when I first started a few years ago it would have to be dried sometimes. It's just a matter of how long it's been sitting around. The stuff I get is probably only a few months old by the time it gets used up.
DougN
_________________
DougN - Just in case you're wondering, I got my "rating" legitimately... by posting aimless drivel, useless advice, and pointless questions. |
|
| Back to top |
|
|
backyard_cnc
Novice
Joined: 01 Nov 2014
Posts: 26
|
| Posted: Tue Feb 03, 2015 10:22 pm Post subject: |
|
|
Hi Guys,
Sorry for lack of recent progress but I have too many other projects and life getting in the way...............plus I'm just plain lazy sometimes  . Did cut a set of plywood saddles today to make holding the Vacuum reserve tanks at the correct angle a little easier. It worked out ok but I may need to modify as I may not have quite enough room between the two tanks to mount my pump! May have to recut them to move the tanks outward an inch or so on each side. Ill keep you posted on how it works out! . Did cut a set of plywood saddles today to make holding the Vacuum reserve tanks at the correct angle a little easier. It worked out ok but I may need to modify as I may not have quite enough room between the two tanks to mount my pump! May have to recut them to move the tanks outward an inch or so on each side. Ill keep you posted on how it works out!
Gerald
 |
|
| Back to top |
|
|
IMMark
Expert
Joined: 18 Nov 2010
Posts: 189
Location: Columbus, Ohio
|
| Posted: Thu Feb 05, 2015 2:14 pm Post subject: |
|
|
Looks like you will have a nice machine soon!
Very nice looking shop as well!
Best of luck on your build.
Mark |
|
| Back to top |
|
|
backyard_cnc
Novice
Joined: 01 Nov 2014
Posts: 26
|
| Posted: Tue Apr 07, 2015 10:39 pm Post subject: |
|
|
Thanks Mark, I worked hard to get the shop to this point and it still has a aways to go but it is reasonably well equipped and its great to have the tools to undertake projects such as this. It could be bigger though and then I would have built at least a 2' by 4' Protoform. I already have product ideas that are too big for this machine!
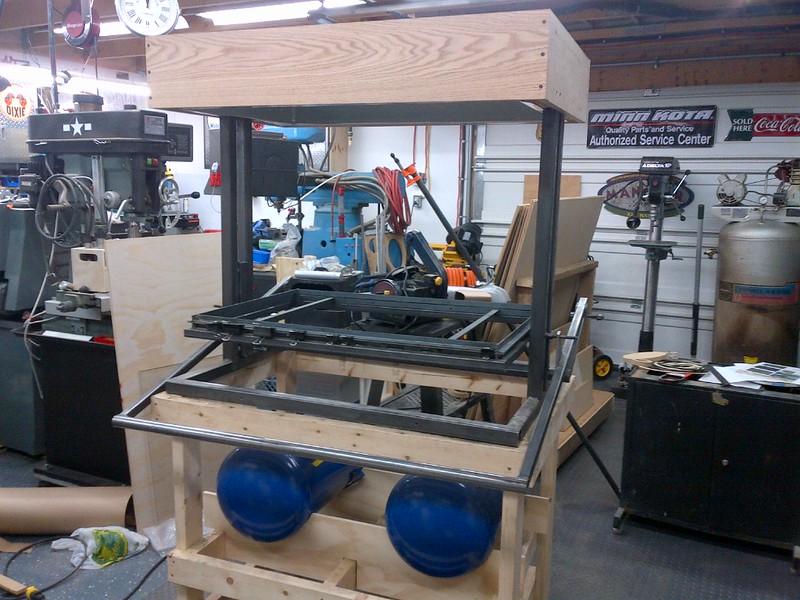
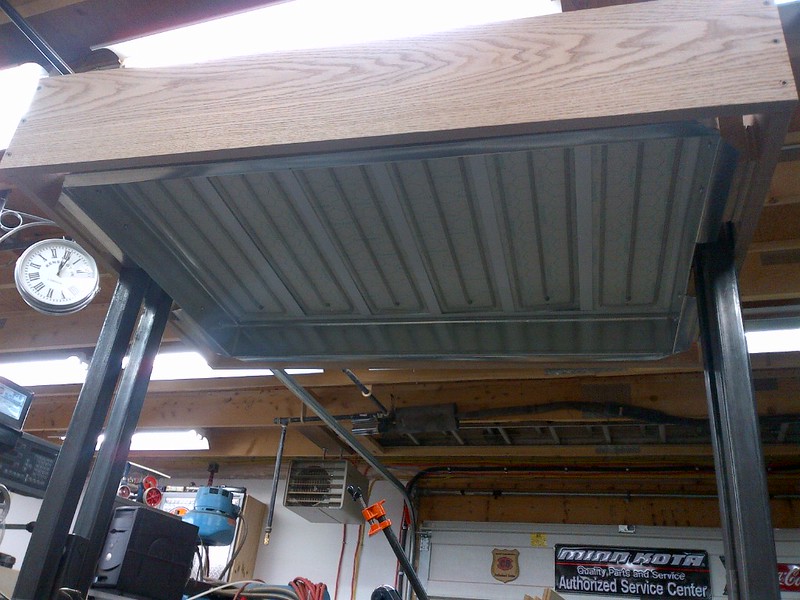
Unfortunately I am sometimes a poor project manager with long lapses in progress on my many projects. However today was the day to make some headway on the ProtoForm 2015 and I got the heater oven mounted and the upper woodwork done and the lower woodwork all cut. While it hurt to buy this very spendy $$$$ oak plank, it sure is gonna look nice once it has a few coats of stain!
I plan on finishing up the woodwork and then working on the electrical to get the heaters under power and that should be a great push to get the vacuum done. I did pick up the aluminium sheet already to make a 24" by 24" Platen but still need to source some 1/2" steel mesh for the spacer between the 2 sheets. Also need to get 3/4" particle board to use the the table base and platen base.
I'll get there eventually but I must say I am well past my planned completion date!.
Gerald

Last edited by backyard_cnc on Sun Apr 12, 2015 8:39 pm; edited 1 time in total |
|
| Back to top |
|
|
backyard_cnc
Novice
Joined: 01 Nov 2014
Posts: 26
|
| Posted: Fri Apr 10, 2015 8:16 pm Post subject: |
|
|
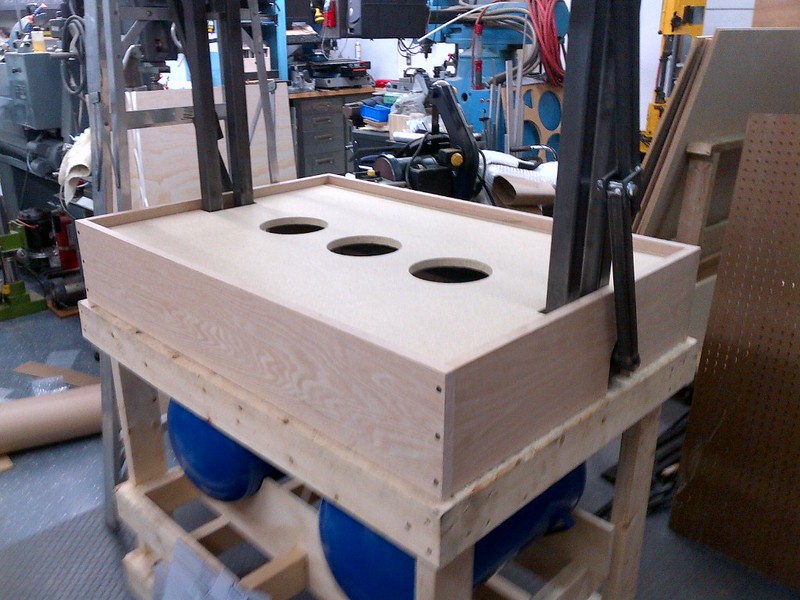
Well completed the bottom box today except for control panel and ball valve cut outs. Gonna have a go at making a small platen over the weekend! Definitely starting to look like a machine! could be wiring and testing the heaters next week! YIPEE...............
gerald
 |
|
| Back to top |
|
|
backyard_cnc
Novice
Joined: 01 Nov 2014
Posts: 26
|
| Posted: Sat Apr 11, 2015 5:07 pm Post subject: |
|
|
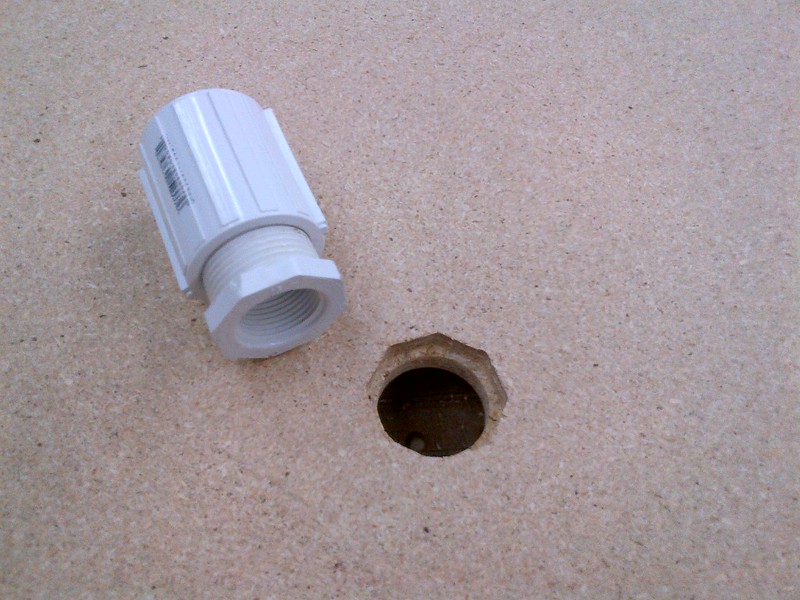
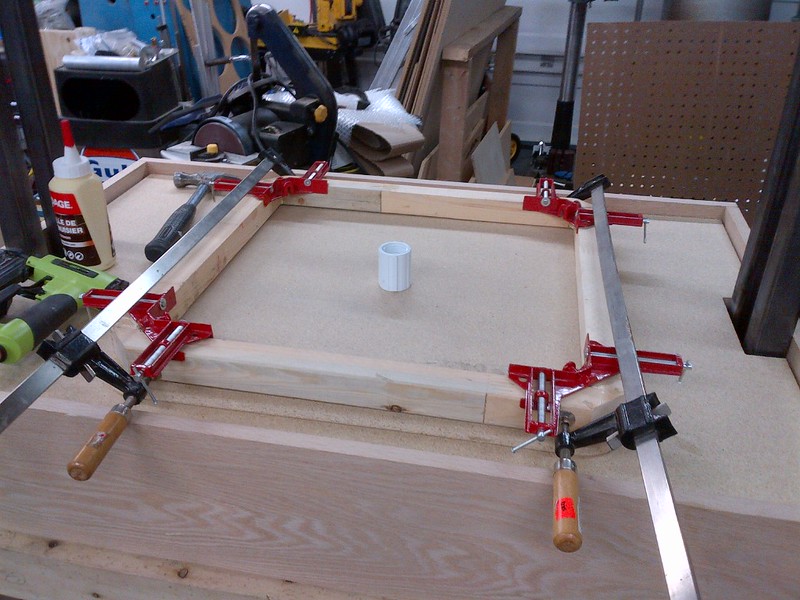
One of the nice things about having a CNC router other than making it easier to make complicated molds is that you can cut and fit pieces together nicely like this cutout for mounting the PVC fitting to the platen base for the vacuum connection. The fitting is a snug fit that will seal nicely with silicon and cannot rotate due to the way it seats into the hex shaped pocket. Not really necessary and no one will see it once the aluminum surface goes on but still a cool feature to this build. As you can see this is the wood work for the smaller of 2 platens I will build for this machine and likely the one I use the most. Feel better and better with each passing day on this project and sure hope it works good when complete or I will be sorely disappointed 
Comments always appreciated to keep the motivation high!
Gerald
 |
|
| Back to top |
|
|
backyard_cnc
Novice
Joined: 01 Nov 2014
Posts: 26
|
| Posted: Sun Apr 12, 2015 8:38 pm Post subject: |
|
|
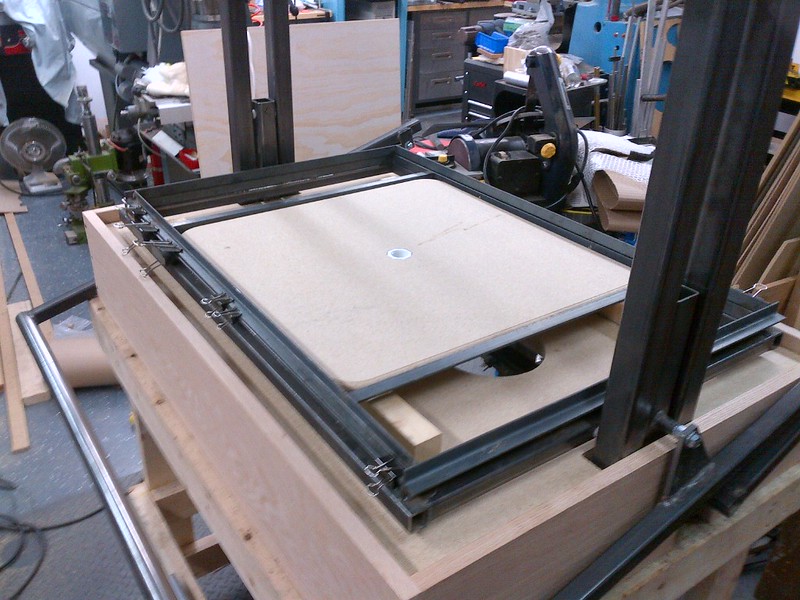
Even though I have no initial plans to use the larger platen I figured since I was doing woodwork I may as well go ahead and construct the wooden base for it so at least its ready for the day I get the aluminium sheet to finish it off. Other than a cover to go over the top heater box and cutting the front of the lower box for the control panel and vacuum gauge this concludes the woodwork phase of this project. Oh yes and of course I will have to paint the wooden base and stain or varnish the nice oak trim!
Next phase will be electrical and lastly the vacuum plumbing!
Gerald
  |
|
| Back to top |
|
|
kayaker43
Expert
Joined: 13 Jun 2007
Posts: 175
|
| Posted: Thu Feb 16, 2017 2:35 am Post subject: |
|
|
Gerald, Nice workmanship!
I see a leak path around your platen fitting. The intent is to pass the PVC fitting through the particle board and seal it directly to the aluminum or formica sheet glued to the wood. The way you did it compromises the seal to the metal sheet and allows vacuum to pass through the porous wood.
Yeah its nit picky but the devil is in the details. It won't make much difference when used with a single stage surge tank but would render the second stage in a two stage system ineffective. Most machines in use have small to medium leaks but still work well enough to get the average job done.
Use it as is, but just know that if you ever need more forming power, you can chase out the leaks, use a good pump with two stage valving and finish in the 29's. A typical single stage tank system with minor leaks pumps down to maybe 26-28 but after the dump finishes off 2-3 inches less. It just depends on what your job requires.
_________________
Doug Walsh
www.build-stuff.com
Hobby-Vac and Proto-Form machine plans
Also other plans books and videos for people who like to build things |
|
| Back to top |
|
|
backyard_cnc
Novice
Joined: 01 Nov 2014
Posts: 26
|
| Posted: Thu Feb 16, 2017 9:50 am Post subject: |
|
|
Hi Doug,
Thanks for the comments. The project is currently stalled as I work on other things and the platen and vacuum plumbing are the last items to complete.However there will be no exposed wood once the platen is complete, the wood top will be completely sealed, first with a eurathane and then with the first layer of aluminium attached and fully sealed to the MDF with high grade silicon. I don't see how it could leak assuming there are no voids in my silicon sealing!
Am I missing something else here?
Gerald |
|
| Back to top |
|
|
kayaker43
Expert
Joined: 13 Jun 2007
Posts: 175
|
| Posted: Thu Feb 16, 2017 9:12 pm Post subject: |
|
|
Again, this is a very small thing that will not matter unless you use a two stage system. But then again, its easy to get right.
You are stopping 1/4 inch short of an airtight system. That little bit of exposed wood between the fitting and aluminum allows air into the very porous particle board. Sinking the fitting deeper would eliminate that. The PVC could then seal to the aluminum without any wood between them.
Sure, it seems like a small thing but any attempts to coat the wood would likely take longer than sinking the fitting deeper until it hits the aluminum sheet. One way is pretty good and one way is perfect. Either one will work for making costume armor.
Actually another way to save it would be to coat just the inside of the hole with epoxy,.. in other words bridge completely over the exposed ring of wood. A two part epoxy putty you buy in sticks would be easy to work with.
The intent is to end up with a thin airtight, low volume aluminum sandwich sealed around the perimeter and around the fitting with silicone. Only non porous materials see vacuum and the wood only serves to support it.
The low volume gives you a faster response to vacuum and less air rushing into the tank reducing final vacuum level.
_________________
Doug Walsh
www.build-stuff.com
Hobby-Vac and Proto-Form machine plans
Also other plans books and videos for people who like to build things |
|
| Back to top |
|
|
backyard_cnc
Novice
Joined: 01 Nov 2014
Posts: 26
|
| Posted: Fri Feb 17, 2017 1:00 am Post subject: |
|
|
Ok Thanks Doug,
I see what you are referring to now. The PVC fitting as shown is only temporarily attached for mock up and it will actually be a fully sealed (with silicone) joint when put together for final assembly. There will be no MDF exposed to vacuum once assembled only, PVC, Silicone and Aluminium. I require pulling 6mm PVC to a depth of about 2 1/2" over a mold some 18" square so I want all the pull I can get for nice consistent results.
gerald |
|
| Back to top |
|
|
|

