 |
www.TK560.com
Vacuum Forming, Movie Prop, Sci-fi and GIjOE Forum
|

|


|
| View previous topic :: View next topic |
| Author |
Message |
jegner
Site Admin

Joined: 30 May 2003
Posts: 2144
Location: Texas, USA
|
 Posted: Sun Jun 08, 2008 7:50 pm Post subject: Posted: Sun Jun 08, 2008 7:50 pm Post subject: |
 |
|
What type of silicone did you use? Looking great!
Jim |
|
| Back to top |
|
 |
DarthVader1
Expert

Joined: 04 Nov 2007
Posts: 193
Location: Phenix City, AL
|
| Posted: Mon Jun 09, 2008 4:28 pm Post subject: |
|
|
| jegner wrote: | What type of silicone did you use? Looking great!
Jim |
I have to correct myself...it's NOT SILICONE, but Latex rubber mold conpound. Sorry for the confusion. Well, if you look at my first attempt of the face mold...you'll see that it's not exactly great, unless you wait a whole 24 hr. period cure time instead of every 4-5 hours, as the instructions say (so as I did before), and leaving the brushed piece in the sun a couple of times in the HIGH HEAT as this past weekend. It's good, if you have really GOOD PATIENCE.
I got it from this place:
http://www.artmolds.com/product323.cfm
It's a brushable latex rubber (according to them, and it really stinks too, like either sulfur or ammonia).  Like I mentioned before, I am going the CHEAPEST way possible, it that means sacrificing process time. I had to go at least a week of procees per part, once the part is sculpted. Like I mentioned before, I am going the CHEAPEST way possible, it that means sacrificing process time. I had to go at least a week of procees per part, once the part is sculpted.
IMHO, I would've prefer one of the quickest ways around and go the SMOOTH-ON way. I know they're expensive, plus you have to mix parts A and B, while the one I have it's just straight from the container...plus you have to brush a HEAVY coat about maybe 6-8 times (as this LAST time took me so far) to have a GOOD and THICK mold. I hope by next week give some update on my final part, which will be the WHOLE BACK/NECK piece.
What I found AWESOME, is the HYDROSTONE...it's so different than Plaster of Paris, that even the 90 Degrees corners are harder to crack, that's why I sand a little bit those corners to prevent cracking while vacuuforming....but that material is AMAZING!!! 
_________________
Robert
BH/TK/TB/TS 060

Last edited by DarthVader1 on Thu Jun 12, 2008 2:48 pm; edited 1 time in total |
|
| Back to top |
|
|
CrazyFool
Expert

Joined: 07 May 2008
Posts: 203
|
| Posted: Thu Jun 12, 2008 6:25 am Post subject: |
|
|
Vader,
I'm not sure if you mentioned it already, but can you please tell me what clay you used to sculpt with? I have experience sculpting in wax but almost none with clay.
Thanks!
CF |
|
| Back to top |
|
|
DarthVader1
Expert
Joined: 04 Nov 2007
Posts: 193
Location: Phenix City, AL
|
| Posted: Thu Jun 12, 2008 2:24 pm Post subject: |
|
|
I don't believe I've posted that before, but it's an OIL BASED clay from DICK BLICK Art Materials online:
http://www.dickblick.com/zz332/32/
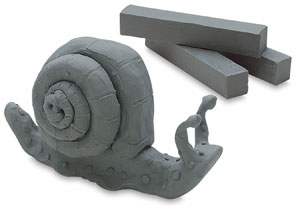
In that picture is about 1 and a half boxes from about 5-6 boxes that are included in one pack. Every string is about 5 or 6 inches long and there are about 4-5 in each box.
For my project, I've purchased 3 packs (5 pounds each), and I still have about two boxes unopened. Very easy to work with (when it's hot outside) and never dries. Don't bother on using it in cold weather, since it will be REALLY HARD to work with.
_________________
Robert
BH/TK/TB/TS 060
|
|
| Back to top |
|
|
jegner
Site Admin
Joined: 30 May 2003
Posts: 2144
Location: Texas, USA
|
| Posted: Thu Jun 12, 2008 9:08 pm Post subject: |
|
|
I have used a product called Klean Klay, a wax based clay, that is fantastic for custom mold pattern making. You can freeze it, and it's hard as a rock, or, you can heat it with a hair dryer for a real easy finish, or, you can warm it in a double boiler, and pour it! It come in different hardnesses, but really, for what we use it for, the medium is all you need.
Looks like this gray stuff is similar.
Jim |
|
| Back to top |
|
|
DarthVader1
Expert
Joined: 04 Nov 2007
Posts: 193
Location: Phenix City, AL
|
| Posted: Sat Jun 14, 2008 9:26 pm Post subject: |
|
|
WEEKLY UPDATE:
Well, so far I wanted to give you a FULL UPDATE of the third, and final part of the helmet/mask, since the other (very last, namely the front - lower neck) part will be just improvised, custom made to size. It will be a waste of plastic, time, resources and electricity doing it in a vacuum forming way.
I wanted to go with measurements (which I did and kept), to start doing a sculpt of that back piece, but Ive just discovered that this piece is the MOST DIFFICULT to accomplish, more than the face, since it has to connect somehow with the other two parts previously done
.and based on the last cast
.the calculations were a little WRONG
somehow. Not bad news, since I was going BY-SCALE from the original on the videos, but I managed to find a solution, since theres no actual or really defined pics of the back of the original ones, so I am coming with an really original idea, just to unite all parts together, and not compromise any gaps in between.
Here are the pics of the progress so far, be advised that Ive tried to do so many calculations, and its still getting difficult, since this has to connect with ALL the other parts at the same time.
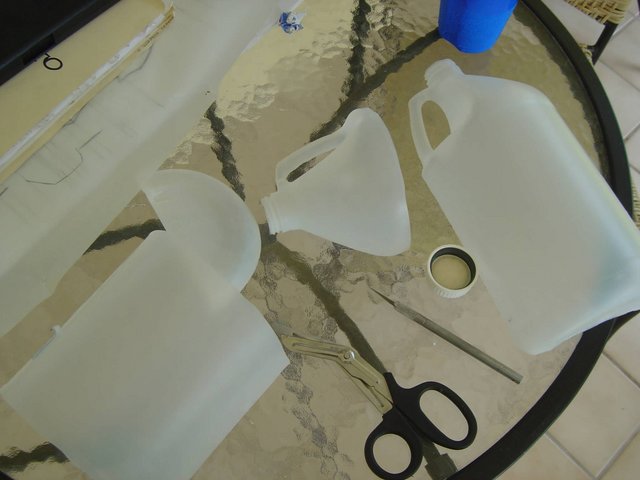
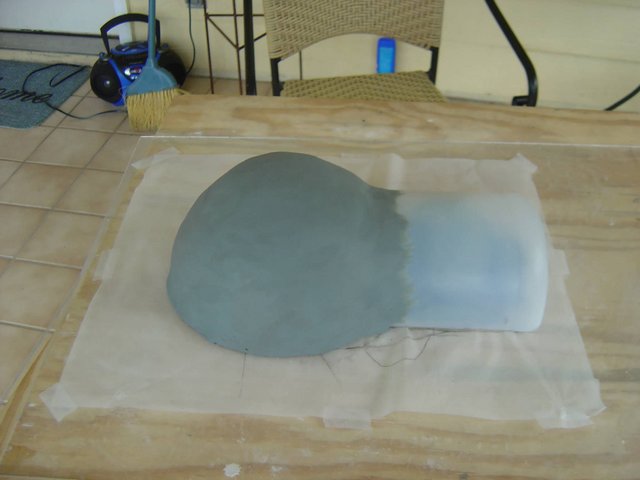
Last minute decision of what to use for the round neck backing. The plastic gallon is ROUND, not squared like a gallon of milk, just to point that out:
Ive chose to go with the "flower foam" instead, but they leave a whole mess around....specially sticking to the clay
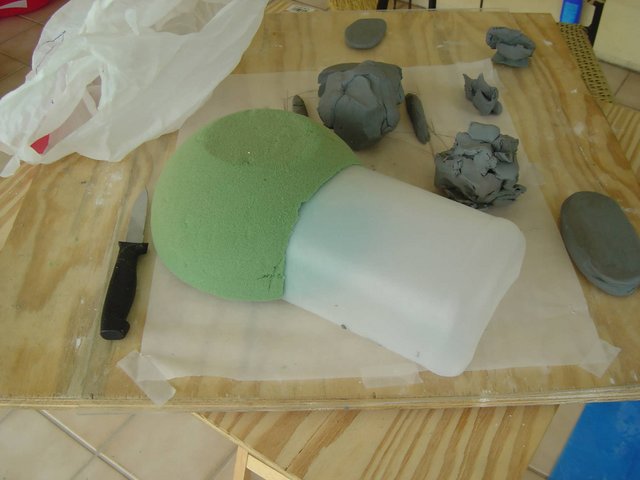
...so, I've decided to cover the "messy part" with a plastic bag, and then do the whole clay shell on top of it with clay, which I had to add clay underneath the plastic gallon regardless (at least for support, since there will be a lot of pressure from the sculpting, but not as much as I thought:
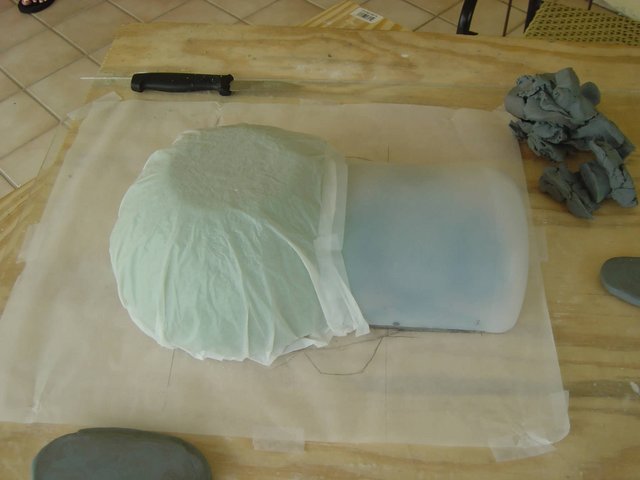
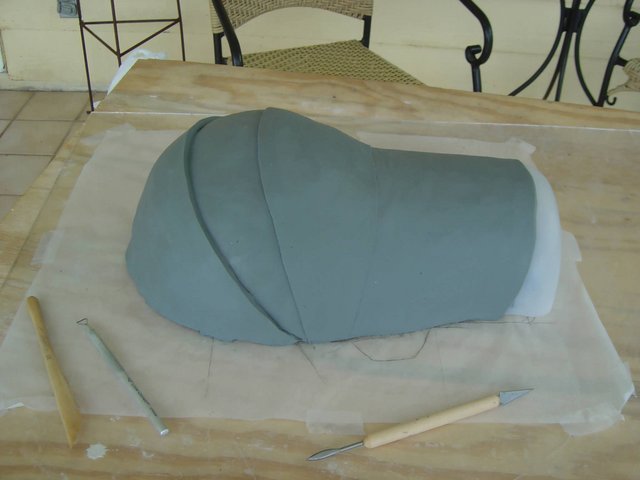
Here's the result of the BASIC FRAME (as of today). I did this to save on clay
.
More progress coming soon
probably by next week.
_________________
Robert
BH/TK/TB/TS 060
|
|
| Back to top |
|
|
DarthVader1
Expert
Joined: 04 Nov 2007
Posts: 193
Location: Phenix City, AL
|
| Posted: Sun Jun 22, 2008 2:48 pm Post subject: |
|
|
UPDATE:
PART # 3 (and final)
?????
Well, after two weeks of no updates or work with this project (being really busy, and was under a mild case of depression for things that have been going on in my personal life, and things that HAVENT happened as well, to include a Shattered Dream that just got my hands on, and the next week: POOF!, no more, but thats a different story.
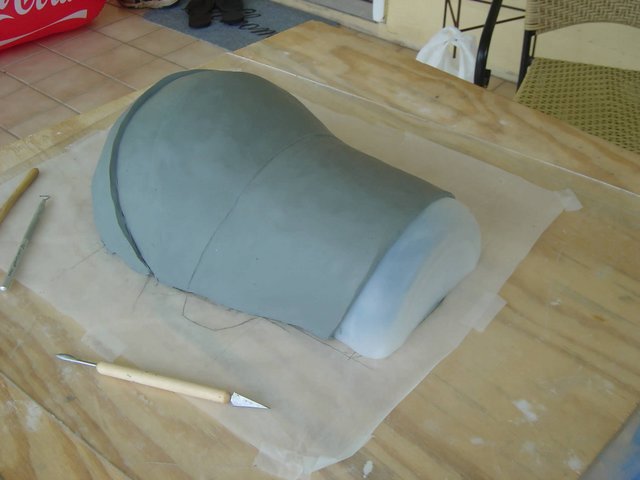
Ive took my time this weekend, and this is the part that covers the very back of the head and half of the neck. Believe me or not, this is the piece that got me puzzled, and probably the most difficult to sculpt, since even the design is simple, but it actually have to interact with the other two pieces somehow, which means that ALL three parts (not counting one that has to be cut to shape and bend, that goes in the front of the neck) have to touch each other at the EARS area, and THAT is not an easy task, and was a design flaw of not thinking about that before.
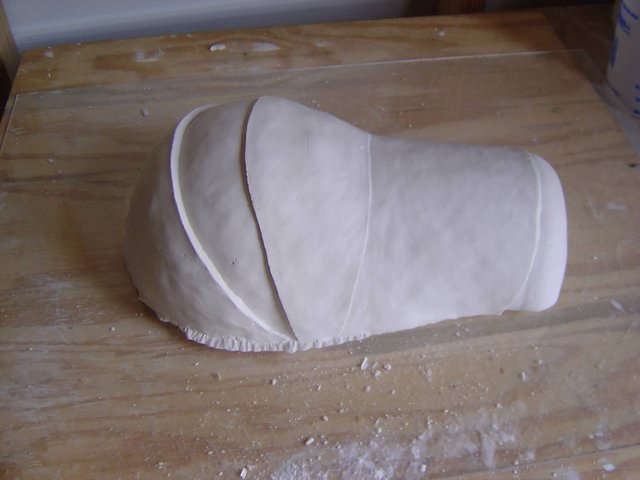
Heres what I got so far (looks like a prototype for "Vader's REVEAL Helmet" back piece, somehow),
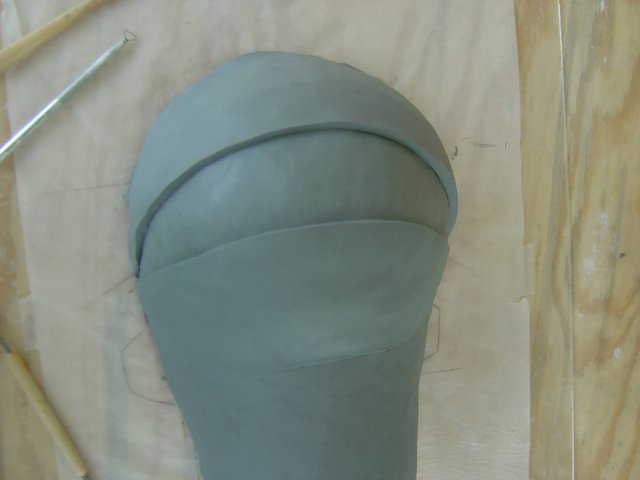
Some of the plastic (when vacuuformed) at the top of the head, will be cut by eyesight, until I get parts one and two together (the most important ones). The top border design, wasnt exactly what I wanted, but that could be corrected once I make the plaster casting, which needs just a hard time sanding off that part.
Another flaw that just slipped away from my mind and NEVER thought about it, is the back piece for the SIDE DETAILS from the BOTTOM of the mask, just below the ears. Based on the design of the mask, I believe that THOSE specific pieces were casted separately, since there is NO WAY to make them as part of either face piece or top-back piece. This last part pictured above, are essential for the WHOLE costume; but for collectors, they only want part 1 and 2 together, thats about it.
More updates next week when I make the casting of the lower-side details backing.
_________________
Robert
BH/TK/TB/TS 060
|
|
| Back to top |
|
|
DarthVader1
Expert
Joined: 04 Nov 2007
Posts: 193
Location: Phenix City, AL
|
| Posted: Fri Jul 04, 2008 1:50 pm Post subject: |
|
|
Well, as my last post said: PART #3 and FINAL (???).....and I was right, it's not a FINAL one, since I've discovered in the process that something was missing, and I didn't realize it until I thought the assembly process....THERE WERE NO BACKING for the lower details below the "ears" for the front mask part.
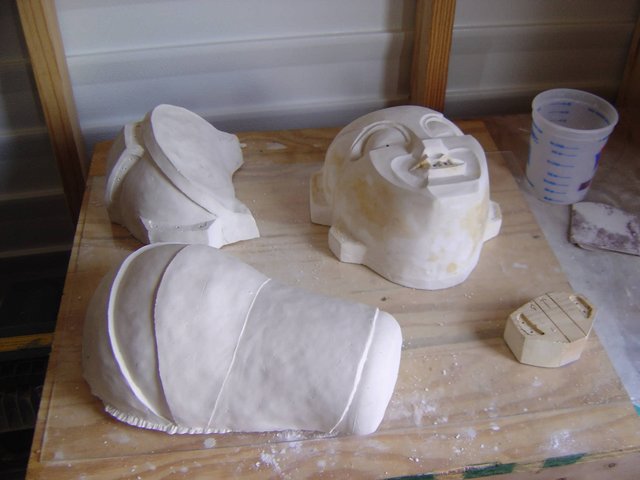
I've just done with the casting process (for the MAIN MASK PARTS), but I have to design the ears so they could be useful, or working, not just pieces of resin bolted in place, but something that I could hear through them....but that is coming soon. These are the pics of my last castings, with the one for the backing of the lower details I had to come up with a WOOD MOLD, since I didn't want to go through the process of applying the latex coating/mold 6-8 times or the plaster bandage process....TEDIOUS!!! 
Here are the pieces for VACUUFORMING, almost ready since I have to do some cleanup AND sanding to all of them, to include the front mask part.
The back of the head part, which I have to add a piece of 1" MDF with the shape of the part at the bottom before vac'form the part, since the sculpt didn't allow me to add space for the cutting line,
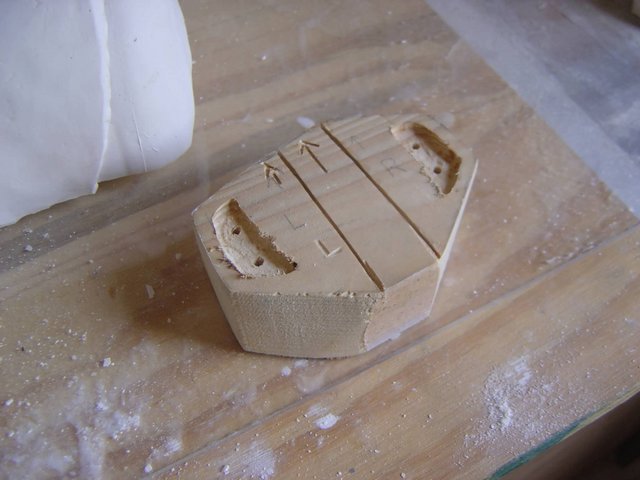
The backing detail cover mold for both sides,
And the pic of ALL pieces together.
Yesterday I've started with the gloves casting process, making a casting of my own hands (I still have to cast my left hand, though. I will post pics as soon as I cast my left hand to show up the process of sculpting the gloves. I will find out the "ears" making process, as soon as I find something I need.
_________________
Robert
BH/TK/TB/TS 060
|
|
| Back to top |
|
|
TK 109
Guru

Joined: 11 May 2007
Posts: 712
Location: Galena, Ohio
|
| Posted: Fri Jul 04, 2008 2:03 pm Post subject: |
|
|
nice progress, this is going along smoothly. 
jeez! hands, too? more to this than i thought...
_________________
-Alex
-------------------------------------------------------
 |
|
| Back to top |
|
|
DarthVader1
Expert
Joined: 04 Nov 2007
Posts: 193
Location: Phenix City, AL
|
| Posted: Fri Jul 04, 2008 2:06 pm Post subject: |
|
|
| TK 109 wrote: | nice progress, this is going along smoothly.
jeez! hands, too? more to this than i thought... |
Thanks, and YES....there is MASK/HELMET, gloves, boots, and of course, the SUIT. Thsi is just the beginning of the process, and I still have less than TWO MONTHS to complete.
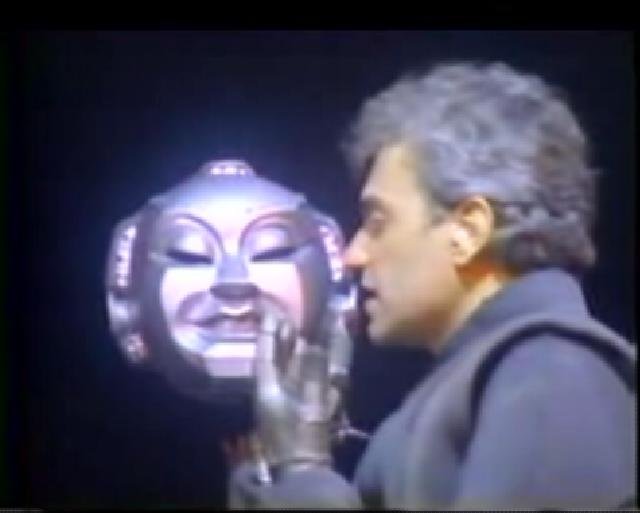
Just take a look at their MUSIC VIDEO back then:
_________________
Robert
BH/TK/TB/TS 060
|
|
| Back to top |
|
|
jegner
Site Admin
Joined: 30 May 2003
Posts: 2144
Location: Texas, USA
|
| Posted: Sat Jul 05, 2008 7:12 am Post subject: |
|
|
Looking great! Thanks for keeping us updated on your progress.
Jim |
|
| Back to top |
|
|
DarthVader1
Expert
Joined: 04 Nov 2007
Posts: 193
Location: Phenix City, AL
|
| Posted: Sun Jul 06, 2008 4:57 pm Post subject: |
|
|
Thanks guys, really appreciated.
Well, another weekend, another update...
GLOVES
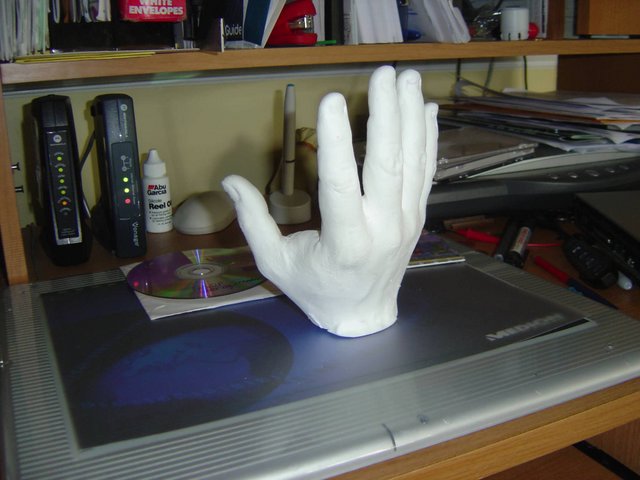
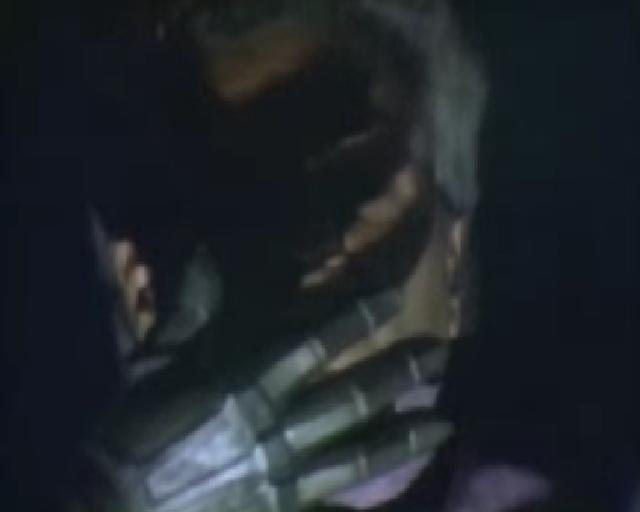
This time I am working on the gloves, which will be casted in latex. Ive started with making a cast of my own hand to use as model to sculpt the mold of the glove. Looks like "THING" from "The Addams Family" 

This is the look I want to have, based on the only three screen captions that I could actually see the details of the gloves.

And Ive done sculpting just the top half of the whole mold, to then make the sculpt for the second half,

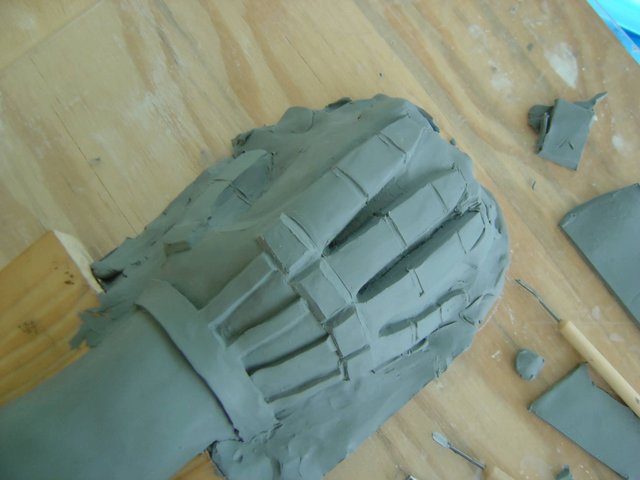
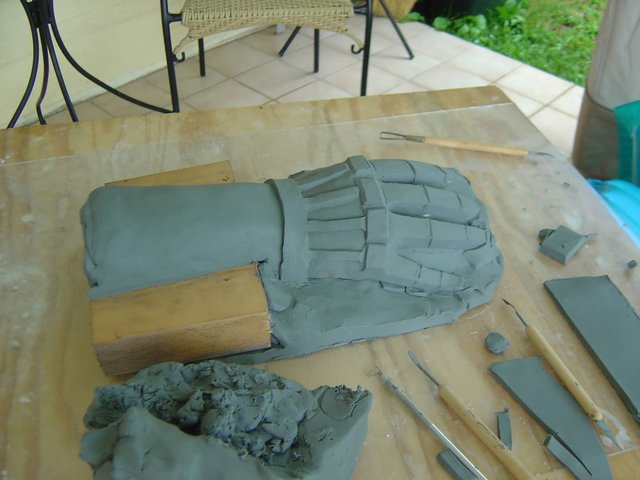
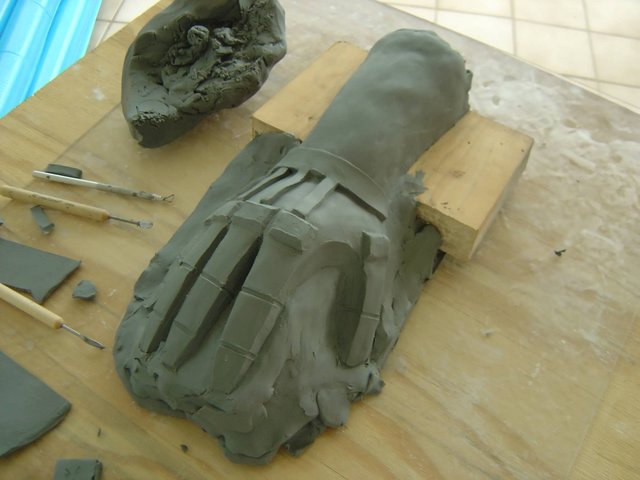
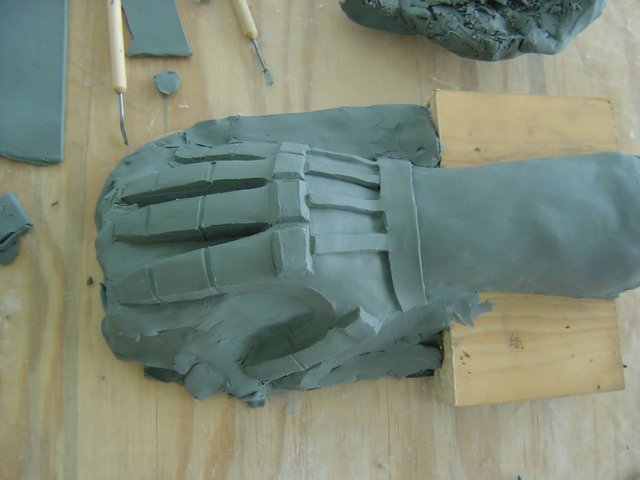
All I have left to do is to cover some areas, and a little cleanup. More updates coming soon as I keep working with it.
_________________
Robert
BH/TK/TB/TS 060
|
|
| Back to top |
|
|
TK 109
Guru
Joined: 11 May 2007
Posts: 712
Location: Galena, Ohio
|
| Posted: Mon Jul 07, 2008 1:28 pm Post subject: |
|
|
yup, good make sure those are guantlet length, because some folks had thier arms exposed in the video.
looking SWEET.
_________________
-Alex
-------------------------------------------------------
|
|
| Back to top |
|
|
DarthVader1
Expert
Joined: 04 Nov 2007
Posts: 193
Location: Phenix City, AL
|
| Posted: Mon Jul 07, 2008 2:56 pm Post subject: |
|
|
| TK 109 wrote: | yup, good make sure those are guantlet length, because some folks had thier arms exposed in the video.
looking SWEET. |
Thanks, and indeed, it's longer in the gauntlet due to THAT same matter. It's the only thing different from the originals. Since there are no GOOD screen caps of the originals, I have to come up with the closest possible, so as the attachment method for the mask.
_________________
Robert
BH/TK/TB/TS 060
|
|
| Back to top |
|
|
jegner
Site Admin
Joined: 30 May 2003
Posts: 2144
Location: Texas, USA
|
| Posted: Mon Jul 07, 2008 4:13 pm Post subject: |
|
|
| Looking great! |
|
| Back to top |
|
|
|
|
You cannot post new topics in this forum
You cannot reply to topics in this forum
You cannot edit your posts in this forum
You cannot delete your posts in this forum
You cannot vote in polls in this forum
|
Powered by phpBB © 2001, 2005 phpBB Group
|

