| View previous topic :: View next topic |
| Author |
Message |
TD1035
Novice

Joined: 02 Aug 2006
Posts: 31
|
 Posted: Thu Jan 08, 2009 12:03 am Post subject: 2x4 Proto-form build...HERE WE GO!!!! Update 1-7-10 Posted: Thu Jan 08, 2009 12:03 am Post subject: 2x4 Proto-form build...HERE WE GO!!!! Update 1-7-10 |
 |
|
I bought Doug's plans quite a while ago but have finally jumped in and started the build. I have to say that Doug's plans are VERY thorough and easy to read...a definite plus with this project and worth every penny!
I had all of the lumber left over from another project so the cart went together pretty quick.

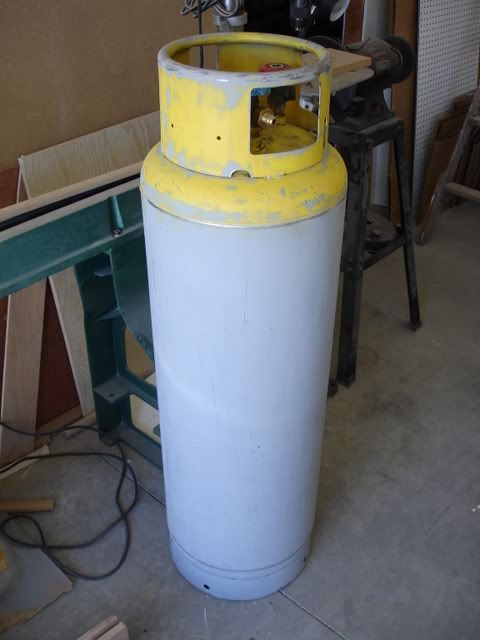
I got the tank from my neighbor who is an HVAC guy. Its about a 35 gal tank that fits perfect on the top shelf of the cart. I just need to put some fresh paint on it.
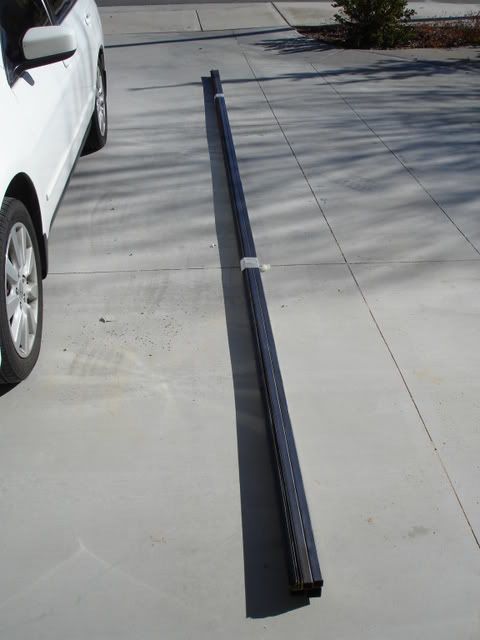
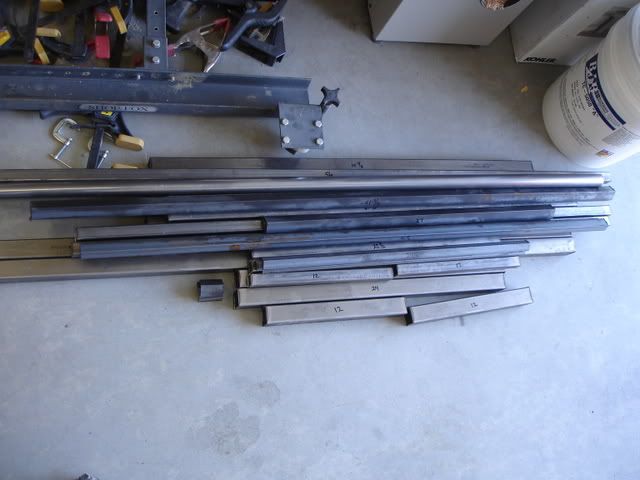
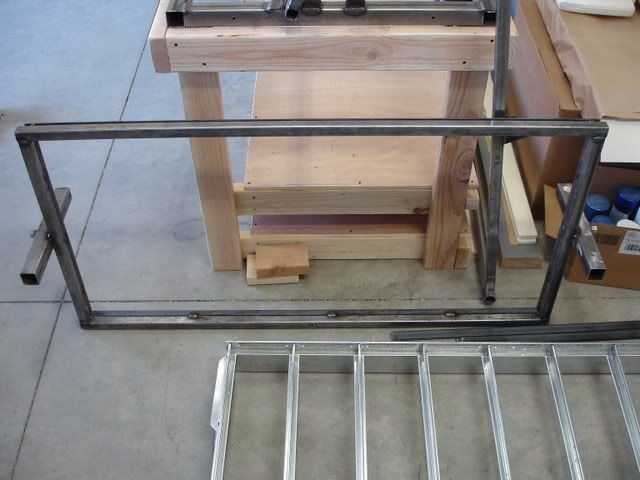
I had the metal for the framework delivered a couple of days ago and it took me about a day to cut everything to size. Now its time to start welding everything together!!!
This is going to be a fun build!!!!
Todd
_________________
"If you're not living on the edge, you're taking up too much space!"
Last edited by TD1035 on Thu Jan 07, 2010 7:05 pm; edited 1 time in total |
|
| Back to top |
|
 |
ahillworks
Master

Joined: 18 Nov 2007
Posts: 308
Location: Orlando FL
|
| Posted: Thu Jan 08, 2009 10:32 pm Post subject: |
|
|
| Rock On lets see this thing =) |
|
| Back to top |
|
|
TD1035
Novice
Joined: 02 Aug 2006
Posts: 31
|
| Posted: Fri Jan 09, 2009 12:34 pm Post subject: |
|
|
I spent the day welding and got the chasis completed along with the carrier frame. I'm still deciding on how I want to do the clamping frame...
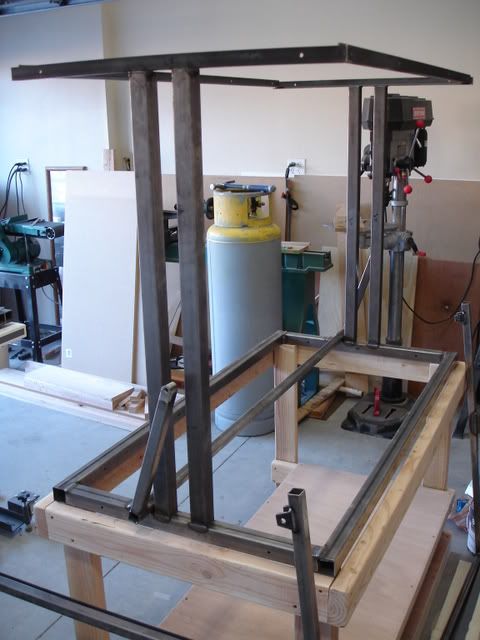
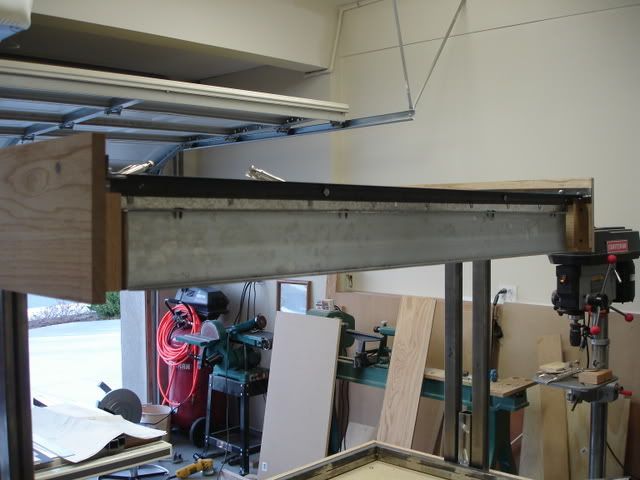
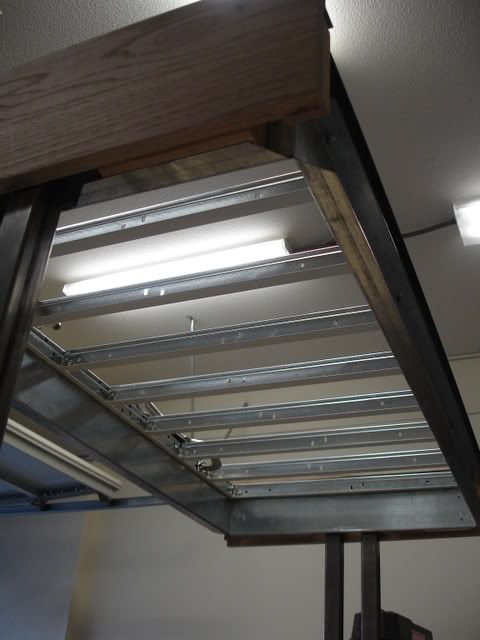
I also go the oven box completed. This is Doug's new and improved design for use with his new heating elements. No need to get something fabricated!
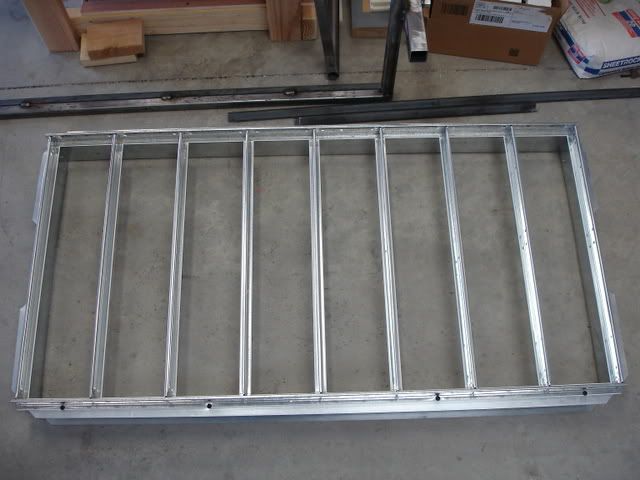
The outside frame is made from 20 ga 3 5/8" track and the top and cross members are made from drop ceiling t-bar and cross tees. SUPER easy to put together! Total cost of oven box materials...$37.00! Can't beat that!
Todd
_________________
"If you're not living on the edge, you're taking up too much space!" |
|
| Back to top |
|
|
kayaker43
Expert
Joined: 13 Jun 2007
Posts: 175
|
| Posted: Sat Jan 10, 2009 7:25 pm Post subject: |
|
|
Wow,.. you're really moving fast. Can you give me an estimate of your time when finished, everyone asks and I never know what to tell them? It depends so much on available tools and skills,.. you seem to have plenty of both.
Just so people know, how did you cut the tubing and what type of welding.
_________________
Doug Walsh
www.build-stuff.com
Hobby-Vac and Proto-Form machine plans
Also other plans books and videos for people who like to build things |
|
| Back to top |
|
|
jegner
Site Admin

Joined: 30 May 2003
Posts: 2144
Location: Texas, USA
|
| Posted: Sun Jan 11, 2009 9:57 am Post subject: |
|
|
Looking great! Thanks for keeping us updated on your progress!
In addition to you time, can you let us know the final cost?
Jim |
|
| Back to top |
|
|
TD1035
Novice
Joined: 02 Aug 2006
Posts: 31
|
| Posted: Sun Jan 11, 2009 10:46 am Post subject: |
|
|
| kayaker43 wrote: |
Just so people know, how did you cut the tubing and what type of welding. |
I used a cut off saw that I picked up from Harbor Freight to cut all the metal:
I picked one up on sale for $75 bucks. Works like a champ. Nice clean straight cuts.
I welded the frame together with a 100 amp wire fed Mig Welder.
No problem on the cost and time. I'm curious myself so I've been keeping track. I'm going to try and get some more done today so I'll try and post some more pics.
Todd
_________________
"If you're not living on the edge, you're taking up too much space!" |
|
| Back to top |
|
|
clonesix
Novice
Joined: 19 Jan 2007
Posts: 63
Location: california
|
| Posted: Sun Jan 11, 2009 4:23 pm Post subject: |
|
|
| Magnificent. Keep posting pictures of the progress. I am excited to see this being built. I may get inspired to build one myself. |
|
| Back to top |
|
|
TD1035
Novice
Joined: 02 Aug 2006
Posts: 31
|
| Posted: Sun Jan 11, 2009 8:32 pm Post subject: |
|
|
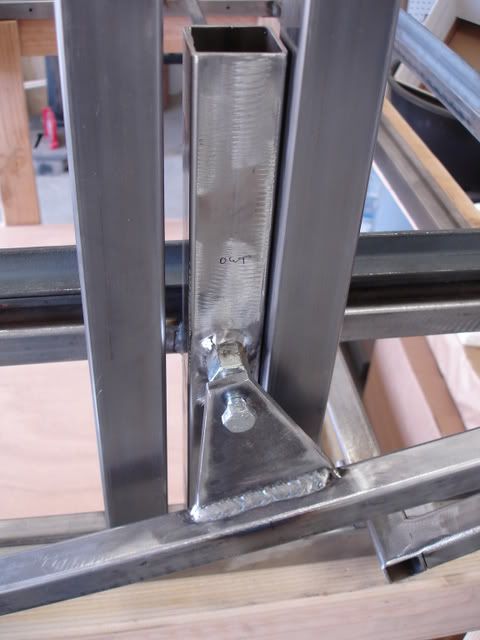
Well, another 7 hours today and this is what I got accomplished...
I cleaned up all the welds and made them nice and pretty!
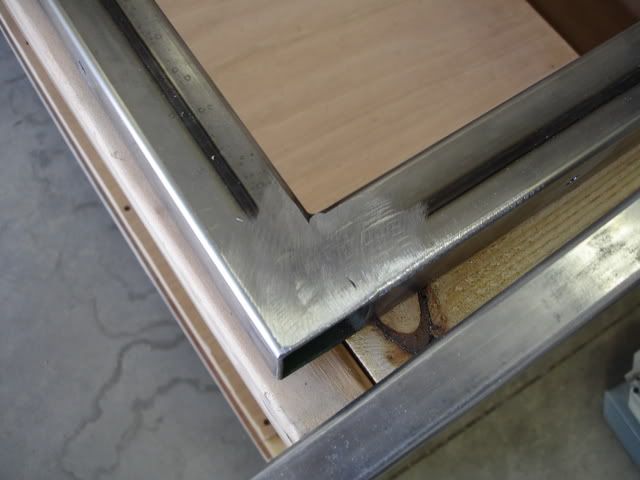
Got the carrier frame installed into the chasis...nice fit!
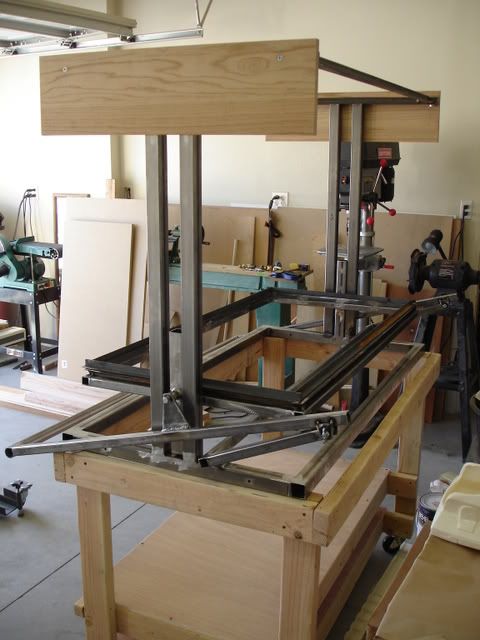
The top and bottom boxes are finished along with the base plate.

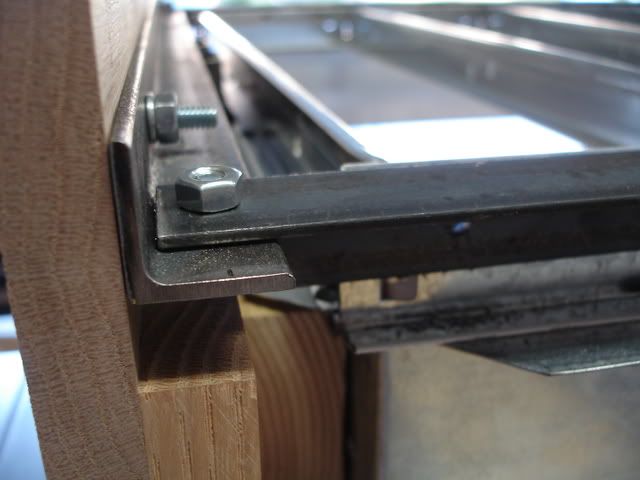
Then it came time to mount the newly designed oven box. I strayed from the plans a bit and made a modification to the angle iron on the top box. By notching out the angle iron and flipping it around, I was able to use it to mount the oven box. I only had to drill two new holes to make it work.
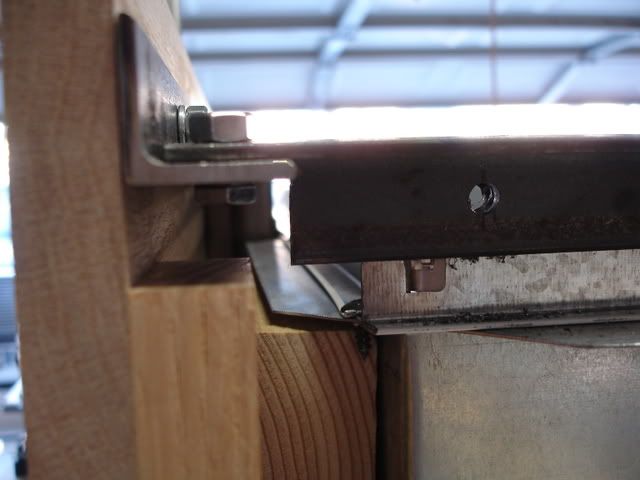
The oven box is now mounted and ready for the heating element install.
Can't wait till next week...
Todd
_________________
"If you're not living on the edge, you're taking up too much space!" |
|
| Back to top |
|
|
kayaker43
Expert
Joined: 13 Jun 2007
Posts: 175
|
| Posted: Sun Jan 11, 2009 9:08 pm Post subject: |
|
|
Todd
At some point I'm going to convert the plans to digital format and offer them on CD at a lower price. I'm not sure how much I'll revise them but I will most likely add more pictures. Maybe if you're interested, you could put all your pics on a disc and sell it to me so I have more images to choose from?
Keep up the good work..
Doug
_________________
Doug Walsh
www.build-stuff.com
Hobby-Vac and Proto-Form machine plans
Also other plans books and videos for people who like to build things |
|
| Back to top |
|
|
TD1035
Novice
Joined: 02 Aug 2006
Posts: 31
|
| Posted: Mon Jan 12, 2009 10:50 am Post subject: |
|
|
Sounds good to me Doug! Man, I wish I would have taken a lot more photos now... 
If you need pics of a certain part of the build or close up details of anything just let me know. Otherwise I'll just start taking more pics along the way.
This week I'm starting on your new heating elements so I'll be sure to take a lot of good photos. Thanks again for the offer and thanks for making this build SO EASY!!!
Todd
_________________
"If you're not living on the edge, you're taking up too much space!" |
|
| Back to top |
|
|
Jr Branham
Novice
Joined: 09 Jun 2007
Posts: 28
Location: Georgia
|
| Posted: Mon Jan 12, 2009 3:58 pm Post subject: proto |
|
|
I built the same size machine...took me about 5 years...lol 
Very nice welds, mine look like bubble gum  , but they have held. , but they have held.
Good Luck, Doug's plans make a nice machine.  |
|
| Back to top |
|
|
TK 109
Guru

Joined: 11 May 2007
Posts: 712
Location: Galena, Ohio
|
| Posted: Wed Jan 14, 2009 3:55 pm Post subject: |
|
|
wow this is fast!
nice, professional work, too. You should stain that pretty wood.
_________________
-Alex
-------------------------------------------------------
 |
|
| Back to top |
|
|
TD1035
Novice
Joined: 02 Aug 2006
Posts: 31
|
| Posted: Tue Jan 20, 2009 11:27 am Post subject: |
|
|
I've got some good new and some bad news...the good news is that I got quite a bit more finished this weekend! The bad news is that my computer crashed on Friday!!! 
I spent about a day trying to fix it and then finally figured out that the drive controller built into the mother board was shot. l was forced to go out and buy another tower and now I am in the middle of transfering over three hard drives worth of info...what a pain in the @#$.
Needless to say that all my photos are on one of the drives so I may be a bit slow with the pics. No worries Doug, I'm taking quite a few pics as I go!
I should have some of them ready to post by this weekend...
Todd
_________________
"If you're not living on the edge, you're taking up too much space!" |
|
| Back to top |
|
|
ANH trooper
Master

Joined: 20 Oct 2005
Posts: 305
Location: UK
|
| Posted: Tue Jan 20, 2009 12:57 pm Post subject: |
|
|
Great job so far Todd!
You work fast. I wish I had the space to a larger former. What is the platen size? |
|
| Back to top |
|
|
TD1035
Novice
Joined: 02 Aug 2006
Posts: 31
|
| Posted: Wed Jan 21, 2009 3:09 pm Post subject: |
|
|
| ANH trooper wrote: | Great job so far Todd!
You work fast. I wish I had the space to a larger former. What is the platen size? |
I am building the machine to house a 2x4 platen but I am going to build three different size platens.
-2x4
-2x3
-2x2
That way I can change the size of the plastic sheets depending on the project without having to worry about waste. I'm still working out the best way to build the clamping frame to make it easy to change with the platens.
I should have some more pics up by this weekend...
Todd
_________________
"If you're not living on the edge, you're taking up too much space!" |
|
| Back to top |
|
|
|

