 |
www.TK560.com
Vacuum Forming, Movie Prop, Sci-fi and GIjOE Forum
|

|


|
| View previous topic :: View next topic |
| Author |
Message |
DarthVader1
Expert

Joined: 04 Nov 2007
Posts: 193
Location: Phenix City, AL
|
 Posted: Mon Jan 19, 2009 11:44 pm Post subject: TOPIC UPDATE Posted: Mon Jan 19, 2009 11:44 pm Post subject: TOPIC UPDATE |
 |
|
"ROBOTO INDUSTRIES" will resume operations sometime soon.....STAY TUNED....!!! 
_________________
Robert
BH/TK/TB/TS 060
 |
|
| Back to top |
|
 |
DarthVader1
Expert
Joined: 04 Nov 2007
Posts: 193
Location: Phenix City, AL
|
| Posted: Sun Jun 07, 2009 6:26 pm Post subject: |
|
|
UPDATE NUMBER.........I've even lost count. 
Well, after over a month hiatus due to personal issues and bad weather at the same time, I've continued with this project, and this time in FULL THROTTLE! My last update was in another topic in the "FABRICATION TECHNIQUES" section in this board. Here's the topic in question:
I haven't done anything since then, but now I've started sanding the imperfections on the mask molds, and started to work with the GLOVES. Last year I've made just the sculp and didn't even finished, but now the top is done, and this week will be sculpting the bottom (way easier than the top) to then make the bottom half of the mold. Here's the progress so far.
What do you think so far?
_________________
Robert
BH/TK/TB/TS 060
|
|
| Back to top |
|
|
TK 109
Guru

Joined: 11 May 2007
Posts: 712
Location: Galena, Ohio
|
| Posted: Wed Jun 10, 2009 10:51 am Post subject: |
|
|
Good, very good! Are these hands going to be latex, or formed plastic, or something else?
_________________
-Alex
-------------------------------------------------------
 |
|
| Back to top |
|
|
DarthVader1
Expert
Joined: 04 Nov 2007
Posts: 193
Location: Phenix City, AL
|
| Posted: Wed Jun 10, 2009 7:31 pm Post subject: |
|
|
The hands will be casted in LATEX, just like the ones in the video, and painted GUNMETAL. You'll see the results when I complete the second half of this glove. Then I will continue with the second set (left hand).
Right now, I'm concentrating on the helmet and it's details. More updates tomorrow.
_________________
Robert
BH/TK/TB/TS 060
|
|
| Back to top |
|
|
DarthVader1
Expert
Joined: 04 Nov 2007
Posts: 193
Location: Phenix City, AL
|
| Posted: Sat Jun 13, 2009 8:26 pm Post subject: |
|
|
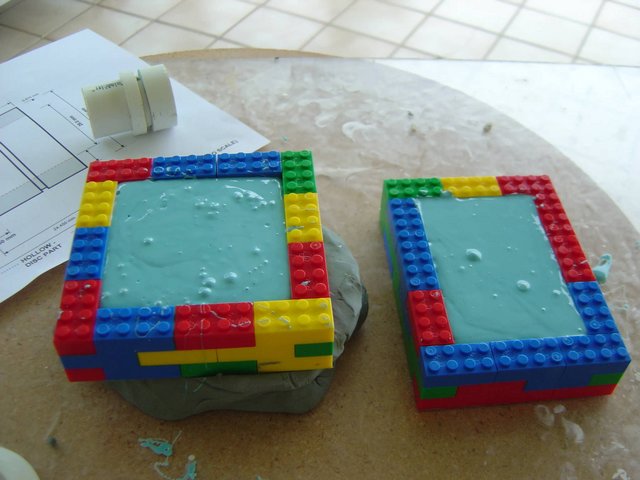
[size=150]-UPDATE-[/size]
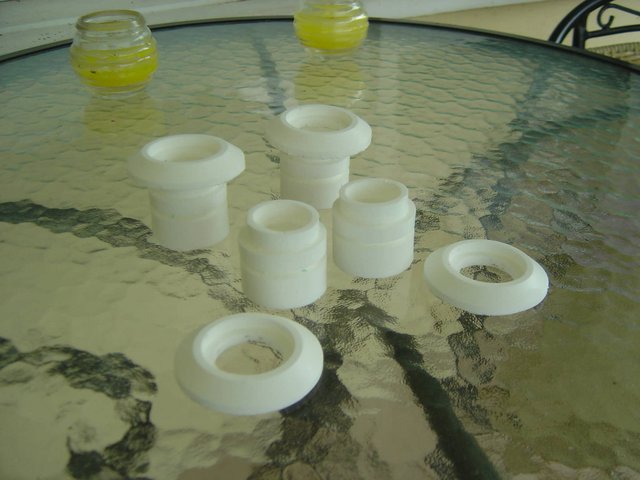
I've finished casting the "ears". What the pics are not showing is the cleanup process (bondo the holes and imperfections and excess resin), and carve the lines along the ridge of the "ring" part.
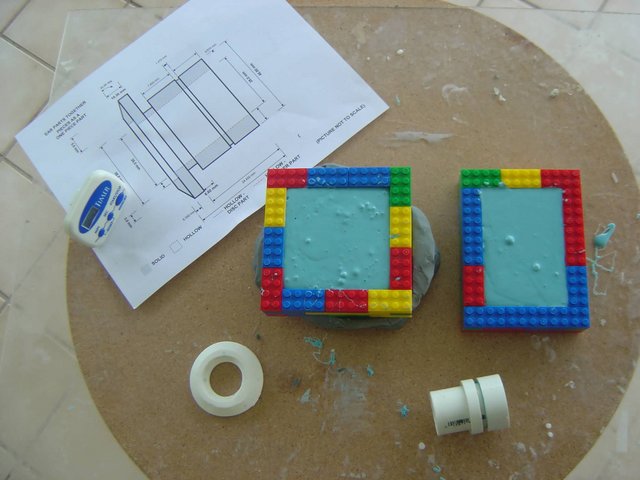
The mold at the left is the mold of the "ring" part, and the one at the right is for a TOP-SECRET thing I have planned for a near future, which most of you will see and enjoy personally at some point. 
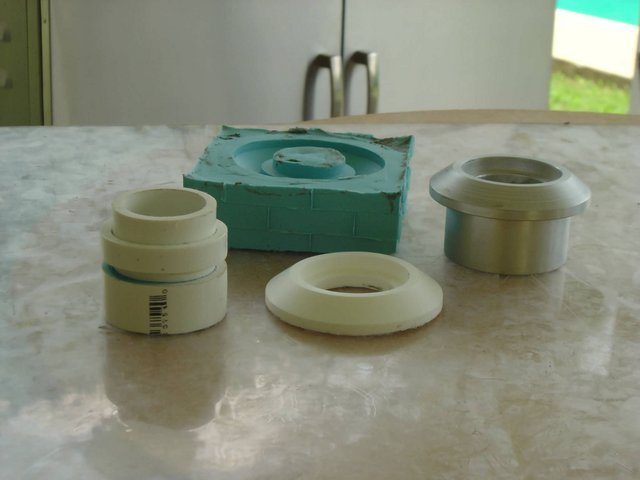
Here are the four ear outside rings, ready for cleanup and attach to the cylinder part...
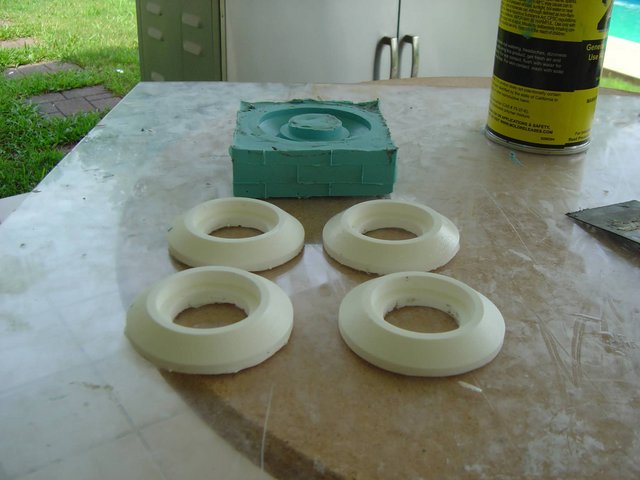
....and now with the castings of the cylindrical part to be attached to, that have to go through the same process, and also I have to cut come extra slack before attaching...
More to come soon.
_________________
Robert
BH/TK/TB/TS 060
|
|
| Back to top |
|
|
jegner
Site Admin

Joined: 30 May 2003
Posts: 2144
Location: Texas, USA
|
| Posted: Sun Jun 14, 2009 9:52 am Post subject: |
|
|
Looks good to me! Can't wait to see the final version!
Jim |
|
| Back to top |
|
|
DarthVader1
Expert
Joined: 04 Nov 2007
Posts: 193
Location: Phenix City, AL
|
| Posted: Fri Jul 03, 2009 9:33 pm Post subject: |
|
|
Well, since the last update I've being thinking about something that made me change the way I was doing the gloves. I came with a different approach of doing things, this time THE EASIEST WAY POSSIBLE.
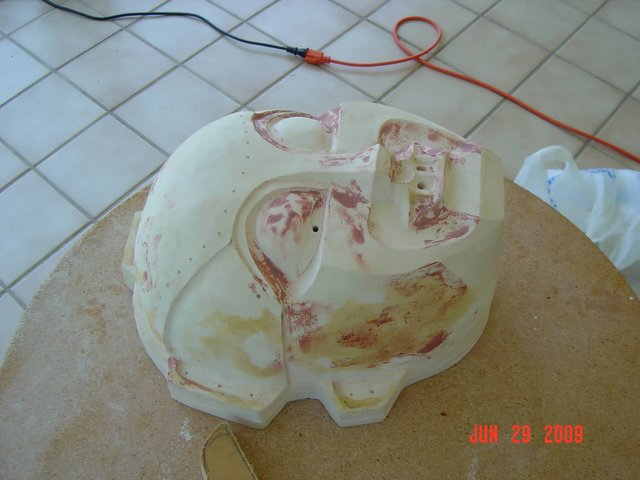
I realized that the first mold and sculpture for the right hand was kind of difficult to make it happen, but then I was thinking about the way the TK amor is done with (mostly), and the best solution is MDF board. This is what I came with...
BTW, this is the mask mold, with some bondo and a lot of sanding, ready for step 2 for vacuuforming:
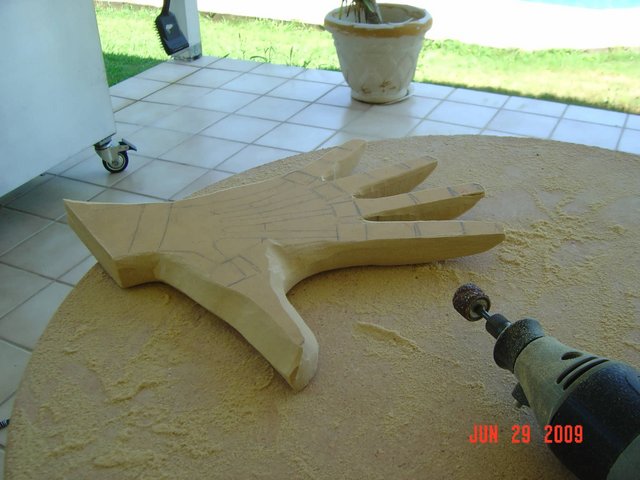
First cutout of the left hand, using a piece of MDF board...
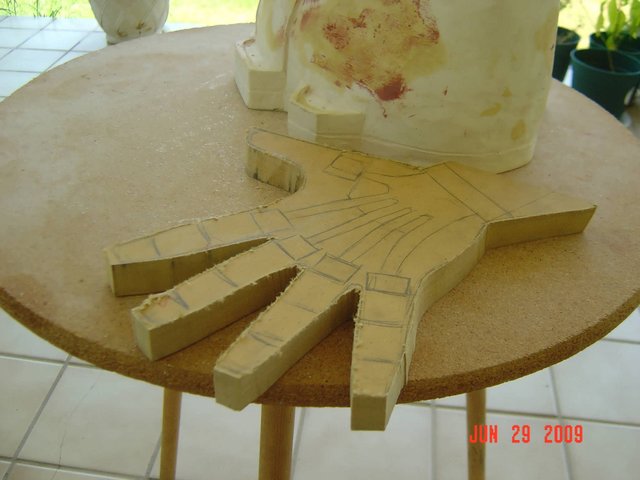
Giving it some shape with my dremmel tool...
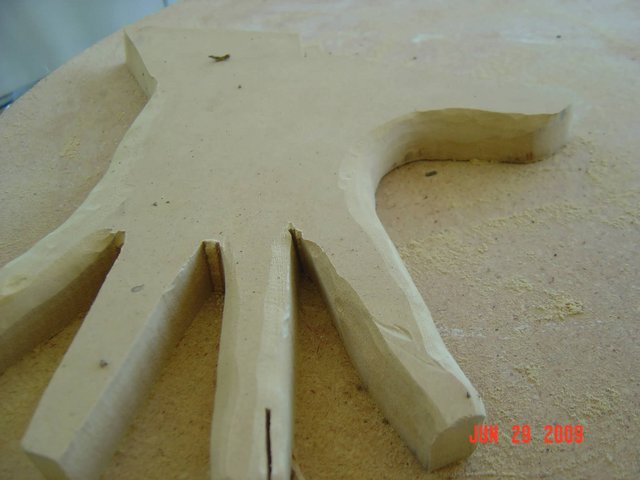
...to try to get the proper "hand" shape...
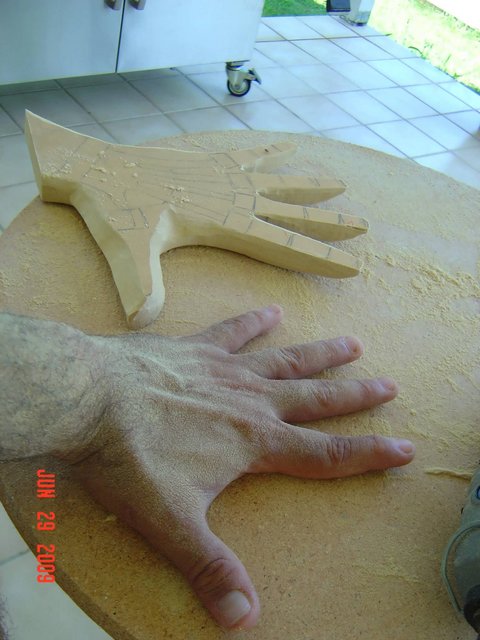
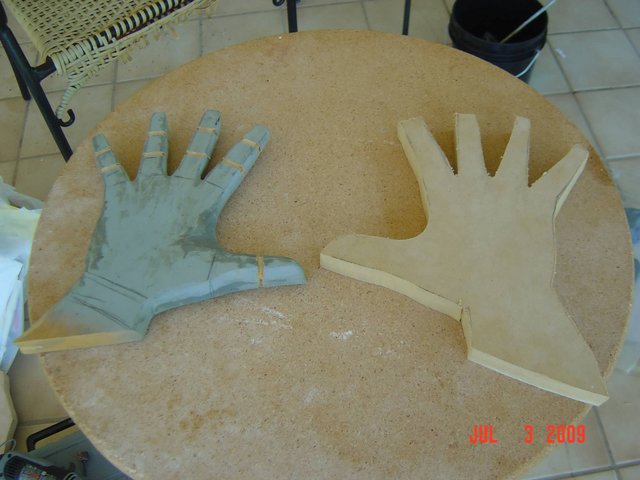
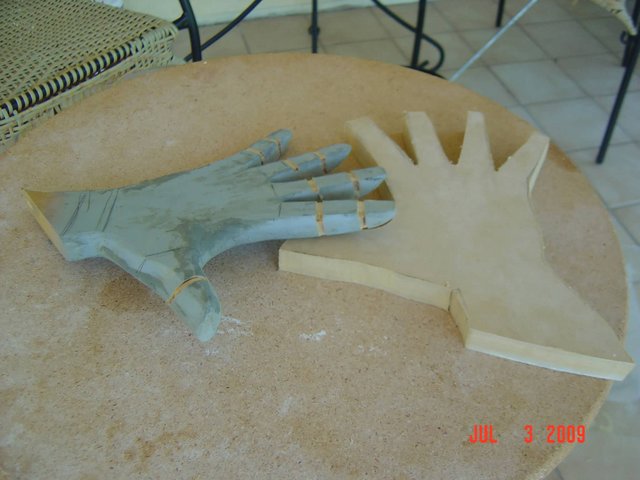
Size comparisons between the mold and the real hand..just to keep the actual shape...
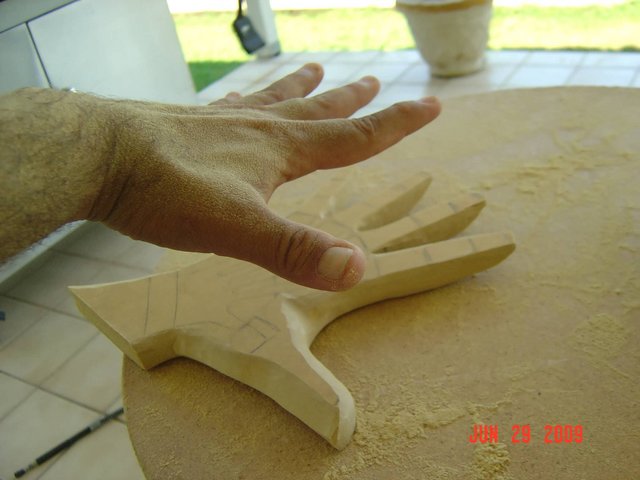
That's the thing about MDF boards; easy to work with, but really messy when it comes to sand down. 
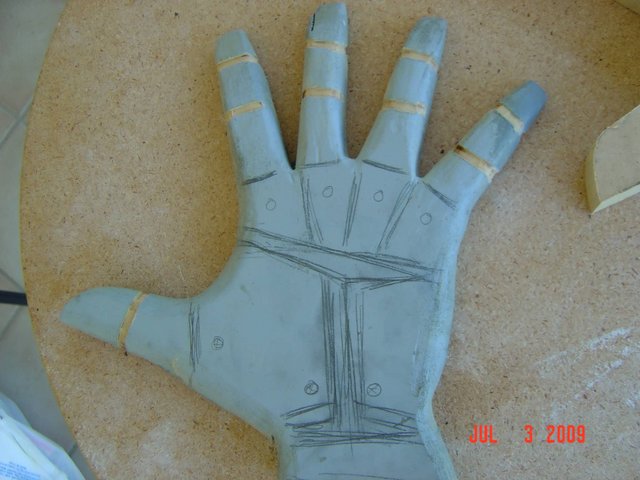
Now, this is the end result: (MEMO TO SELF: remember to make/finish as much details as you need, before applying primer or preparing for a mold). I sanded everything with fine grit paper AFTER I sprayed the whole thing with automotive primer, which makes you see all kinds of imperfections during the process, not to mention the clay I used before while preparing for the mold-half. I've carved the lines where the fingers bend in the MDF hand mold, which will minimize the use of clay for sculpting the details fo the hand later on...the less clay, the better.

I've came up with a design for the inside of the hands, since there area no reference pics showing the inside of the hands, sooooo, I will make them more "ROBOTIC", and less "human-shaped" as possible...
Now, a comparison between the original size, and the sculpted hand so far...
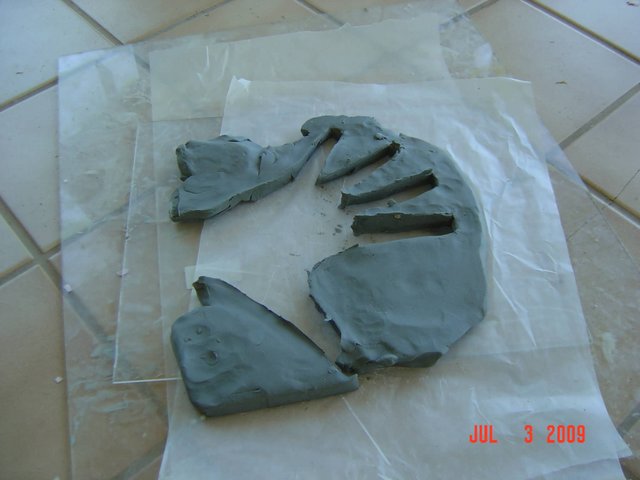
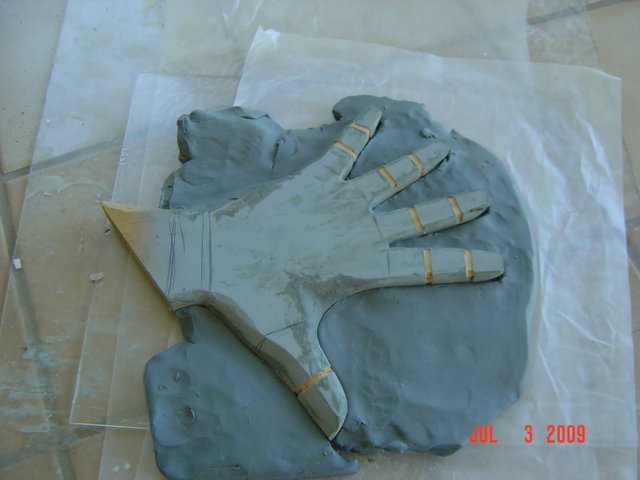
And this is the setup for the mold. I flattened about ¼ to ½ inch of clay, so it could properly cover HALF of the glove mold, which I did by carving around the hand mold with a knife, and extracting the clay thats laying underneath the mold, that way to accommodate the mold and be easier for preparation.
More updates coming this weekend, which includes upper and lower hand detailing, more vacuuforming progress and more.
_________________
Robert
BH/TK/TB/TS 060
|
|
| Back to top |
|
|
TK 109
Guru
Joined: 11 May 2007
Posts: 712
Location: Galena, Ohio
|
| Posted: Sun Jul 05, 2009 4:59 pm Post subject: |
|
|
AHA! There you go! That should be a little faster, and better!
_________________
-Alex
-------------------------------------------------------
|
|
| Back to top |
|
|
jegner
Site Admin
Joined: 30 May 2003
Posts: 2144
Location: Texas, USA
|
| Posted: Sun Jul 05, 2009 5:14 pm Post subject: |
|
|
| Cool! Keep those updates coming! |
|
| Back to top |
|
|
DarthVader1
Expert
Joined: 04 Nov 2007
Posts: 193
Location: Phenix City, AL
|
| Posted: Sun Jul 05, 2009 9:22 pm Post subject: |
|
|
| jegner wrote: | | Cool! Keep those updates coming! |
"AS YOU WISH." 
- NEW UPDATE AFTER INDEPENDENCE DAY -
As I've previously noted, I've decided to change the method of creating the gloves; cheaper, faster, easier, and cost-cutting measure.
Of course, the "easier" part doesn't come THAT easy, since I have to go back and redo the details of the forehands from scratch, since it's a different model/sculpt. The volume overall is lower, and as the originals, they'll be made out of a THIN LAYERED LATEX, just way thicker than your traditional latex gloves you see used at hospitals....and prostate checks. 
Seriously, if you see the videos I've posted earlier in the thread (specially of the concert versions), you'll see that the thickness is really close to the actual hand, making the effect believable as a "ROBOTIC" hand. Well, here's the progress so far, which I was able to complete the first half of the right "hand",
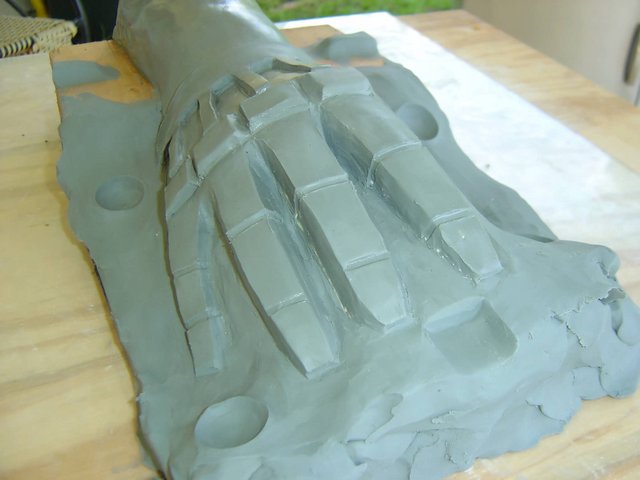
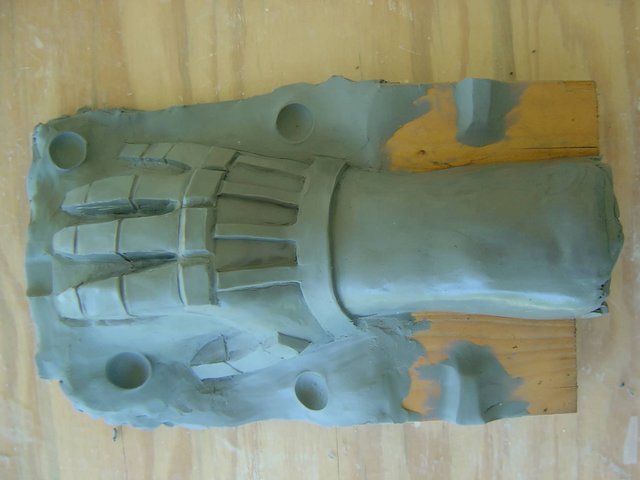
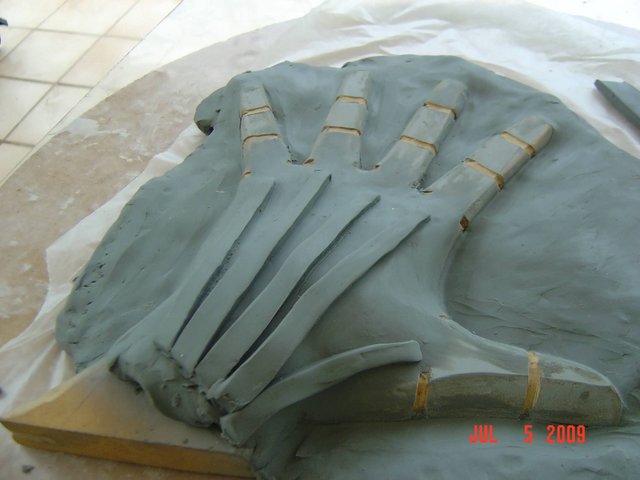
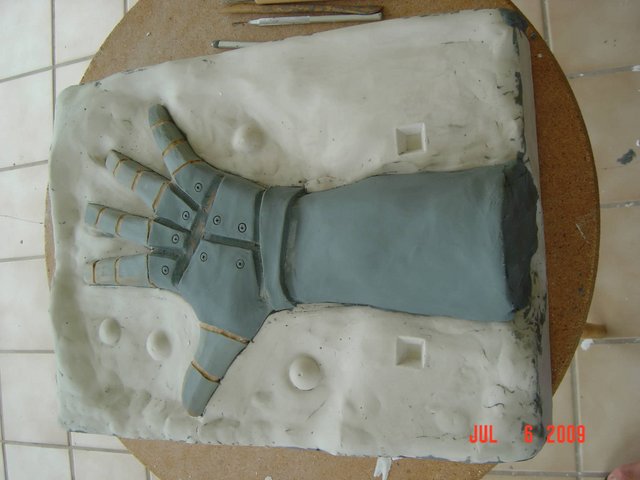
I've started by sanding the "details" of the palm, which looks a little like a "SPIDERMAN" glove, but it won't. I came with this UNIQUE design, since there's no physical proof of the design of the palm, not even on the videos.....I've decided to do a design of my own, and make it my "signature design" by creating a ROBOTIC palm, and I will be adding more details later on (details to be shown on my next update this week), but I want to concentrate on the visible details first......
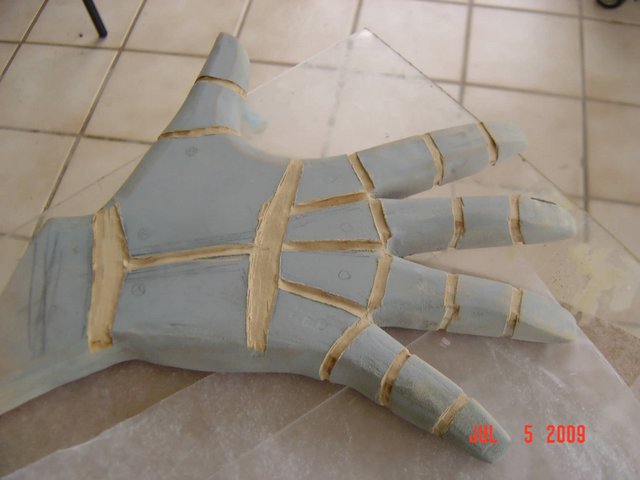
Preparing the forehand mold first after shaping the bottom/palm...
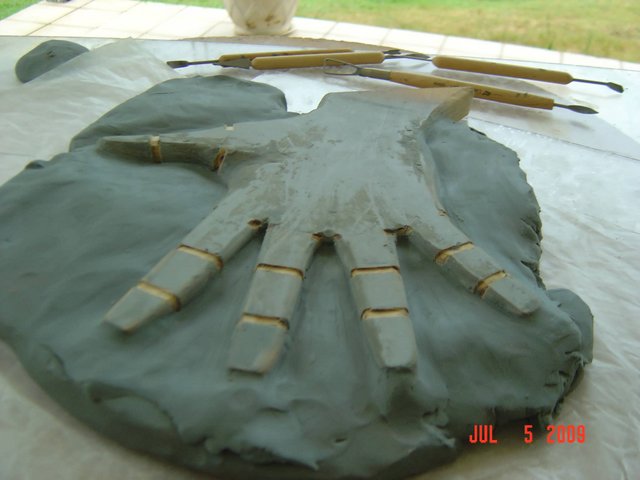
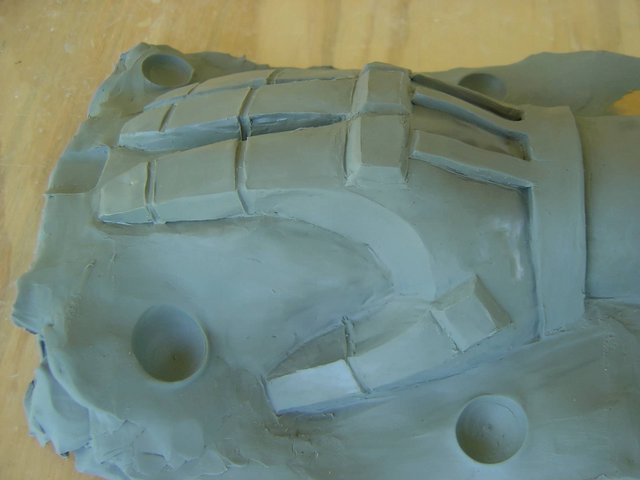
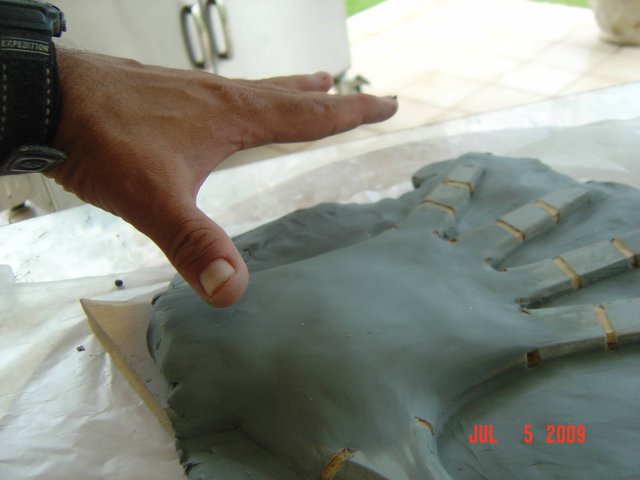
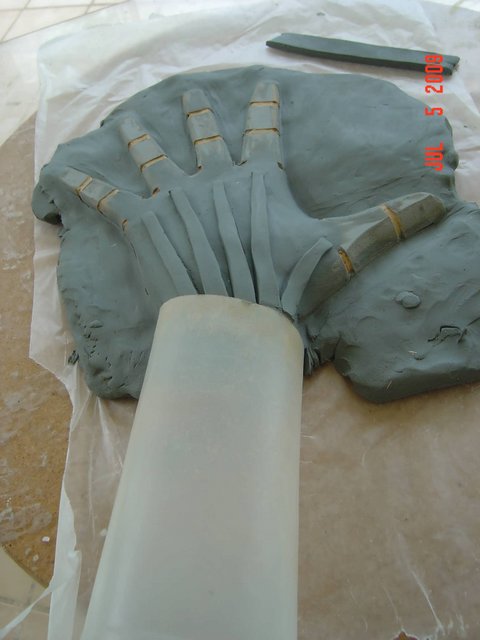
Adding more volume to the upper hand, due that the hand mold is almost "flat", and I want it to be more shaped to the real deal...
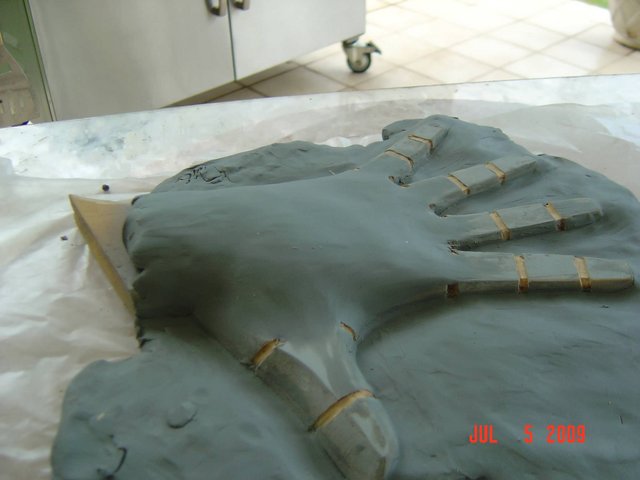
Compared to what I was just talking about....
...adding the "tendon" details...
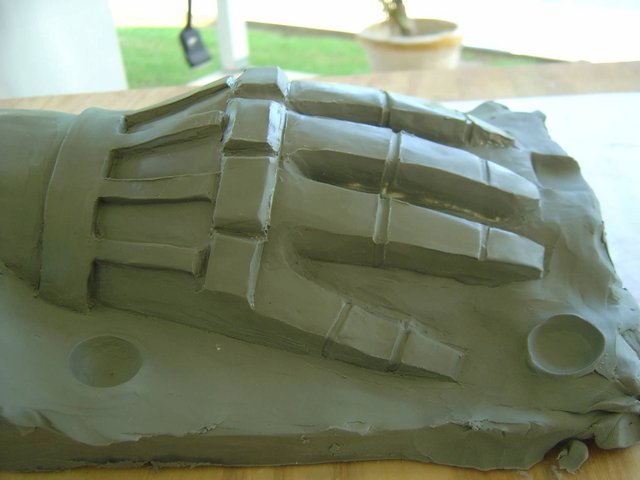
...adding the "forearm" part, which is the same plastic cut out from the gallon, used to make the "neck" area of the very back of the head mold...
Added the "wrist" detail and the "knuckles" details. Knuckles details what I came out with, is basically those flexible plastic things you use for under the furniture to prevent scratching. I've paid only about $3 per a set of 12 at HOME DEPOT. Less time and effort for me to sculpt and detail.
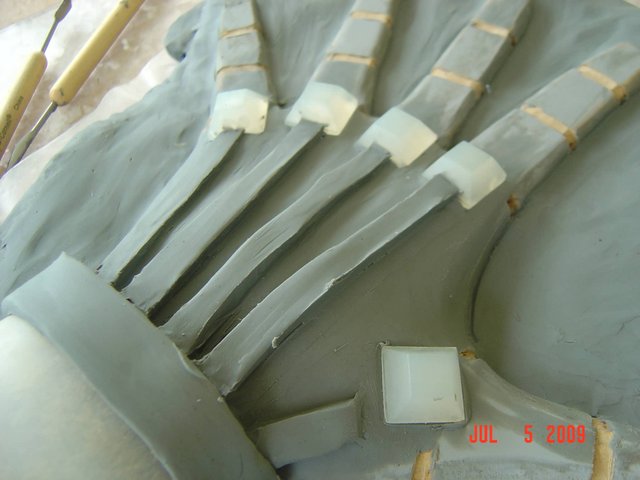
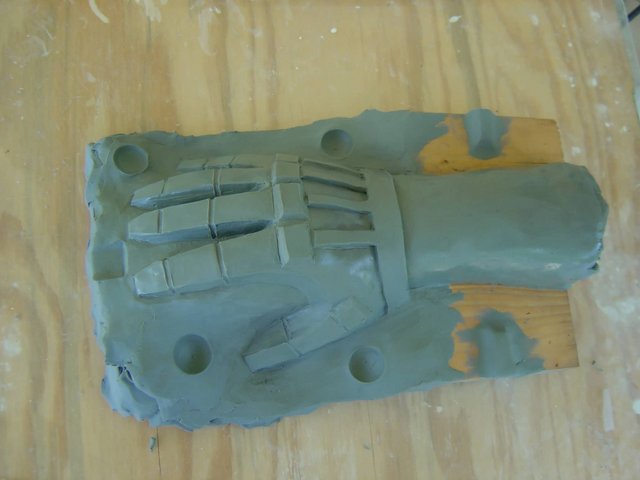
Hand, almost ready to make a mold of the first half... notice the "guides" I used in the clay...couple of them are the same things I used for the "knuckles" in the hand mold.
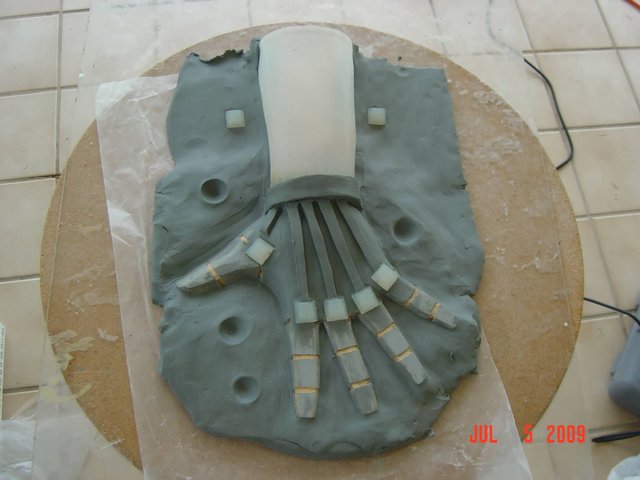
More updates coming this week, since I'm rushing this project as fast as I can.
_________________
Robert
BH/TK/TB/TS 060
|
|
| Back to top |
|
|
DarthVader1
Expert
Joined: 04 Nov 2007
Posts: 193
Location: Phenix City, AL
|
| Posted: Thu Jul 09, 2009 9:55 am Post subject: |
|
|
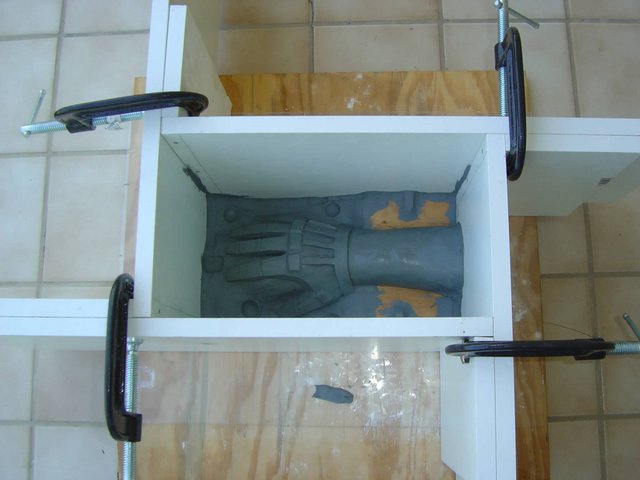
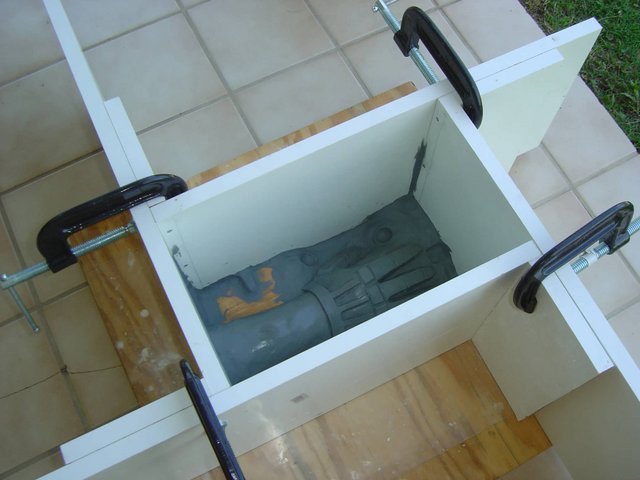
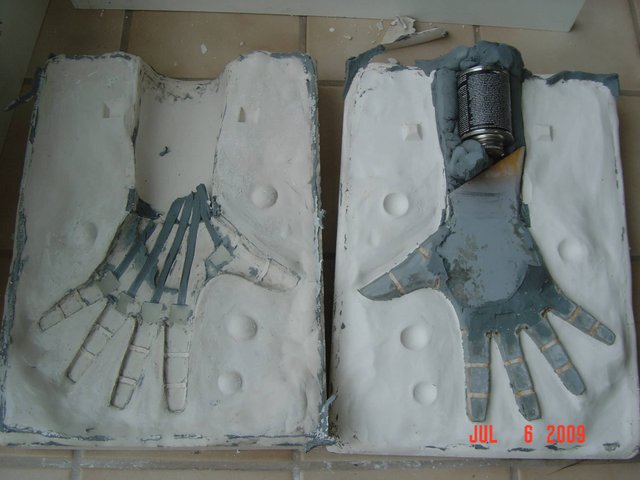
Well, finished the whole mold for the left hand. (NOTE TO SELF: Do not use the plastic film to build the wrist or a cylinder of any kind). Unfortunately, when I did the first half, the plastic "wrist" came out loose while pouring the plaster, and it made a little mess outside the mold and some inside the hand mold itself. Fortunately, nothing that I wouldn't clean myself or fix. For the other half, I've decided to use clay, with some kind of support inside, such as an empty PVC Glue can.
I did some details of my own, as a "signature design", unfortunately on the finishing making of the mold, two or three of those designs were erased of the mold somehow. 

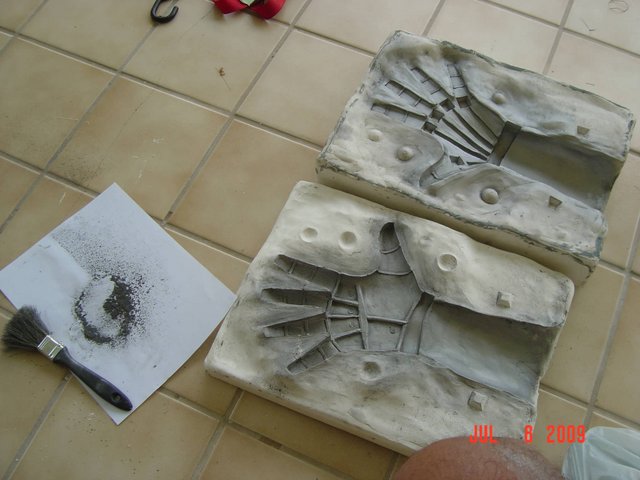
I've done both halves, and time for cleanup the mess. Not the prettiest job in the world, but practical. As you look at the left half, reminds me of another note: APPLY SOME MOLD RELEASE before casting the mold half. It took me a good deal of time cleaning the details of the forehand.
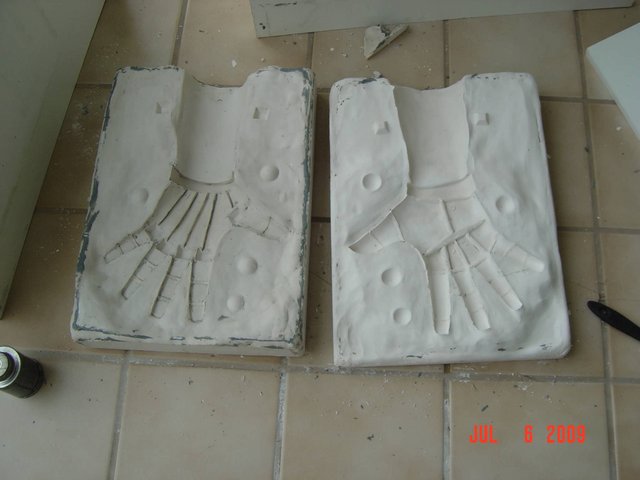
Mold is cleaned up, and ready for first casting....
Now, the interesting part...adding color to the latex casting while pouring the latex in the mold. I used something called ALUMILITE, which is a metallic talc/powder used for cold-cast molds. It serves as MOLD RELEASE at the same time, giving the casting a metallic look once it's out of the mold....no need to paint afterwards.
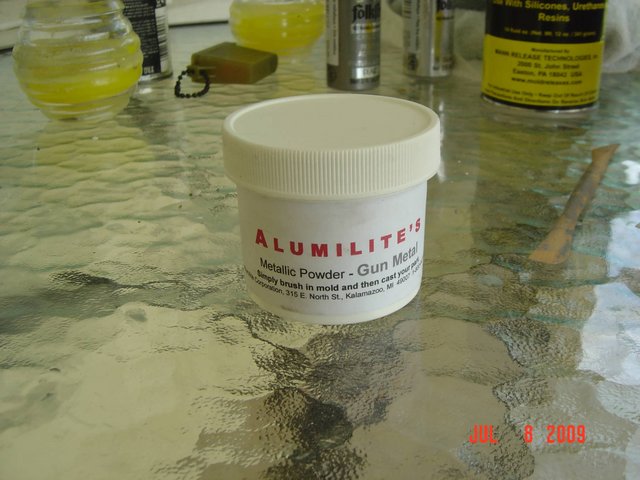
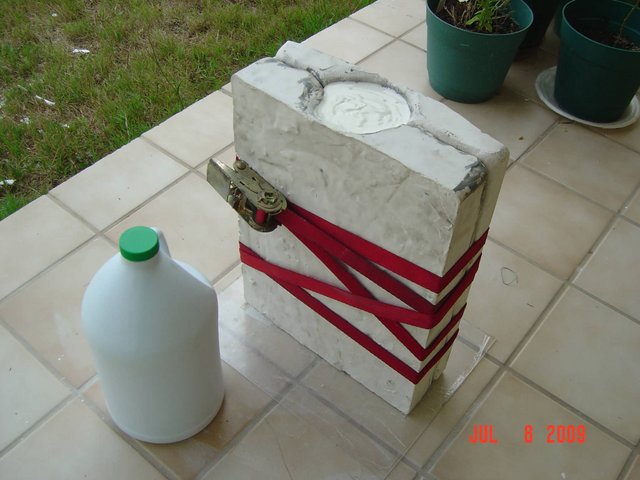
I've applied the powder in the internal cavities of the mold with a clean, soft brush, to then close it, secure with ratchet straps or rubber bands. BE advised...this process is rather messy, and make sure you use some kind of protection on the floor, such as brown paper or anything you could use to pick up the excess and throw it back in the canister....and not to do this in a windy area......trust me.
Latex poured in the mold once it's secured....
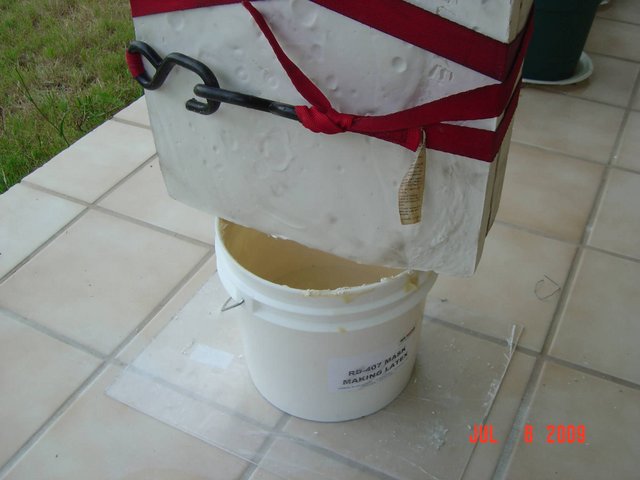
...and taking the excess out once you pour back the rest of the latex back in the gallon after a few minutes.
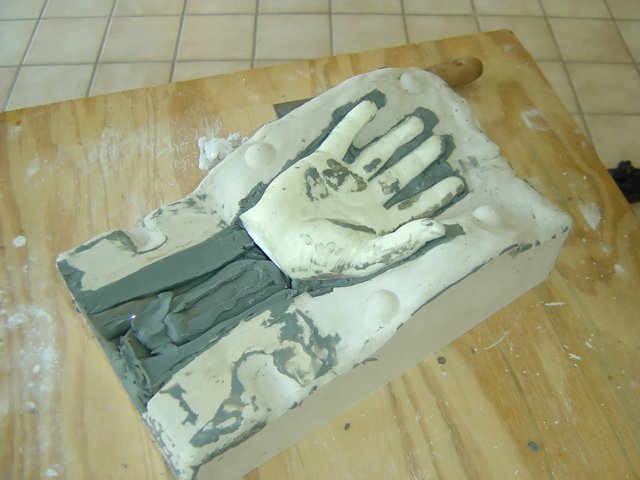
Next day, I separated both halves to expose the final result, and....EUREKA.....well, somehow. You could see that came exactly as my hand is, which is what I wanted,
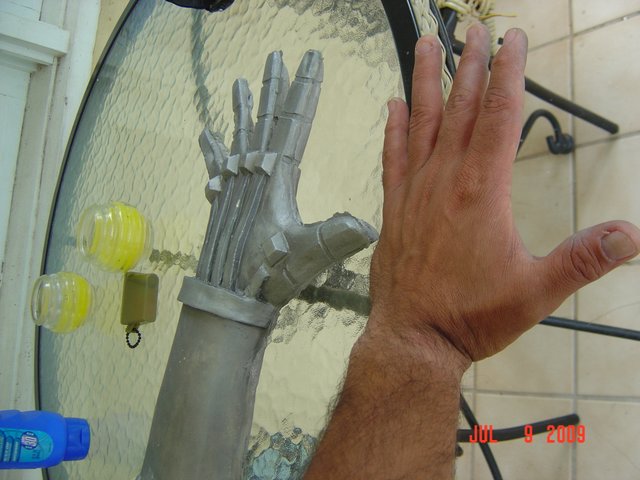
Obviosly there's some cleanup to do, specially the excess latex where the mold halves meet...
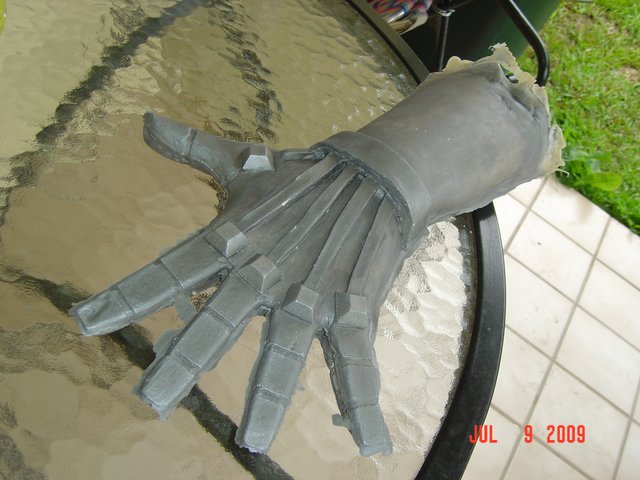
But there's a problem. Once I took this glove out of the mold, the ALUMILITE didn't stick completely to the glove, since I have to find a way to clean it without removing it from the glove.....I will update on that soon...
And if you look at the outside edge on the hole of the glove, you'll see that it's warped...that's because some of the latex haven't dried up since yesterday.
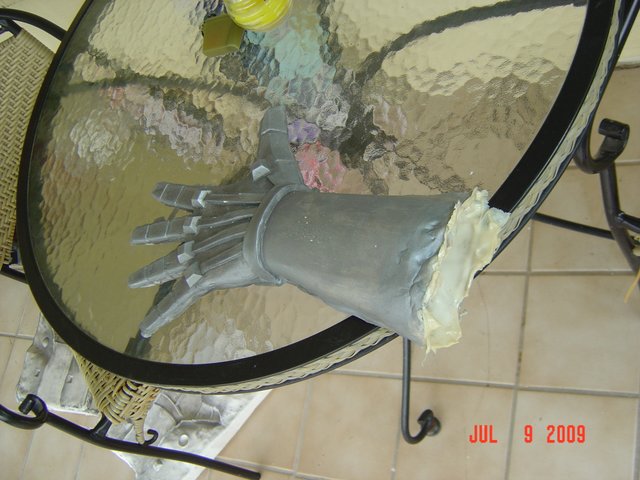
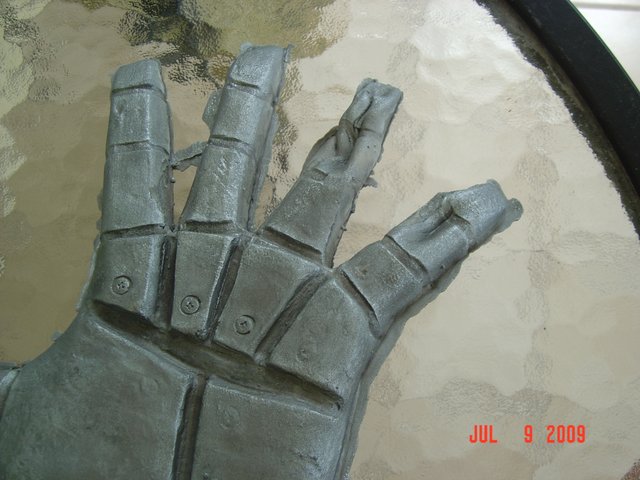
Another thing, the glove came out perfect on the outside, but in the inside is still wet, and a lot of latex got to waste. The main problem I found was that I let the latex in the mold for over 30 mins (45 mins, actually), and the glove was supposed to have a thin layered wall, similar to those yellow gloves you use to wash dishes, but the walls came out too thick, similar to those found in quality halloween latex masks. Next time I will let it sit for only 15 minutes to see what happens....and NO ALUMILITE (until I find out if after cleaning is good enough). Same thing happened to the last two fingers in this pic....latex too wet inside, and the inner layers got stuck to each other. What a shame.
More updates coming later on.
_________________
Robert
BH/TK/TB/TS 060
|
|
| Back to top |
|
|
TK 109
Guru
Joined: 11 May 2007
Posts: 712
Location: Galena, Ohio
|
| Posted: Sat Jul 11, 2009 3:40 pm Post subject: |
|
|
That looks awesome!!
_________________
-Alex
-------------------------------------------------------
|
|
| Back to top |
|
|
DarthVader1
Expert
Joined: 04 Nov 2007
Posts: 193
Location: Phenix City, AL
|
| Posted: Tue Jul 14, 2009 6:57 pm Post subject: |
|
|
Thanks Alex.
This is my progress as of today...
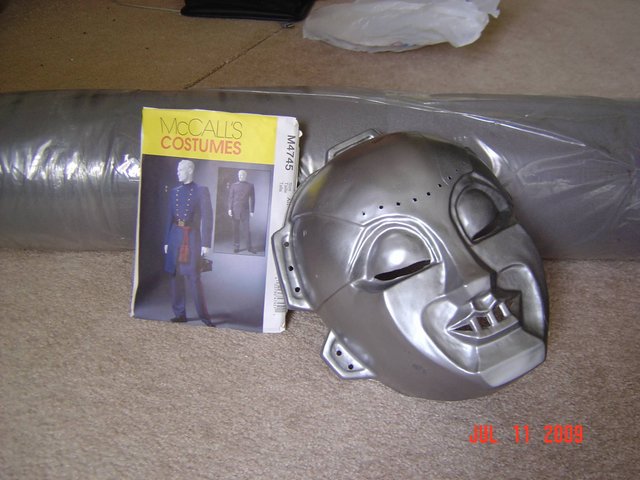
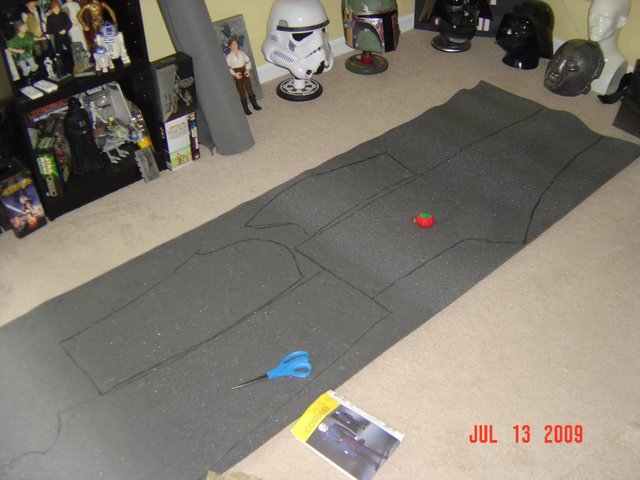
During the weekend, I received a large roll of goodness....meaning it's the CAR HEADLINER MATERIAL which the original suits were made of (we think). Using a CIVIL WAR UNIFORM sewing pattern, I'll be making the pants and coat, but as you saw in the videos and screen caps, it's designed in a slighly different way, which I will be creative for that.

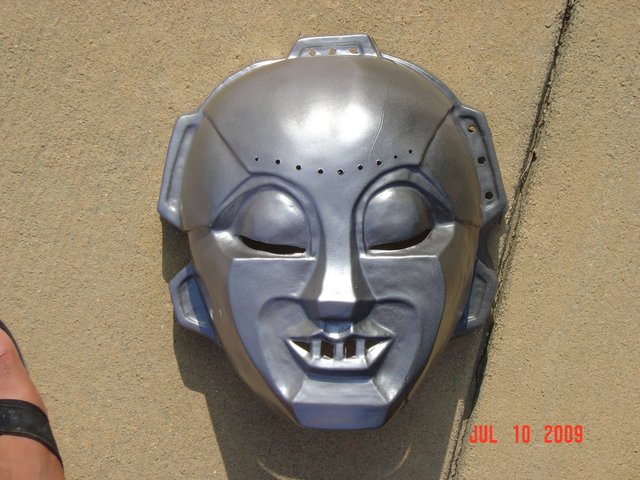
Here's the roll in the back of the pattern package and my prototype mask (BTW as you see, it's painted and holes for lights done....i will explain later)...
I've started cutting the pattern with the easiest part....the pants and the jacket sleeves.
I will update more on the suit sometime this week.
I've being working with the helmet, which constitutes the MOST IMPORTANT part of this project. Couple of days ago (and as I mentioned before), I painted the mask trying different paints and colors. I tried the best around for this purpose (TAMIYA Gunmetal spray). It gives a nice and shiny look, but it's too dark to be noticed around, specially in the dark. I decided to use acrylic paints found at WALMART...
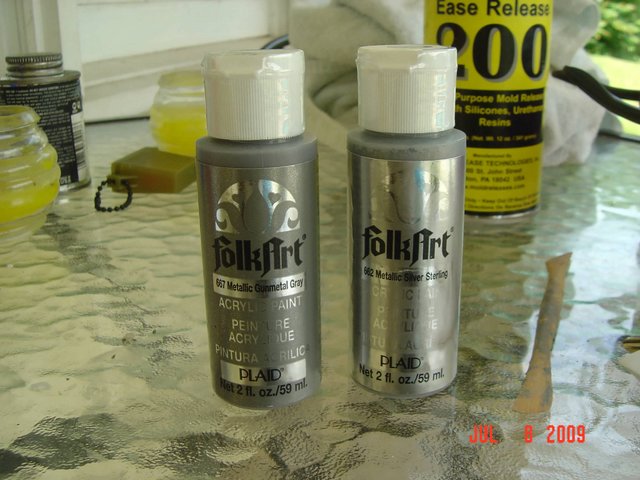
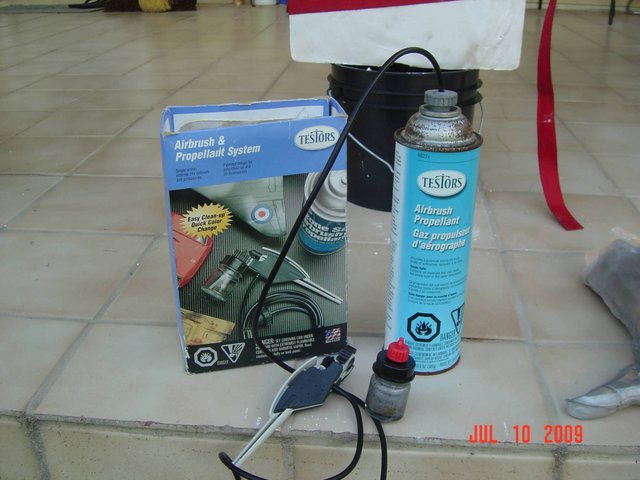
And with the use of the cheapest airbrush available (even though I have a compressor and a professional airbrush handy), and only for one reason....to obtain the right color not available in stand-alone spray can or bottle.
For this one, I had to use 3 parts SILVER to 1 part GUNMETAL to create the best effect. I could still use 50/50 of each color, but I prefer the silverish color better, since it was still looking dark before compared to the gloves. 
At the left of the screen (side where my TOE is) , it's sprayed with the acrylic mix; the right is painted with the TAMIYA spray paint. Notice the difference in color / tone while outside in the porch.
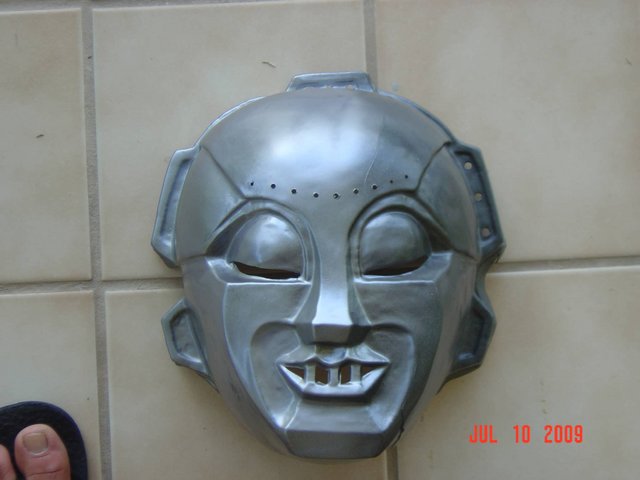
And in broad daylight...
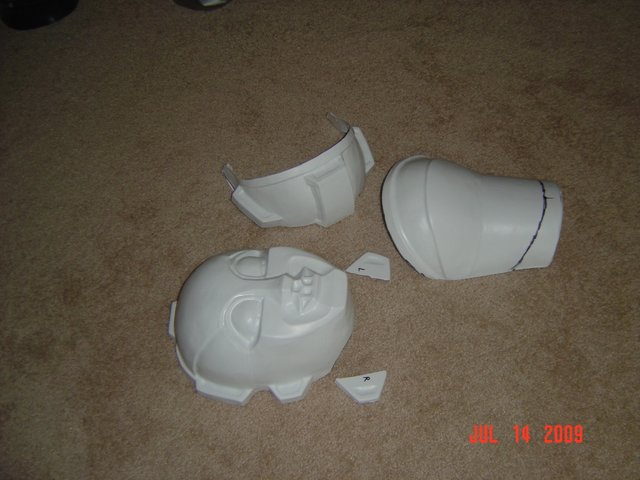
Today, I've decided to go forward with the vacuuforming process (again), to finally see what has to be fixed before creating another mold. Once again the mask and the top back molds of the helmet got stuck to the plastic, but with a little patience I was able to retrieve them without breaking the mask parts.
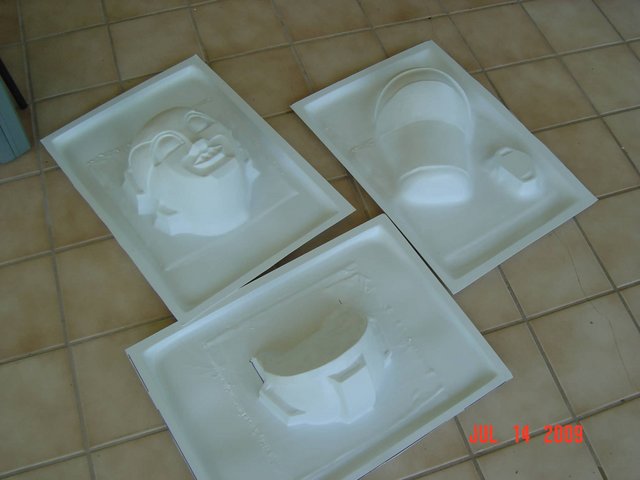
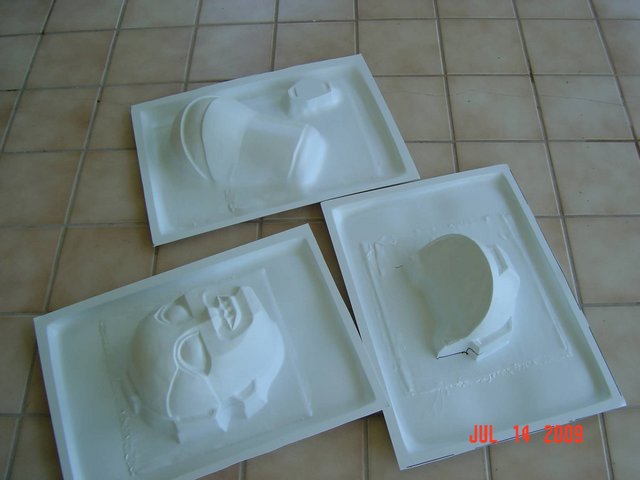
Here are the parts cut from the rest of the plastic. The small two pieces are to cover the back of the lower "ears", which I didn't designed properly, and will be added later on once the LED lights are connected and glued in place.
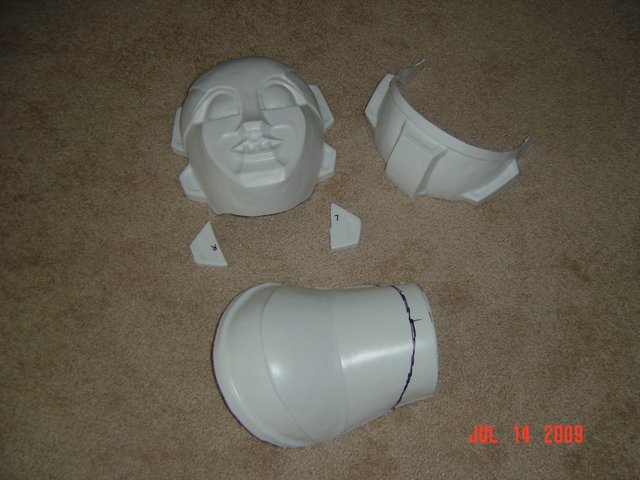
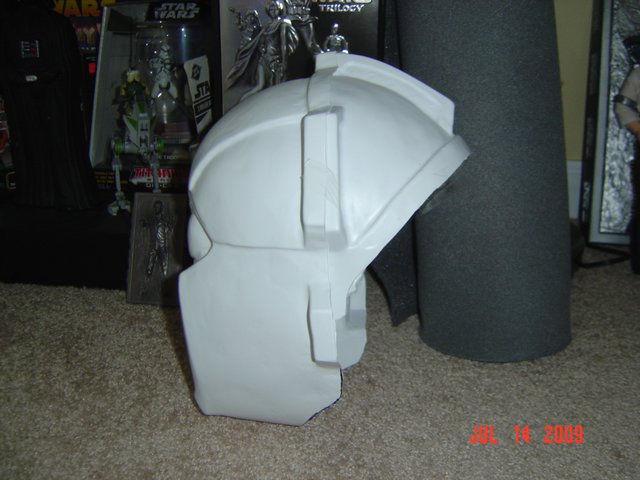
Side view of the 3/4 helmet (the way it will be assembled if I decide to do a run of these helmets:

And now with the rest of the back that covers the mid section and neck. NOTE: there is another part that goes in FRONT of the neck, but I will do it with a strip cut to shape from a cheap FOR SALE plastic sign, and the areas in between parts will be covered in BONDO to camouflage the errors that will be fixed at a later time in the molds. The black line is where I have to cut so I could move my neck upwards, and most of the lower part will be covered by the neck of the jacket.
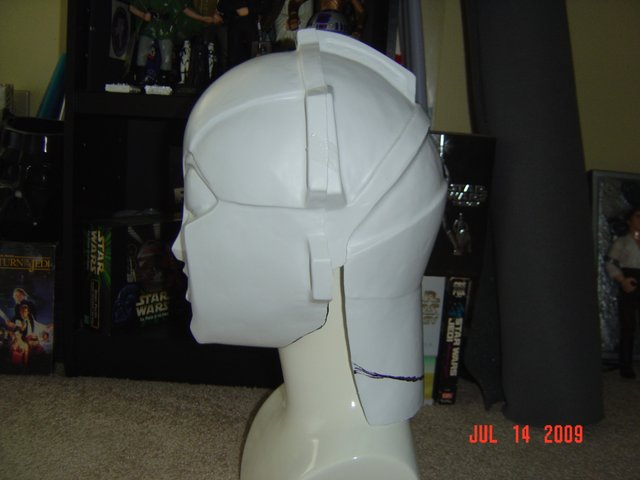
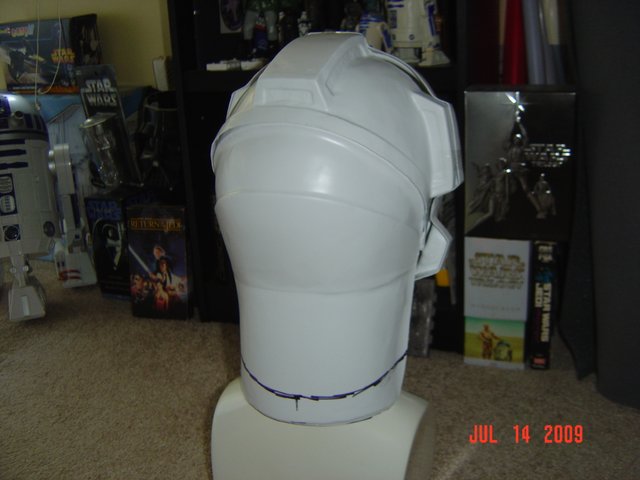
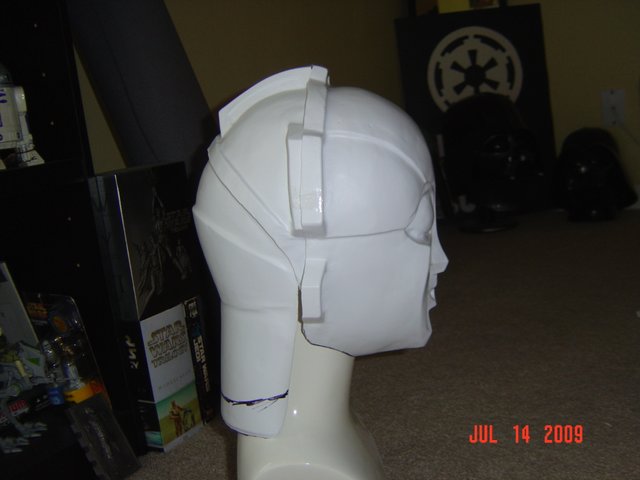
This is a screen cap showing the same angle of view.

What do you guys think? "Ears" coming up next.
_________________
Robert
BH/TK/TB/TS 060
Last edited by DarthVader1 on Tue Jul 14, 2009 7:23 pm; edited 1 time in total |
|
| Back to top |
|
|
jegner
Site Admin
Joined: 30 May 2003
Posts: 2144
Location: Texas, USA
|
| Posted: Tue Jul 14, 2009 7:05 pm Post subject: |
|
|
| Very well done! Thanks for documenting the process! |
|
| Back to top |
|
|
DarthVader1
Expert
Joined: 04 Nov 2007
Posts: 193
Location: Phenix City, AL
|
| Posted: Thu Aug 06, 2009 7:00 am Post subject: |
|
|
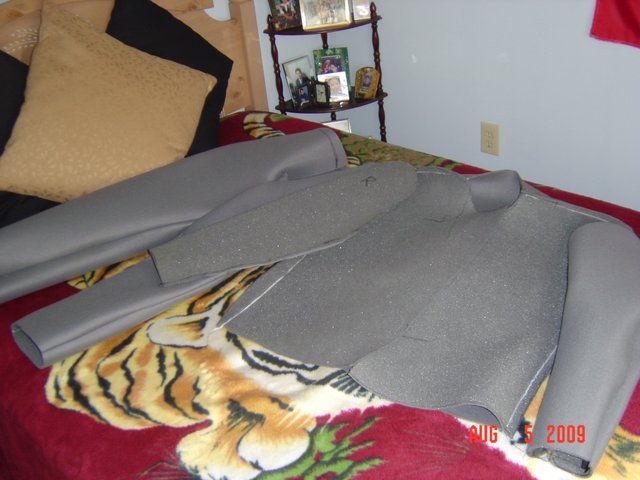
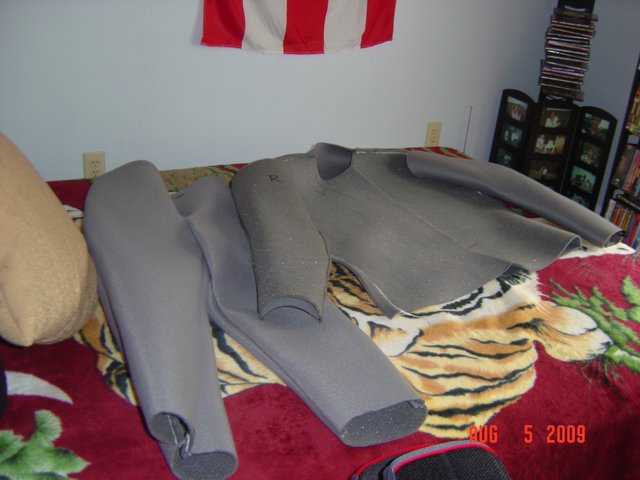
QUICK UPDATE: (SUIT TEASER)
Progress being slow, but better to take it slow and precise than fast and sloppy. Here's just a TEASER pic of the suit itself, almost finished stage. Pants are basically done, and I still have to make the neck and attach the sleeves to the jacket, plus the crease details along the front and back.
_________________
Robert
BH/TK/TB/TS 060
|
|
| Back to top |
|
|
|
|
You cannot post new topics in this forum
You cannot reply to topics in this forum
You cannot edit your posts in this forum
You cannot delete your posts in this forum
You cannot vote in polls in this forum
|
Powered by phpBB © 2001, 2005 phpBB Group
|

