| View previous topic :: View next topic |
| Author |
Message |
Patternman
Newbie
Joined: 01 Oct 2010
Posts: 11
|
 Posted: Fri Oct 01, 2010 6:17 am Post subject: New member intro and an oven question Posted: Fri Oct 01, 2010 6:17 am Post subject: New member intro and an oven question |
 |
|
Hi Everyone.
First off thanks so much for all of the great info on this forum. I'm an independent patten maker for the foundry industry and wanted to try out some vacuum forming to see if I could work it into some of my pattern work... Which justified my real reason which was to make some parts for my car!
I put together a 2'x2' rig and was really pleased with the forming results.
Here's a couple of shots of the finished former.
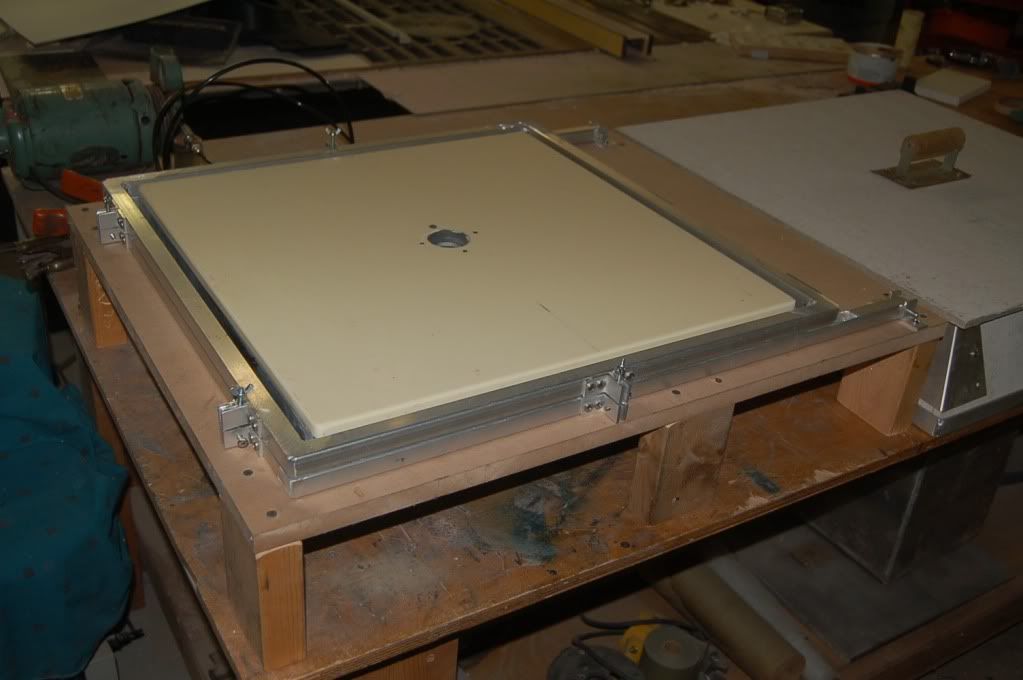
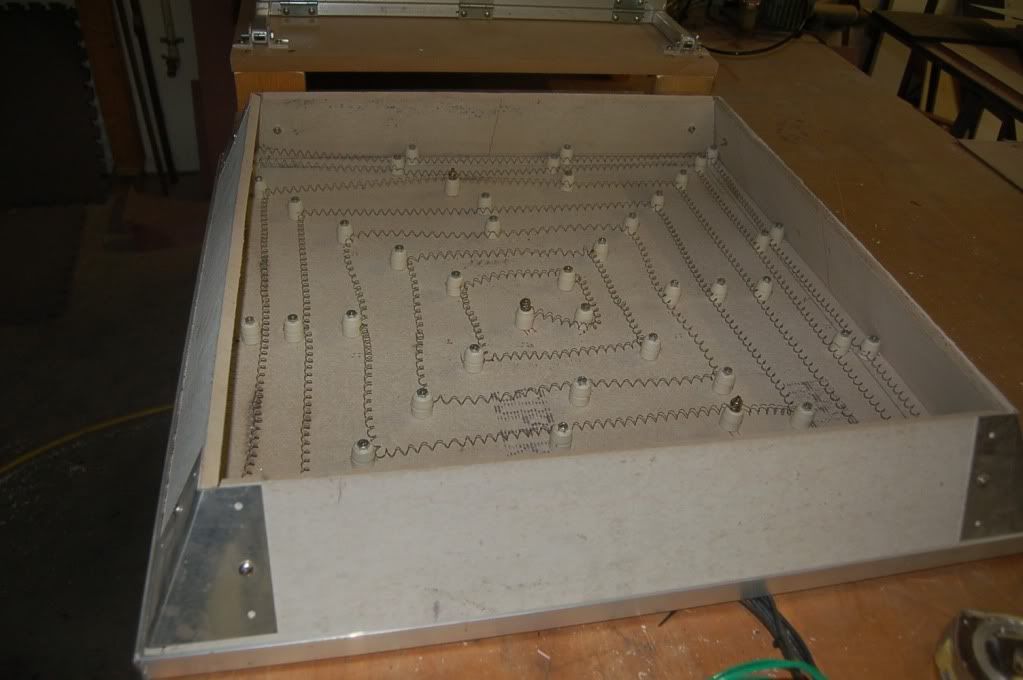
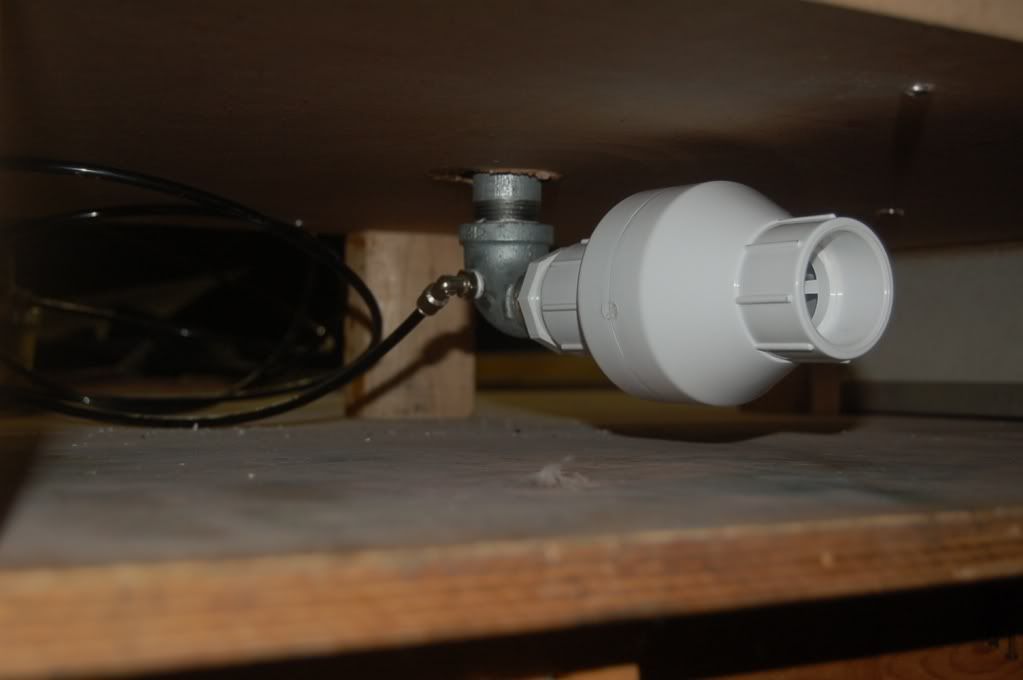
I'm using a small shop vac through the one way valve and a vacuum pump for the final pull. This arrangement is working out really well for me.
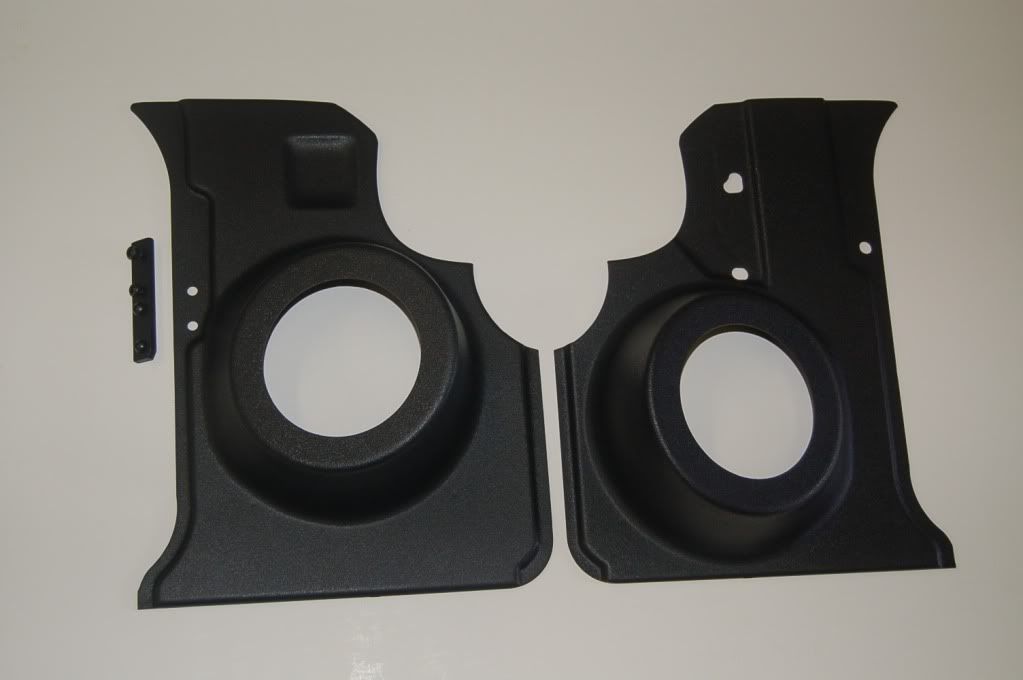
The first (and only) thing I made were kick panel speaker mounts for my car.
I designed the panels in a 3D solids program and then CNC carved the components.
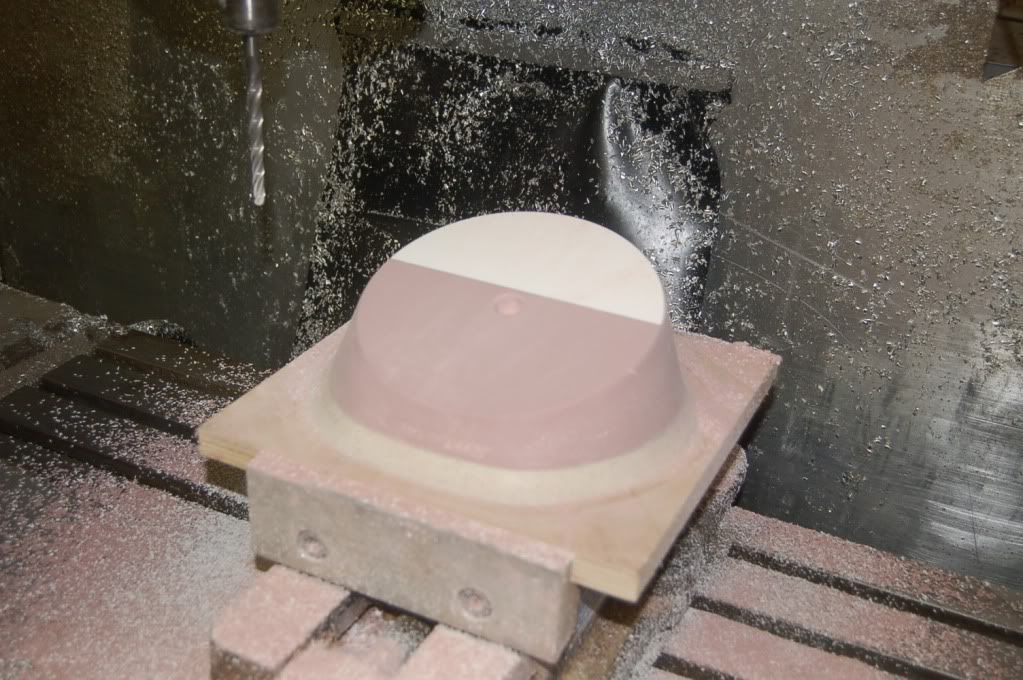
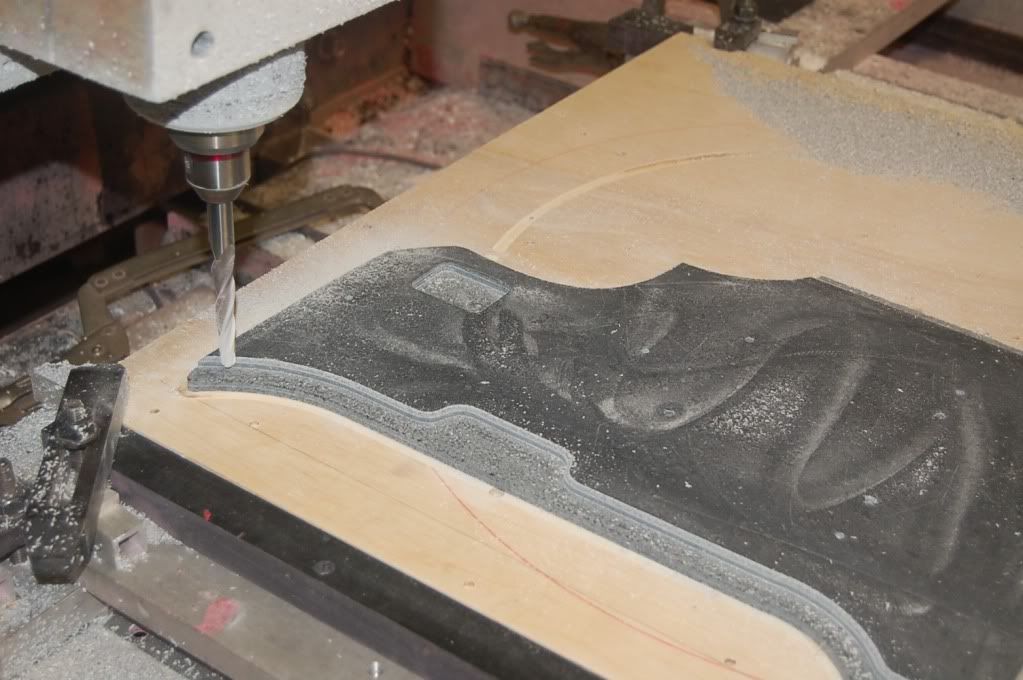
I'm using 1/8" ABS. The first pull was a little weak but the plastic was too cool and I didn't really know what to expect so my technique was lacking. After a couple of trys I got all the bugs worked out and it really works great.
Here is a shot of the finished product. I sprayed them with SEM trim black.
Vacuum forming is fun! No really... I'm having a blast with this.
Now for the oven question. My router is a 4'x5' machine. Now I'm not planning on pulling anything that large but when you have the capacity you tend to build everything to match. I looked at all the patterns I've done in this machine and 3' x 4' oven would cover about 90 percent of what I want to do.
I'm mostly going to be doing ABS in the .060" range but may occasionally go as high as .125" and as low as .040 HIPS.
I've decided that going with the modules like the Protoformer would be best. I saw the post "2x4 Proto-form build...HERE WE GO!!!! Update 1-7-10" and the picture of Todd stretching nichrome wire and of course without reading any further bought the Protoform plans. Unfortunately I guess I misunderstood because the section on the oven says " From this point on I am assuming that you already have or will soon purchase the heating element package from me" Curses... Foiled again. Now I don't regret buying the plans but I'm no further along than i was before. The section on vacuum is worth the 65.00.
I've messed with the oven calculator and It seems to make my head spin. When I built my 28 x 28 oven I used it to confirm what I had already read but now I'm having trouble trying to use my own sizes. I'm thinking 6" x 36" modules would probably be the best way to go broken into two 36 x 24 sections. I have 220V 200 amp service so power is not a problem. Now to get this out of the way I'm very comfortable working around electricity. I've run many a 220V outlet and know the value of "first make last break" philosophy so we can save the disclaimers 
So can anyone guide me on using the oven calculator to design this thing?
Thanks
Derek |
|
| Back to top |
|
 |
kayaker43
Expert
Joined: 13 Jun 2007
Posts: 175
|
| Posted: Sat Oct 02, 2010 4:05 pm Post subject: |
|
|
Derek
I'm the last guy to discourage anyone from designing their own oven, that's what I did. I don't think anyone here will disagree that you can build a functional oven using the oven calculator, yet some ovens do work much better than others. You will find that the next oven you build, or the one after that will be better based on what you learned before. Its also well known here that hardibacker is a poor product for use in ovens. If you have time to build and re-build, then consider it a fun journey and proceed. Don't assume it will end up cheaper, better or faster than buying an oven kit that is already optimized and uses the right materials.
It makes little sense for the Proto-Form plans to tell you how to buy and coil nichrome wire then tell you where to buy ceramic fiber board so you can find out its more expensive than the kits for sale. The high temp board is most of the cost of Proto-Form heating elements. Before you are tempted to cut corners, read this.
http://www.tk560.com/phpBB2/viewtopic.php?t=1351&postdays=0&postorder=asc&start=30
Doug
_________________
Doug Walsh
www.build-stuff.com
Hobby-Vac and Proto-Form machine plans
Also other plans books and videos for people who like to build things |
|
| Back to top |
|
|
Fredo
Master
Joined: 21 Mar 2007
Posts: 251
Location: Kingdom of Nye Area 51
|
| Posted: Sat Oct 09, 2010 10:25 am Post subject: |
|
|
Posted somewhere, the proto-form has a 1200 watt panel x 8 = 9600 watts, you need a 1800 watt 6"x36" panel x 8 = 14400 watts. About 65 amps at 220.
one segment
1800w
220v
@ 8.182 amps, 8.333 w/sq.in Your old oven is a little over 3 w/in2
You need 8.96 coiled inchs of 22awg nichrome wire for one segment.[I would just make it an even 9] 72 total coiled inchs.
It's up to you to fit it to a panel. The HB will get a lot hotter than before, and may fail sooner, rather than later.
I would use GFI breakers for this oven, I try to make everthing electric I build and use, foolproof, because I know what kind of fool I'm dealing with..  ........Fredo ........Fredo
_________________
If someone has a gun and is trying to kill you,
it would be reasonable to shoot back with your own gun...The Dalai Lama..Seattle 2001 |
|
| Back to top |
|
|
Patternman
Newbie
Joined: 01 Oct 2010
Posts: 11
|
| Posted: Mon Oct 11, 2010 7:51 am Post subject: |
|
|
Hi Guys. Thanks for the responses.
Doug I can certainly see your point about the heating elements and about using the proper backing board. Having said that I'm still using the hardee backer. The first reason is operating capital. Right now I can make this happen with cement board. The second is as you said it may take a few tries to get things sorted so I'd rather experiment with something cheaper. The usage on this machine will initially be very low. 4 or 5 heats a month at the most.
Fredo thanks for the help with the numbers. You ended up at the same place I did eventually so I'm feeling a little better about my numbers.
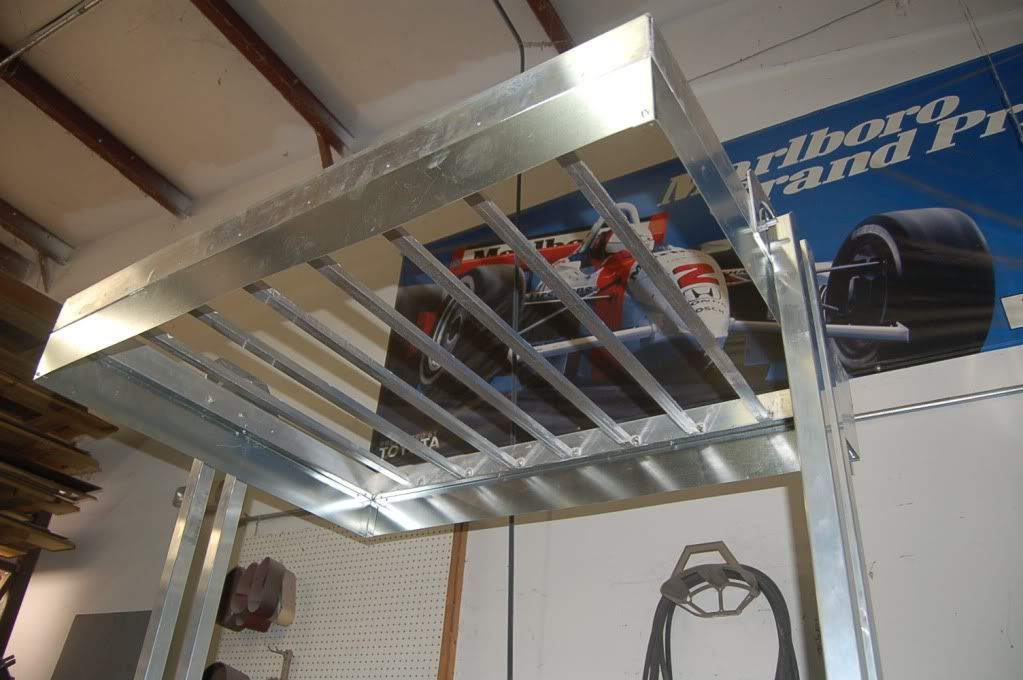
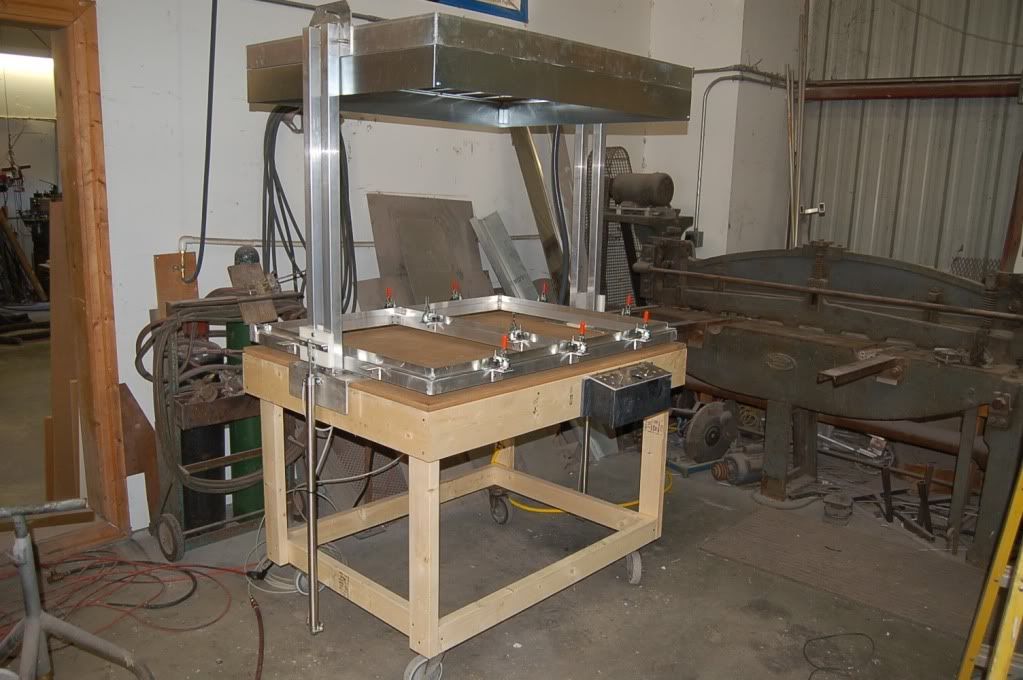
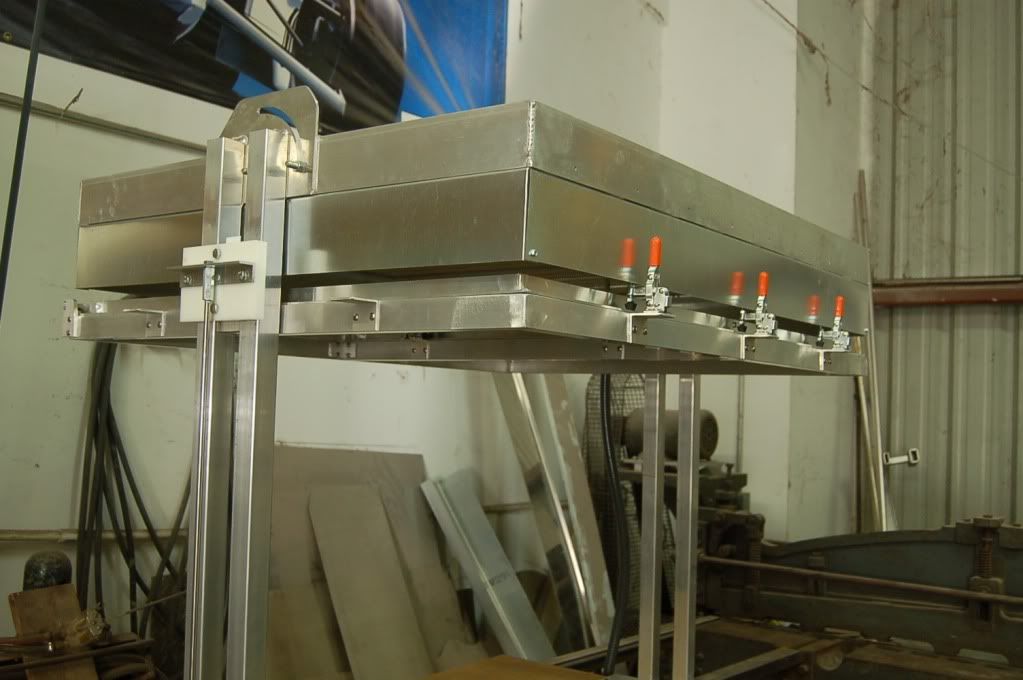
Since I wasn't ready to jump into the heating elements I went ahead and built the framework and cart. It's based on the Stelter 4X4 unit.
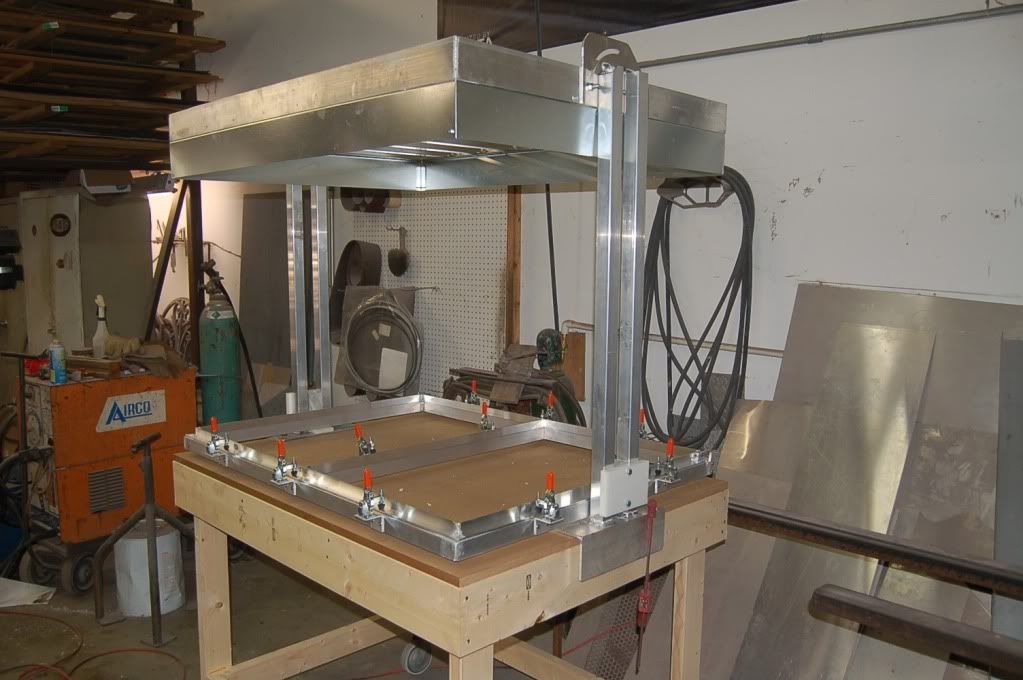
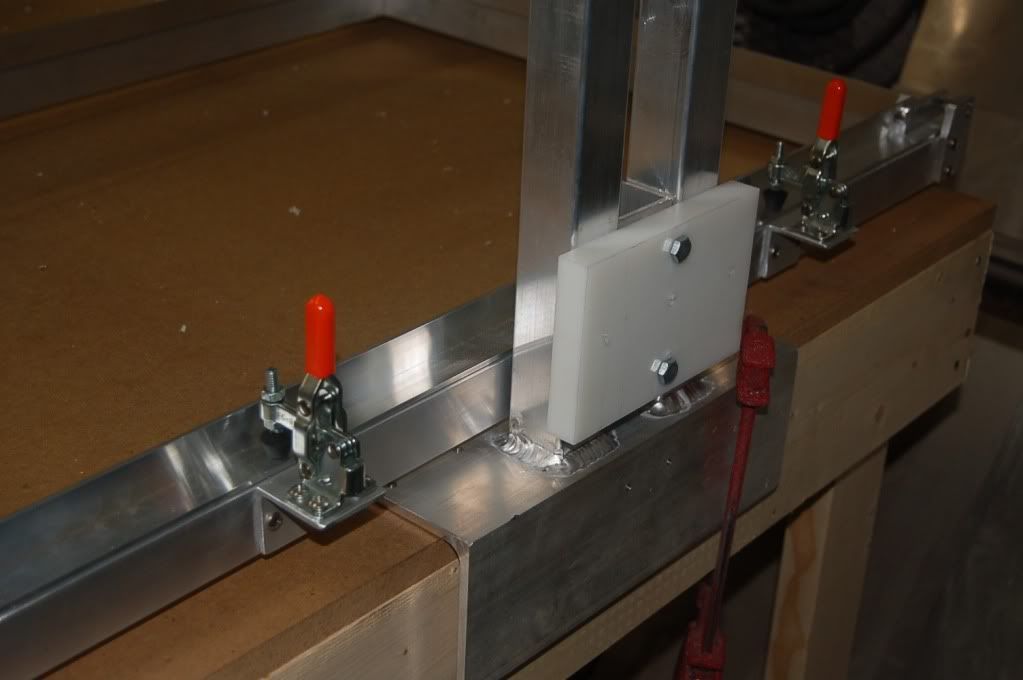
The slide mechanism is pretty simple and will be operated with pneumatic cylinders. Right now two people can move it with very little effort.
I set the framework up to do 3X4' and 3X2'. The oven will have 2 zones.
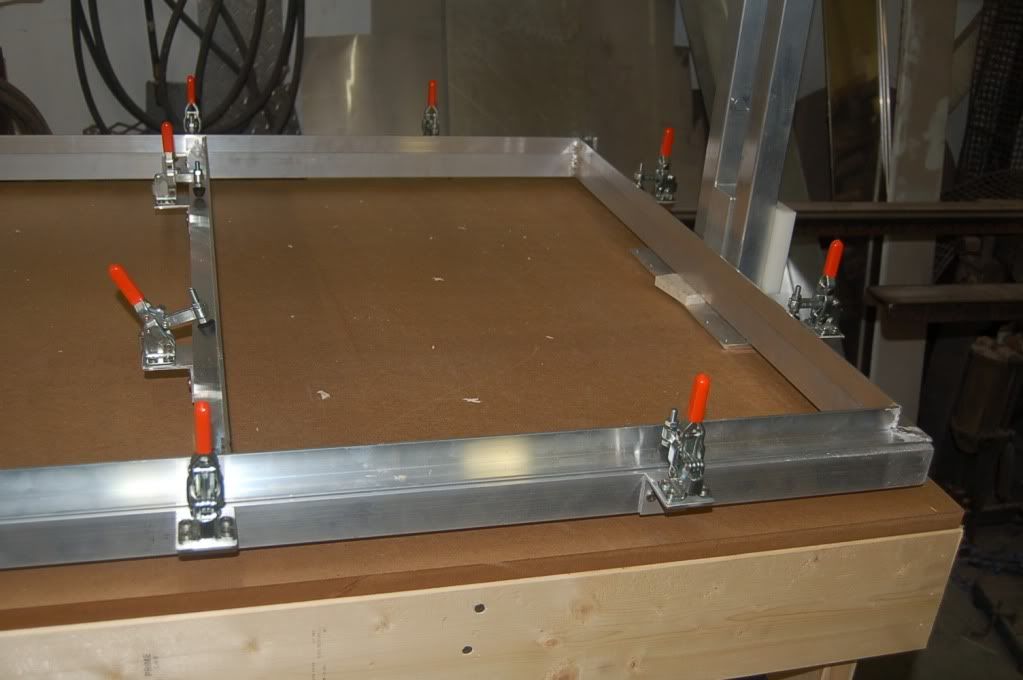
The oven frame is all aluminum with a galvanized sheet shield. I'll switch the galvanized out with stainless if this design works out.
Originally I was going to mount it to the end of a bench so I made it so I can tilt it for storage. I ended up putting it on a cart so it will probably stay locked in place.
Now for the business end. Here is my first test panel. The numbers ares as follows. These are the real numbers not from the oven calculator.
243V
35.5 Ω
Draws 6.8 in actual power when it's heating.
This configuration will give me 7.6 W/in² and keep me under 30 amps per side which is where I'd like to run it. The majority of my pulls will be .063" ABS so I'm hoping the 7.6 W/in² won't be too low.
Again this isn't a production machine.
Thanks
Derek |
|
| Back to top |
|
|
jegner
Site Admin

Joined: 30 May 2003
Posts: 2144
Location: Texas, USA
|
| Posted: Tue Oct 12, 2010 7:59 am Post subject: |
|
|
| Well done! Can't wait to see what you come up with next! |
|
| Back to top |
|
|
Patternman
Newbie
Joined: 01 Oct 2010
Posts: 11
|
| Posted: Tue Oct 19, 2010 7:46 am Post subject: |
|
|
Thanks!
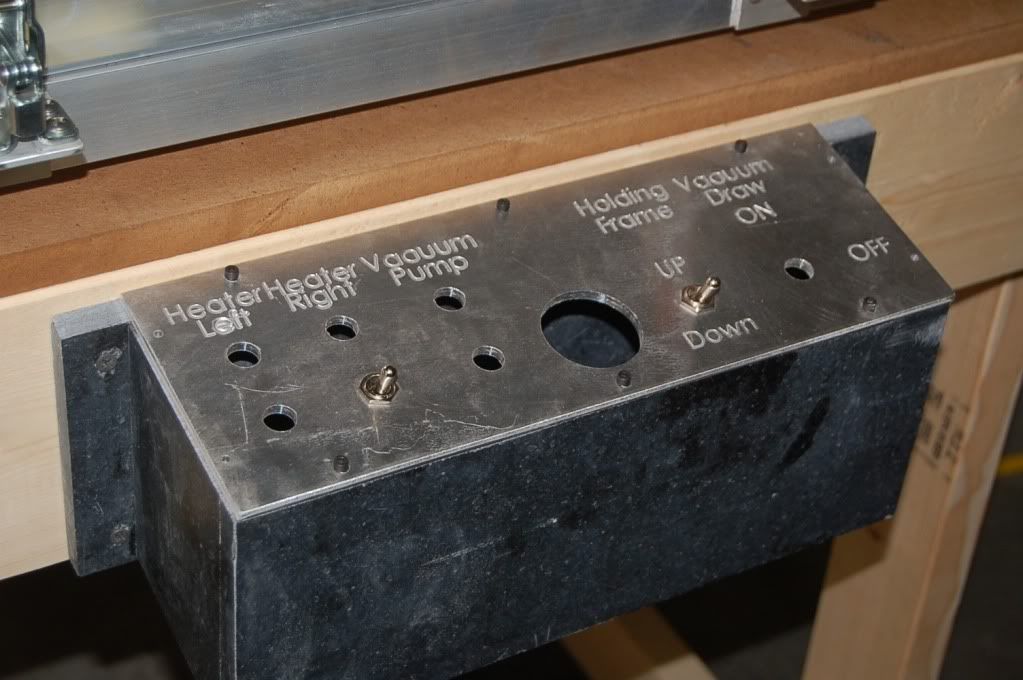
Well here's an update. Pneumatic cylinders are installed and operating and one side of the oven is operational. This is all I need to get through the first job I have.
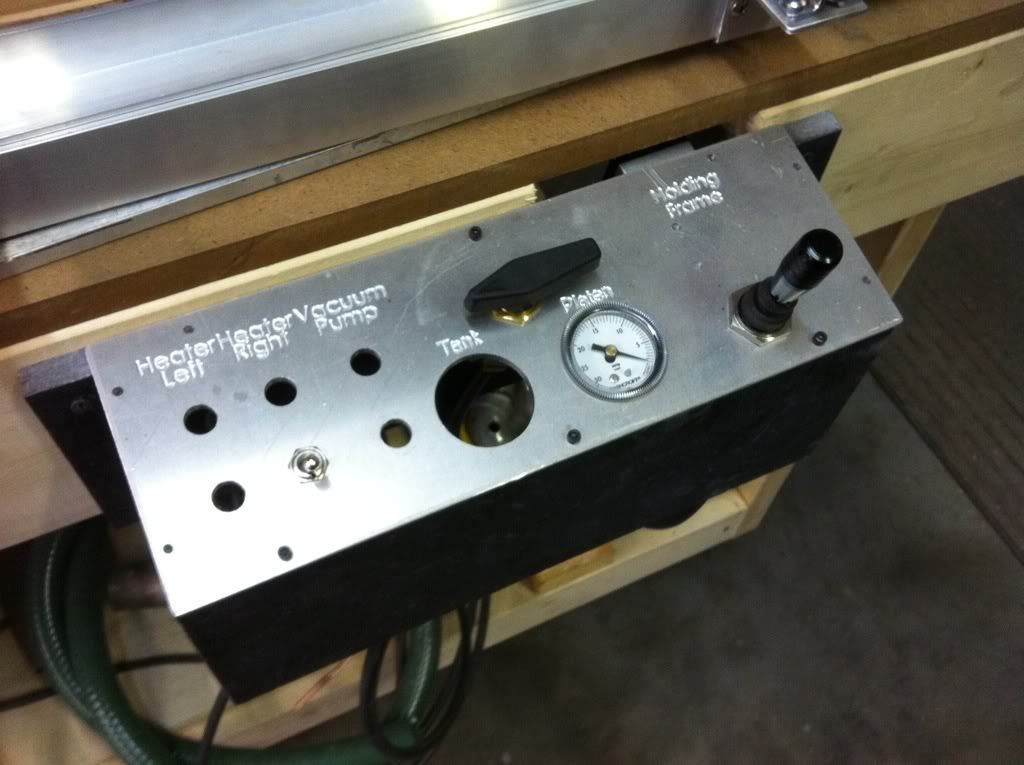
Some day I'll fill the holes! The font I use for engraving has extra lines in it that I need to remove. Unfortunately I forgot to remove the line from the "C" in vacuum. No biggie.
Frame Up
The color of the coils are really even so I think I'm in good shape.

For now I'm just going to move the vacuum system from my other former over to this one.
Derek |
|
| Back to top |
|
|
jdougn
Guru
Joined: 18 Mar 2009
Posts: 714
Location: Louisville KY area
|
| Posted: Sun Oct 24, 2010 6:36 pm Post subject: |
|
|
Nice work Derek! I'm particularly interested in the pnuematic cylinders you used. How fast do the move the plastic carrier up & down?
_________________
DougN - Just in case you're wondering, I got my "rating" legitimately... by posting aimless drivel, useless advice, and pointless questions. |
|
| Back to top |
|
|
Patternman
Newbie
Joined: 01 Oct 2010
Posts: 11
|
| Posted: Mon Oct 25, 2010 4:16 am Post subject: |
|
|
Thanks
If you watch this video of the machine I used for inspiration (copied) I have the same speed.
http://www.youtube.com/watch?v=ZgvLjkLTet4
I'm not sure if it's at that speed for the function of the plastic or the limitations of the slider mechanism. Let's just say it works better at a slow pace!
Did some pulls with it and it worked like a champ. I'm now assembling the parts to do a 2 stage vacuum system with a reservoir tank as opposed to the shop vac. Just not enough control with the shop vac. I used an air valve that I had laying around for the pneumatics. Unfortunately it puts air in the up position or the down position so there is no middle ground. I want to get it rigged so the frame switch has a center off position that will hold it in place. I stuck with the single hole platen and it's working out just fine.
Derek |
|
| Back to top |
|
|
jdougn
Guru
Joined: 18 Mar 2009
Posts: 714
Location: Louisville KY area
|
| Posted: Tue Nov 02, 2010 9:00 am Post subject: |
|
|
Hey Derek, I've watched the Stetler vac former videos before and it looks like a nice machine. It'd be great to convert my current machine to pneumatics. My intention is to build a larger machine (maybe 4'x8') and it would probably require pneumatics since the plastic carrier would be too heavy to operate manually. Do you have a good source for the pneumatic cylinders?
_________________
DougN - Just in case you're wondering, I got my "rating" legitimately... by posting aimless drivel, useless advice, and pointless questions. |
|
| Back to top |
|
|
Patternman
Newbie
Joined: 01 Oct 2010
Posts: 11
|
| Posted: Tue Nov 02, 2010 10:24 am Post subject: |
|
|
| jdougn wrote: | | Hey Derek, I've watched the Stetler vac former videos before and it looks like a nice machine. It'd be great to convert my current machine to pneumatics. My intention is to build a larger machine (maybe 4'x8') and it would probably require pneumatics since the plastic carrier would be too heavy to operate manually. Do you have a good source for the pneumatic cylinders? |
Hi Doug
I got them from http://www.aircylindersdirect.com/catalog/details/39
Their prices were good and the turn around time was very quick. Click on the build link to build the cyl you want. They also have fittings at a good price. I used 1 1/16" bore cylinders. fore mine and they have plenty of holding power.
Derek |
|
| Back to top |
|
|
jdougn
Guru
Joined: 18 Mar 2009
Posts: 714
Location: Louisville KY area
|
| Posted: Sat Nov 13, 2010 11:10 am Post subject: |
|
|
Thanks for the link. I'll have to study up some on pneumatics but this looks like a really good source for what I want to do.
_________________
DougN - Just in case you're wondering, I got my "rating" legitimately... by posting aimless drivel, useless advice, and pointless questions. |
|
| Back to top |
|
|
taurus66
Newbie
Joined: 08 Nov 2010
Posts: 20
|
| Posted: Sat Nov 13, 2010 1:32 pm Post subject: |
|
|
Just like to say... AWESOME machine there.. Nice work..
_________________
One day i may win the lottery.. In my dreams that is.. |
|
| Back to top |
|
|
Cjosh
Joined: 21 Nov 2010
Posts: 2
|
| Posted: Sun Nov 21, 2010 11:56 pm Post subject: Re: New member intro and an oven question |
|
|
Hi, I'm new here and I wanted to know about for the capabilities of the oven. In the picture I've seen, it looks that it has a best combination of some parts and the oven. I think that in the cylinder frame, we can assume that it would be work much better.
_________________
My TV shows appliances |
|
| Back to top |
|
|
Patternman
Newbie
Joined: 01 Oct 2010
Posts: 11
|
| Posted: Wed Jan 05, 2011 1:58 pm Post subject: |
|
|
Hi Guys
Thanks for the compliments!
As far as capacity I think everything is pretty much spelled out in the tread.
I switched over the pneumatic control from an electrically operated valve to a manually operated valve. Big improvement. The manual valve allows me to stop the frame at any position which is really convienet for loading. When it's in the center position it closes both ports so the frame is pretty firm. And of course the panel I made was too small to hold the new valve so I knocked out a new one.
Here is a link to the valves on ebay
http://cgi.ebay.com/ws/eBayISAPI.dll?ViewItem&item=300436718024&ssPageName=STRK:MEWAX:IT
I also added an old water heater tank to the mix and converted it over to a 2 stage system.
So far it's been working perfectly. Now I need to work on technique!
Derek |
|
| Back to top |
|
|
Igen
Joined: 16 Mar 2011
Posts: 1
|
| Posted: Wed Mar 16, 2011 8:08 am Post subject: |
|
|
Very Nice Machine Derek, i loved the Stelter-Design since i first time saw the video. Im going to build the same and after reading threads some weeks i registered today coz i stumbled over your post
Im located in Germany and its part of a hobby building the machine so i dont want to spend too much money for it. I just bought some FESTO pneumatic parts like valves and stuff for some Euro on Ebay but i dont have any clue of the whole pneumatik thing. Maybe you can post some pics of your plumbing and electric wiring setup?
Im sure many others too would love to see some pics of the "hidden area" and maybe a howto of such a cool machine.
Igen |
|
| Back to top |
|
|
|

