 |
www.TK560.com
Vacuum Forming, Movie Prop, Sci-fi and GIjOE Forum
|

|


|
| View previous topic :: View next topic |
| Author |
Message |
Fredo
Master
Joined: 21 Mar 2007
Posts: 251
Location: Kingdom of Nye Area 51
|
 Posted: Wed Feb 01, 2012 10:46 am Post subject: Posted: Wed Feb 01, 2012 10:46 am Post subject: |
 |
|
According to the oven calculator 11.52" of coiled 22 gage wire yields 1 220v 1400 watt segment, 13.44 in will give you a 1200 watt segment. The 200*f increase in temp will somewhat change the wave length of the emitted IR. Salamander has this tech manual that will help explain IR radiation as it relates to temp.... http://www.infraredheaters.com/page1.html It was worth the time it took me to wade through it  .............Fredo .............Fredo
_________________
If someone has a gun and is trying to kill you,
it would be reasonable to shoot back with your own gun...The Dalai Lama..Seattle 2001 |
|
| Back to top |
|
 |
MDR
Novice
Joined: 22 Nov 2011
Posts: 49
Location: Missouri
|
| Posted: Wed Feb 01, 2012 10:04 pm Post subject: |
|
|

Here's the oven running at 100%. I checked the resistance, the center section was 6, and the outer section was 14, I'm thinking I checked it correct. My current is 240v, if this helps anybody. |
|
| Back to top |
|
|
MDR
Novice
Joined: 22 Nov 2011
Posts: 49
Location: Missouri
|
| Posted: Wed Feb 01, 2012 10:09 pm Post subject: |
|
|
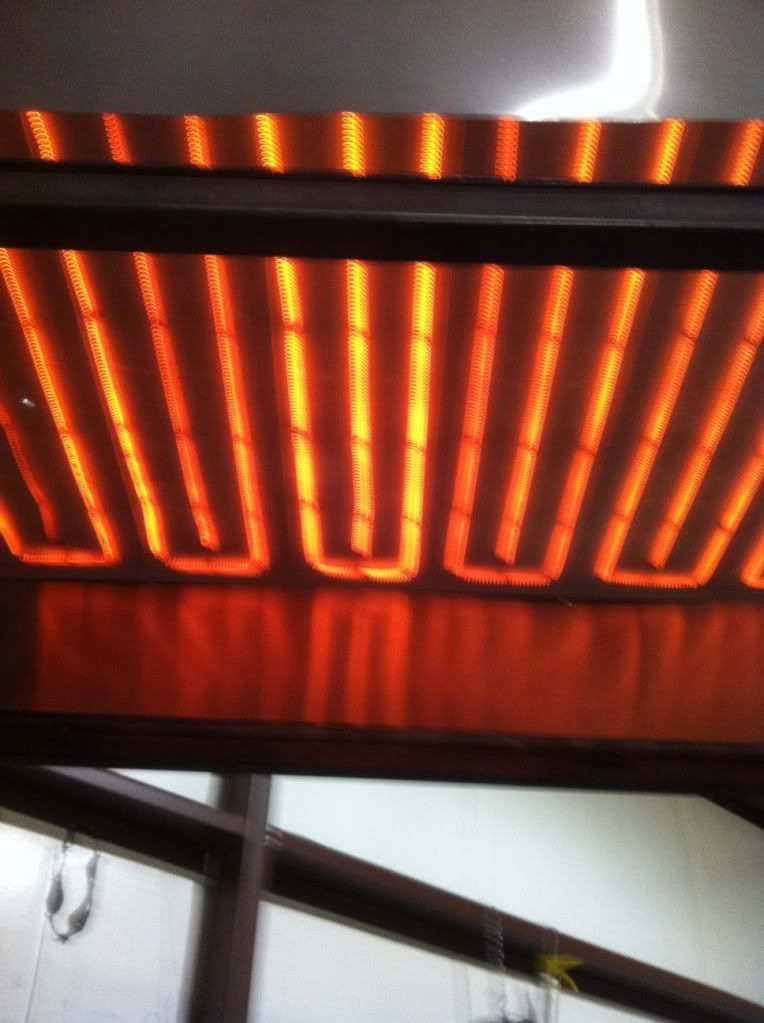
Here is another pic, which shows the new wire glowing a little brighter, I cycled the machine acouple times kicking the oven off and on, after few times the new section glowed the same, and everything checked out being the same per zone. |
|
| Back to top |
|
|
MDR
Novice
Joined: 22 Nov 2011
Posts: 49
Location: Missouri
|
| Posted: Mon Feb 06, 2012 9:16 pm Post subject: |
|
|
I finally tried the machine out and it went real good until I got to the forming part.
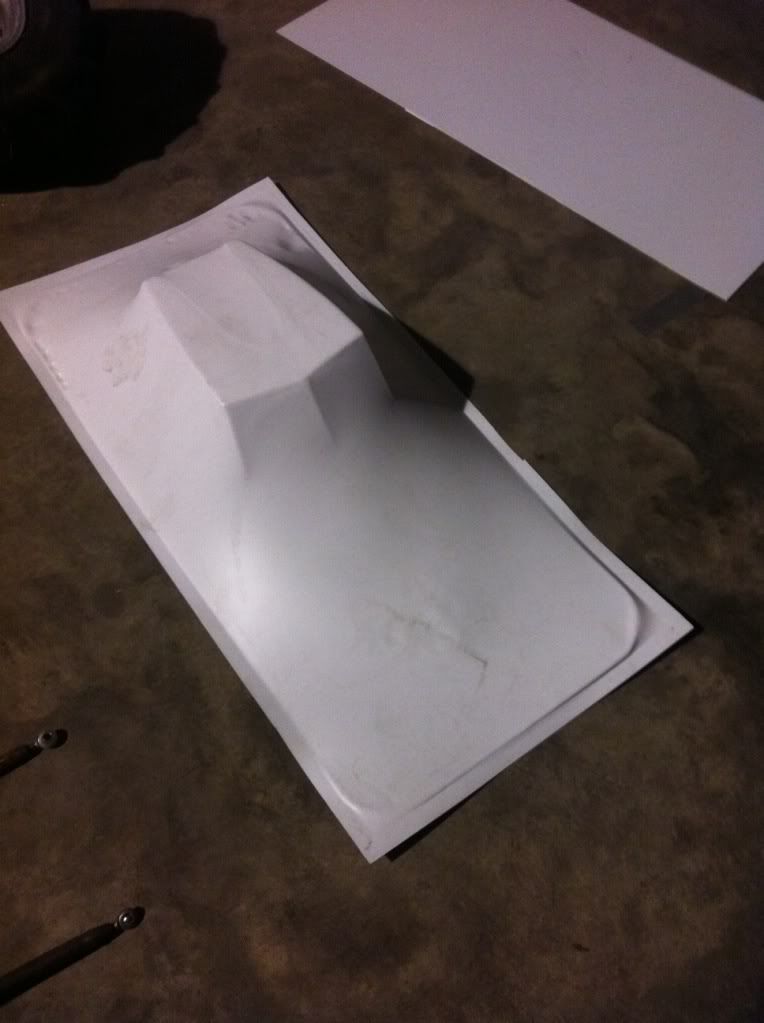
I tried three times with the same result. I first attempt was with-28hg and didn't get the handle all the way, so I tried a garbage bag and it sucked out real hard, and still had -22hg on the gauge.

I have a 1/4 lip around the platen but my mold is so tall that the middle of the plastic is missing it, at least this is what I'm hoping. If anybody has any suggestions I would be thankful. Please help me out, I'm running out of time! |
|
| Back to top |
|
|
jdougn
Guru
Joined: 18 Mar 2009
Posts: 714
Location: Louisville KY area
|
| Posted: Mon Feb 06, 2012 10:54 pm Post subject: |
|
|
Can't tell what the picts are exactly.
What size of plastic? 2'x4'?
What type of plastic and how thick?
For each of the three attempts, how much sag did the sheet have?
If the hot plastic is not sealing to the platen here some ideas that have worked for me in various situations. You'll quickly see which of these suggestions may help your situation. These are somewhat ranked according to ease.
- If possible, let the plastic sag more which will help it seal.
- Without plastic in the carrier, raise the carrier up to the oven and let it heat up for 10-15 minutes, especially if the room is chilly. A hot plastic carrier frame will put more heat into the edge of the plastic allowing it to stretch more easily and get a seal.
- Re-positioning the mold is easy and may help. If this is for the fenders then the mold is large and tall so re-positioning may not work.
- Make sure the plastic carrier is going all the way down to the table top. If the strength of the plastic does not allow the plastic carrier to go all the way down then try applying more force on the lowering handle. When I'm forming 1/4" ABS almost my entire 200lb weight is on the carrier handle to get the plastic to stretch enough to seal. However, if that much force is being used for thinner plastic then it's probably not hot enough.
- If the plastic carrier is hitting bottom and there is still no seal then try raising the platen up higher which will help seal the plastic quicker. Where the sheet mounts in my plastic carrier is about 3/4" below the top of the platen.
- How close is the perimeter of the platen to the plastic carrier? The thinner the plastic the closer the perimeter of the platen can be to the carrier. For this situation, getting the perimeter of the platen as close as possible to the plastic carrier will also help seal the plastic quicker. Although, for your setup this may not be at all easy.
- Another thing would be to use D-shaped EPDM weather striping around the edge of the platen to help the plastic seal down quicker. The weather striping will have to be replaced on a regular basis since the adhesive breaks down under heat but it will get you going. Get it at Lowes, Home Depot, or probably most big box stores. The foam weather striping doesn't work at all in my experience. The foam immediately breaks down under the heat and vacuum and makes the seal even worse.
- Like a lot of things, I figured this out by accident. Try using what I call "Helpers" around the inner perimeter of the plastic carrier. Fasten small aluminum angle to the top clamping edge of the plastic carrier, probably 1/4" to 1/2" above the face of the plastic sheet. The plastic will still stretch around the platen some but then the Helpers will quickly force the plastic down to the platen face. I like using aluminum angle because it transfers heat faster than steel helping the edge of the plastic sheet to sag better.
Others will probably have additional ideas. Hope some of these help.
dn
_________________
DougN - Just in case you're wondering, I got my "rating" legitimately... by posting aimless drivel, useless advice, and pointless questions. |
|
| Back to top |
|
|
ANH trooper
Master

Joined: 20 Oct 2005
Posts: 305
Location: UK
|
| Posted: Tue Feb 07, 2012 2:53 am Post subject: |
|
|

Why do you have the lip around the edge of the platen?
Surely the platen surface needs to be rounded so the plastic can seal against it. It looks like the plastic won't seal properly with that lip you have there and your formings look as though no vacuum pressure has been applied - just the plastic pulled over the tool using the frames to stretch it. |
|
| Back to top |
|
|
MDR
Novice
Joined: 22 Nov 2011
Posts: 49
Location: Missouri
|
| Posted: Tue Feb 07, 2012 8:38 am Post subject: |
|
|
| Ok, Thanks for the suggestions The size is 2x4 .60 hips. The first attempt I didn't let the plastic sag much at all, and didn't get the carrier frame down all the way. The second attempt, I let the plastic sag about 2" and pushed the frame all the way down. The third attempt, I let the plastic get very hot, but it still only sagged about 3-4". I'm looking into raising the platen up some more, right now it is only sticking up 1/2" above the carrier frame. Last night after I got home I was thinking about tring this, and now since you suggested it too, (Doug) it might work. As for the perimeter,there is a 1/2" gap on the front side and about 1/8" on the back side, the thing moved when I was bolting it down, I'm going to fix it but it is kinda a pain when doing it by yourself. The helpers is a great idea, just don't know if I'll have enough room, I'll look into that. As for the lip, I read it in someone elses post, it was suggested by a well experienced vacuum former, so I put it into my design, I really think it would work if the plastic would catch it, and after I raise my platen up, I believe it will. Went ahead and ordered some more plastic, it could be a long ride. |
|
| Back to top |
|
|
jdougn
Guru
Joined: 18 Mar 2009
Posts: 714
Location: Louisville KY area
|
| Posted: Tue Feb 07, 2012 9:00 am Post subject: |
|
|
| MDR wrote: | | Ok, Thanks for the suggestions The size is 2x4 .60 hips. The first attempt I didn't let the plastic sag much at all, and didn't get the carrier frame down all the way. The second attempt, I let the plastic sag about 2" and pushed the frame all the way down. The third attempt, I let the plastic get very hot, but it still only sagged about 3-4". I'm looking into raising the platen up some more, right now it is only sticking up 1/2" above the carrier frame. Last night after I got home I was thinking about tring this, and now since you suggested it too, (Doug) it might work. As for the perimeter,there is a 1/2" gap on the front side and about 1/8" on the back side, the thing moved when I was bolting it down, I'm going to fix it but it is kinda a pain when doing it by yourself. The helpers is a great idea, just don't know if I'll have enough room, I'll look into that. As for the lip, I read it in someone elses post, it was suggested by a well experienced vacuum former, so I put it into my design, I really think it would work if the plastic would catch it, and after I raise my platen up, I believe it will. Went ahead and ordered some more plastic, it could be a long ride. |
Well you're being smart about the way you're working through this so far and trying different approaches. Almost all my experience is with thick ABS and that will be different than what you're doing. ABS likes a raised lip around the perimeter of the platen area and it makes a better seal. My understanding is some plastics might not work as well with a raised lip. I wouldn't worry about the corners on the platen unless the plastic tears there. Mine are 90 degree with only the sharp edges knocked off. Let us know how it goes!
dn
_________________
DougN - Just in case you're wondering, I got my "rating" legitimately... by posting aimless drivel, useless advice, and pointless questions. |
|
| Back to top |
|
|
MDR
Novice
Joined: 22 Nov 2011
Posts: 49
Location: Missouri
|
| Posted: Tue Feb 07, 2012 11:25 am Post subject: |
|
|
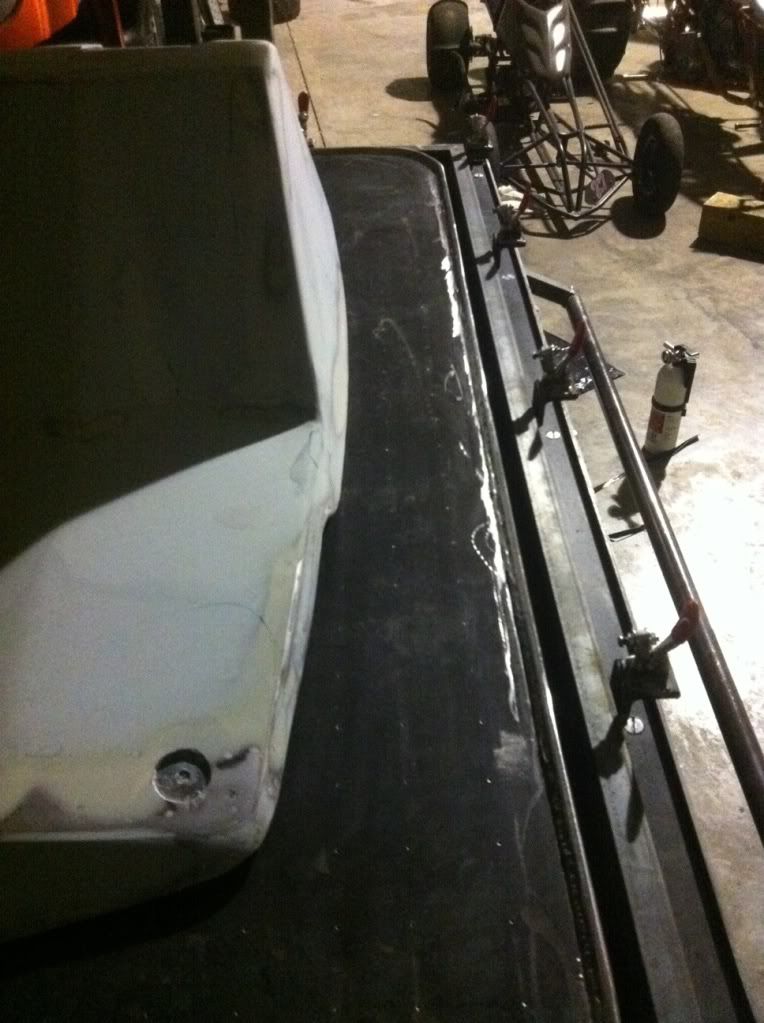
Ok, I raised the platen up 1" and everything was looking real good until POP!
I was using the plastic that didn't form the first, which worked out good.
I then tack a little strip of metal in the gap under neath the mold to give a place for the plastic to stop. I was turning my over back on to heat the plastic and the center section of the oven is not coming on, I have power to the controls, in and out, and I even have power to the nichrome wire, just no heat, I really don't know what to do. |
|
| Back to top |
|
|
jdougn
Guru
Joined: 18 Mar 2009
Posts: 714
Location: Louisville KY area
|
| Posted: Tue Feb 07, 2012 12:13 pm Post subject: |
|
|
Looks like you're getting there. Some of these ideas may help keep the plastic from popping.
- less perimeter heat
- less vacuum
- clay plugs for when the holes blowout
- thicker plastic
_________________
DougN - Just in case you're wondering, I got my "rating" legitimately... by posting aimless drivel, useless advice, and pointless questions. |
|
| Back to top |
|
|
MDR
Novice
Joined: 22 Nov 2011
Posts: 49
Location: Missouri
|
| Posted: Tue Feb 07, 2012 1:48 pm Post subject: |
|
|
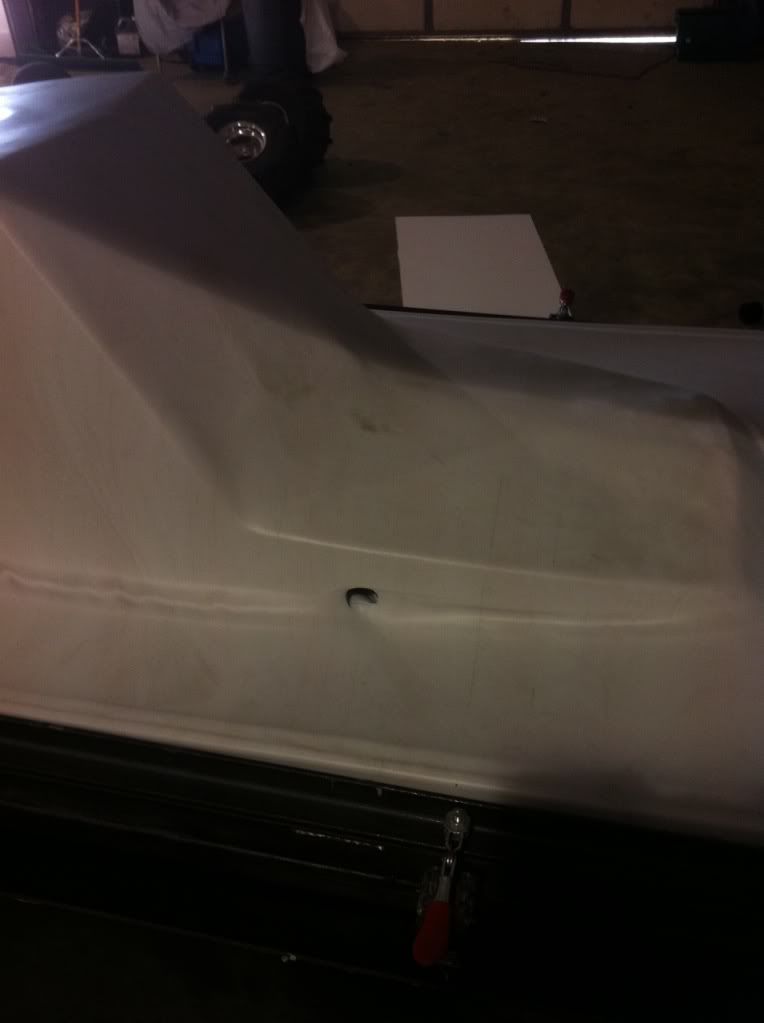
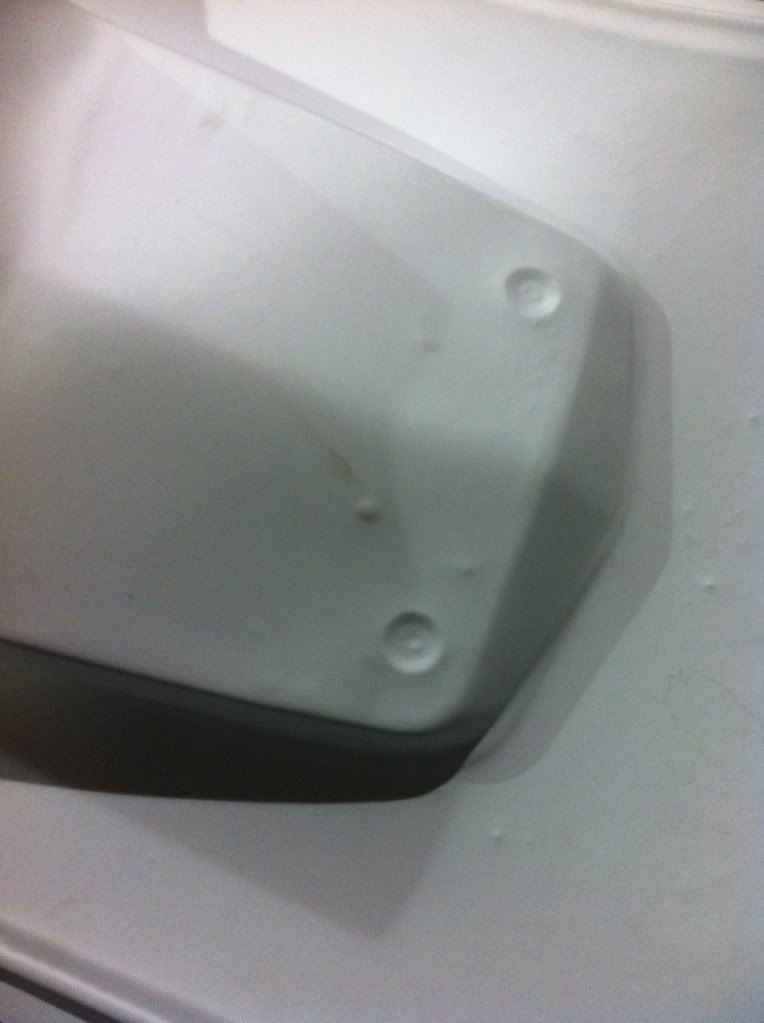
http://emob1122.photobucket.com/albums/l531/MDR38/1328630378.jpg?t=1328630379
Ok hear is the pic of the hole at the base of the platen right under the mold. If I had a problem with the connection to the nichrome wire, would the whole zone not work, I have them jumped from one post to the next. If I had a break in the wire would I have resistance, which I know I would not?.?. I'm not at my shop right now but I'm going there later, and I'll check everything, and might try getting ahold of my electrician buddy. |
|
| Back to top |
|
|
MDR
Novice
Joined: 22 Nov 2011
Posts: 49
Location: Missouri
|
| Posted: Tue Feb 07, 2012 4:25 pm Post subject: |
|
|
| Ok, I had my electrician come over, we ran a few test and found that the center bakatronic switch was bad, he does work on switch boards, so he soldered the switch back together. I did have just the two most outer section on this zone, but I was pulling 40 amps, so I added two more sections from the center zone. All help is well appreciated! She is back up and running, just not good parts yet. |
|
| Back to top |
|
|
MDR
Novice
Joined: 22 Nov 2011
Posts: 49
Location: Missouri
|
| Posted: Tue Feb 07, 2012 5:00 pm Post subject: |
|
|
Ok, the electrician didn't fix the controller correct, it's on or off, I guess I'll order another one. I fired the machine up again, to try one more piece, I added a small piece under the mold to try and keep the plastic from being sucked in and pop, it didn't work out. I'll cut a new piece and put it right to the edge.
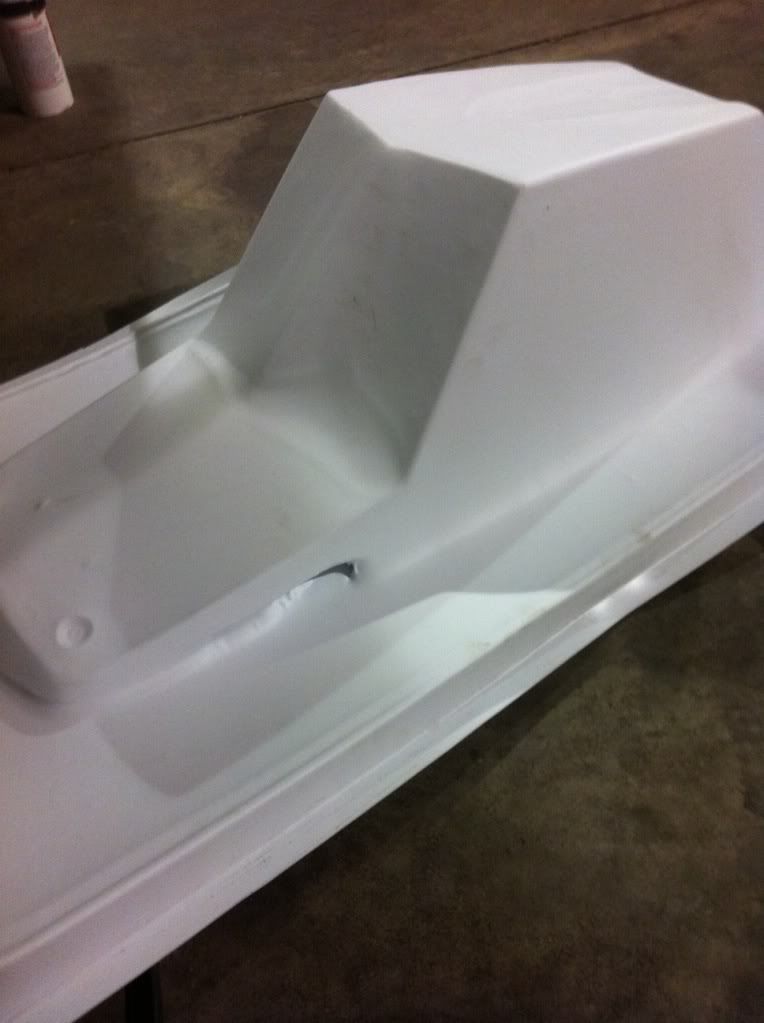
Now my mold is taking it toll from all that heat.
I'll fix that tomorrow too! I really need to get a good pull, so I can cast a new mold, maybe I'll get there so day! |
|
| Back to top |
|
|
jdougn
Guru
Joined: 18 Mar 2009
Posts: 714
Location: Louisville KY area
|
| Posted: Tue Feb 07, 2012 8:19 pm Post subject: |
|
|
The area of the blow out definitely needs work on the mold. You really don't want any undercuts. Get the bondo out! My suggestion would be to cut a piece of MDF or plywood the same shape as the entire bottom of the mold with at least 10 degrees of draft. Then bondo between the mold & MDF.
Hopefully, you'll get a good pull soon. The BC8009 can be sanded and cut with carbide tip blades so you can probably clean the casting up pretty good. BCC also makes a bondo just for the the BC8009 that handles high heat. It is more slightly more expensive than auto body bondo but it sets up harder and is much closer to the same density as BC8009. However, I've also used regular bondo and it does okay too.
Keep up the good work!
_________________
DougN - Just in case you're wondering, I got my "rating" legitimately... by posting aimless drivel, useless advice, and pointless questions. |
|
| Back to top |
|
|
MDR
Novice
Joined: 22 Nov 2011
Posts: 49
Location: Missouri
|
| Posted: Tue Feb 07, 2012 10:10 pm Post subject: |
|
|
Yes the mdf board is on my list for tomorrow. I'm going to fill the undercut with the board and a base with a bevel.
http://i1122.photobucket.com/albums/l531/MDR38/1328657826.jpg?t=1328657828
This is an example, it's the last pull I did, I just ruff cut it out. Sorry I can't post the image from my phone, so maybe someone could for me. |
|
| Back to top |
|
|
|
|
You cannot post new topics in this forum
You cannot reply to topics in this forum
You cannot edit your posts in this forum
You cannot delete your posts in this forum
You cannot vote in polls in this forum
|
Powered by phpBB © 2001, 2005 phpBB Group
|

