| View previous topic :: View next topic |
| Author |
Message |
BYWInsaniac
Joined: 20 Jun 2006
Posts: 3
Location: Manhattan Beach, CA
|
 Posted: Tue Jun 20, 2006 5:06 pm Post subject: Intro/Oven Heating question Posted: Tue Jun 20, 2006 5:06 pm Post subject: Intro/Oven Heating question |
 |
|
Hey, I'm new here. My name's JJ, I'm a college studentstudying animation, and I've been eyeballing vacuum forming for quite a while. I've done a few things sewing-wise and a few projects in latex, but I've always wanted to do some vacuum form projects.
I've just recently decided to go forward with a design that I based on TK-Big's machine and the one from Studiocreations.com (i think thats the site...). It uses an oven (a cooking oven, not a custom made oven) for a heating source, then the frames are placed over table, etc. I do have two questions:
1. When actually forming, you just hold the frames down onto the table and have someone kick the ShopVac on, correct?
2. Is it necessary to put weather stripping down on the table? How necessary is it to maintaining the vacuum?
3. What kind of re-enforcement is put inside the box to prevent collapse, if any?
4. Any other tips/suggestions?
-JJ |
|
| Back to top |
|
 |
AlterEgos
Expert

Joined: 30 May 2006
Posts: 115
Location: Centreville, VA
|
| Posted: Tue Jun 20, 2006 7:41 pm Post subject: |
|
|
1. Yes.
2. Very necessary. The weather stripping stops any outside air from coming in to ruin your pull. That's why they call it "vacuum" forming.
3. What box are you speaking of? Pic please. 
4. Build the Thurston James style of machine for less chances of anything going wrong. 
_________________
-John |
|
| Back to top |
|
|
BYWInsaniac
Joined: 20 Jun 2006
Posts: 3
Location: Manhattan Beach, CA
|
| Posted: Tue Jun 20, 2006 8:00 pm Post subject: Re: |
|
|
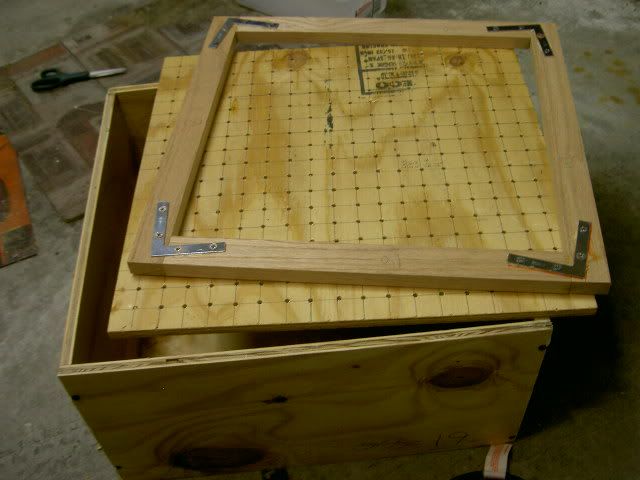
That's the box that I have. Should I put any kind of re-enforcement in there, or is there no danger of it collapsing when I turn the vacuum on?
-JJ |
|
| Back to top |
|
|
AlterEgos
Expert
Joined: 30 May 2006
Posts: 115
Location: Centreville, VA
|
| Posted: Tue Jun 20, 2006 8:10 pm Post subject: |
|
|
Your box should be good to go, as long as you don't put 50 lb. plaster molds on it. But, if you're that concerned about it, you can bolt in some 3/4" square steel tubing on the box frame (which is what I did on mine).
Hope this helps
_________________
-John |
|
| Back to top |
|
|
knightshade
Expert
Joined: 19 Jun 2005
Posts: 123
Location: Rochester NY
|
| Posted: Thu Jun 22, 2006 7:42 am Post subject: |
|
|
Of minor concern - the size of the vac chamber....
I thought that I read somewhere the smaller the chamber, the better off one was.
Also - weatherstripping??
where are you putting that?
I don't think that I have any on my table, but if it would help me to get (and keep) a better vaccum seal, perhaps it is time for a modification |
|
| Back to top |
|
|
jegner
Site Admin

Joined: 30 May 2003
Posts: 2144
Location: Texas, USA
|
| Posted: Thu Jun 22, 2006 8:52 am Post subject: |
|
|
I agree, the box the forming platen is sitting on should be as shallow as possible. Basically the shop vac will have to evacuate all the air from the box BEFORE it can start pulling down the plastic. Less of a cavity the better.
Also, on the pegboard vac machines I've done, weatherstriping is a must. Also, be sure your box is air tight, and not leaking air. Silicone that as much as possible. Then use some of that aluminum duct tape on the seams.
Jim |
|
| Back to top |
|
|
ROYAL RED
Newbie
Joined: 18 May 2006
Posts: 21
|
| Posted: Thu Jun 22, 2006 11:04 am Post subject: |
|
|
Post deleted.
Last edited by ROYAL RED on Tue Nov 07, 2006 10:15 am; edited 1 time in total |
|
| Back to top |
|
|
BYWInsaniac
Joined: 20 Jun 2006
Posts: 3
Location: Manhattan Beach, CA
|
| Posted: Thu Jun 22, 2006 7:46 pm Post subject: Re: |
|
|
Crum. Oh well. Wish I'd checked up on this again before gluing down the pegboard! Oh well, I can always rip it off and make adjustments. I did give it a very thorough silicon cauking, however. I gobbed it on, then screwed it shut, making sure the outside seams had a good amount of silicon on them.
Anyhoo, thought I'd update that I did get the weatherstripping and did a test pull (is that what they call it with vac-form?), so here's some pics!
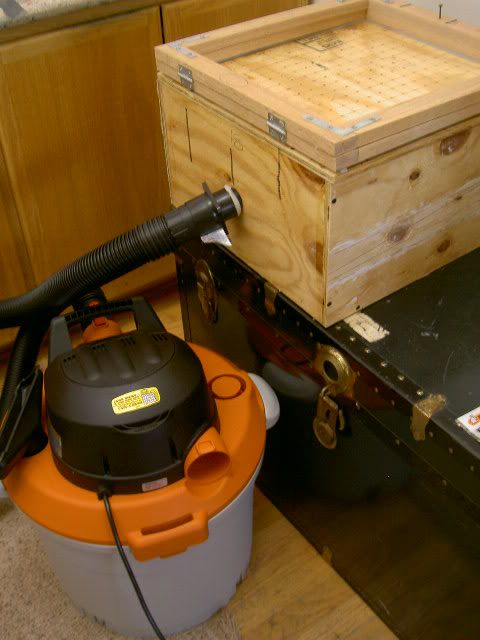
Here's my baby:
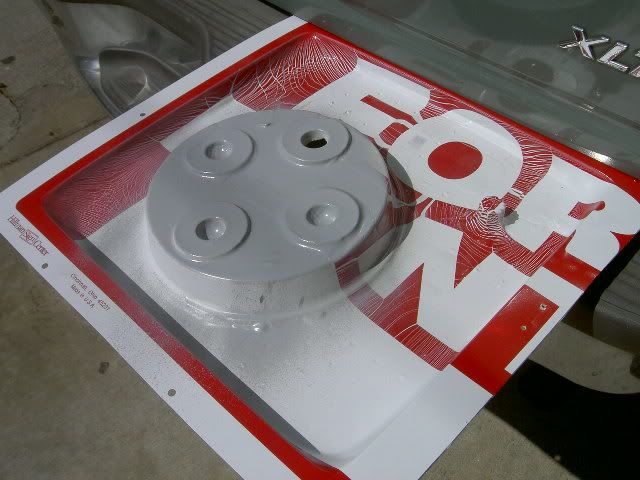
Here's my first test pull on a "For Rent" Sign:
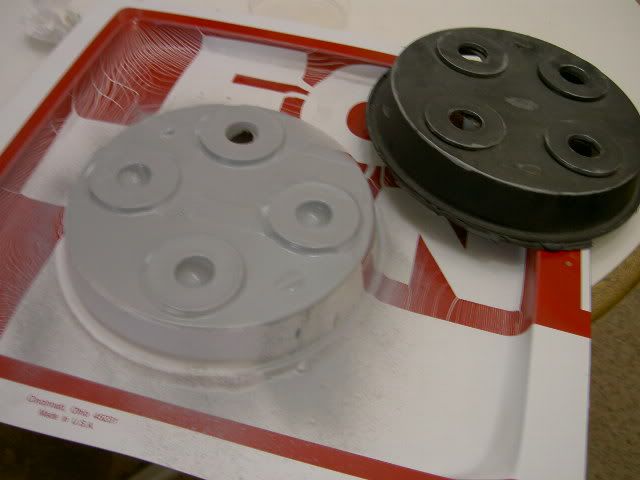
Here's the pull with the model, a Cyclotron from a Ghostbusters Proton Pack I am making:
Now, the more that I think about it, I'll definately open this up and shallow out the chaimber a bit. I do plan to do a few more tests with this one first though, just to get the hang of it before tinkering with the machine.
-JJ |
|
| Back to top |
|
|
knightshade
Expert
Joined: 19 Jun 2005
Posts: 123
Location: Rochester NY
|
| Posted: Thu Jun 22, 2006 7:52 pm Post subject: |
|
|
| An alternative might be to find something that you can fill the chamber with? |
|
| Back to top |
|
|
ROYAL RED
Newbie
Joined: 18 May 2006
Posts: 21
|
| Posted: Fri Jun 23, 2006 7:40 am Post subject: Re: |
|
|
Post deleted.
Last edited by ROYAL RED on Tue Nov 07, 2006 10:14 am; edited 1 time in total |
|
| Back to top |
|
|
TKBIG
Guest
|
| Posted: Fri Jun 23, 2006 10:03 am Post subject: |
|
|
I'll post pics of my v2 vac table later this evening. It's still a $10 special (literaly) but works great. I have done bucks that are approx 15 inches in height using .125 HIPS and get very sharp results. My old trusty Craftsman 5hp Shop Vac is still the power source.
I do want to make a few more adjustments to my setup. I'll be sure to post them as I go along for the budget minded folks to follow.
Best advice is to make the box setup as thin as structurally possible. Like Jim and AE have stated make the chamber as small as possible. |
|
| Back to top |
|
|
TKBIG
Guest
|
| Posted: Fri Jun 23, 2006 8:48 pm Post subject: |
|
|
Here is my current "thinline" vac table.........hope this will help.
It's 24x24 at 1 3/4" thick. I made this one with oak for the platen and arched shaped cross beams inside to allow for air flow (sorry, don't have pics of the inside).

 |
|
| Back to top |
|
|
|


