 |
www.TK560.com
Vacuum Forming, Movie Prop, Sci-fi and GIjOE Forum
|

|


|
| View previous topic :: View next topic |
| Author |
Message |
tubachris85x
Master

Joined: 15 Jan 2007
Posts: 351
Location: Ft. Lauderdale, Florida
|
 Posted: Tue Jan 30, 2007 8:54 pm Post subject: Posted: Tue Jan 30, 2007 8:54 pm Post subject: |
 |
|
Alright........
I just got my first hand introduction into the world of power tools and the world of sawdust....
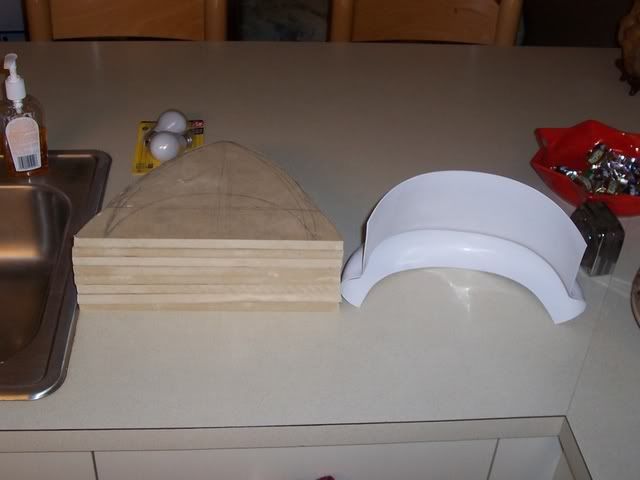
I began making the layers for my first mold. It is for the helmet modification of the backpiece, for the FX helmet. My jigg saw busted on me (its old, and just bought $10 saw blades too!:thumbsd:thumbsd) So I was reduced to using my larger circular saw, to cut around the lines, and then use my dremel to cut partially in the excess to weaken the wood, and then sanded it down with the belt sander. I cut out two shapes but my tracer piece is sanded down to its final shape before I go ahead and glue all needed 14 layers....Enjoy.

-tubachris
_________________
 |
|
| Back to top |
|
 |
badger
Novice

Joined: 03 Sep 2006
Posts: 63
|
| Posted: Tue Jan 30, 2007 10:23 pm Post subject: |
|
|
Lots of progress!
Welcome to the kitchen vacforming club.
badger |
|
| Back to top |
|
|
crashmann
Guru

Joined: 27 Sep 2005
Posts: 501
|
| Posted: Tue Jan 30, 2007 11:07 pm Post subject: |
|
|
Very nice progress there Chris! I'm impressed with your tenacity in spite of the limited tools you have available. Keep at it!
However, you will want to invest in a good respirator. The MDF is glued together using resins which contain urea formaldehyde (ok, so it's a teensy, weensy bit, but you still don't want to be breathing in the dust). Check out the MSDS sheet: http://www.norbord.com/MSDS_MDFEng_2006.pdf
My kids are super allergic to everything (I'm surprised they are not allergic to water  ) so I have to work outside, and change my clothes before hanging out with them. I can get away with a little sanding inside, but I always use a shop vac to collect the dust. ) so I have to work outside, and change my clothes before hanging out with them. I can get away with a little sanding inside, but I always use a shop vac to collect the dust.
I'm definitely looking forward to seeing your progress on this special project, so keep the pics coming!
Charlie |
|
| Back to top |
|
|
tubachris85x
Master
Joined: 15 Jan 2007
Posts: 351
Location: Ft. Lauderdale, Florida
|
| Posted: Wed Jan 31, 2007 5:45 am Post subject: |
|
|
| crashmann wrote: | Very nice progress there Chris! I'm impressed with your tenacity in spite of the limited tools you have available. Keep at it!
However, you will want to invest in a good respirator. The MDF is glued together using resins which contain urea formaldehyde (ok, so it's a teensy, weensy bit, but you still don't want to be breathing in the dust). Check out the MSDS sheet: http://www.norbord.com/MSDS_MDFEng_2006.pdf
My kids are super allergic to everything (I'm surprised they are not allergic to water ) so I have to work outside, and change my clothes before hanging out with them. I can get away with a little sanding inside, but I always use a shop vac to collect the dust.
I'm definitely looking forward to seeing your progress on this special project, so keep the pics coming!
Charlie |
Thanks, I do need to get a decent mask for this part of the project. Its kind of funy though, cause Ive noticed that whenever im sanding, I hold my breath for the durtion of the time, but that dosnt save me either cause there's still particles floating around.
Im gonna try to get some more work done makin these tonight, last night I had to stop cause the neighbors arent as enthusiastic about buling star wars costumes.....lol
-tubachris
_________________
|
|
| Back to top |
|
|
jegner
Site Admin

Joined: 30 May 2003
Posts: 2144
Location: Texas, USA
|
| Posted: Wed Jan 31, 2007 7:18 am Post subject: |
|
|
Ah, MDF. Gotta love that stuff. Safety is #1, and the dust from MDF can make you sick, so a good respirator is tops on my list of shop equipment.
The MDF sandwich method is simple to do, easy to shape, and durable for most of our costume hobby needs, and for me, living in a small town with limited vac-forming resources, is easy to find. Just be sure to add a sanding sealer before you do any final coat!
Jim |
|
| Back to top |
|
|
tubachris85x
Master
Joined: 15 Jan 2007
Posts: 351
Location: Ft. Lauderdale, Florida
|
| Posted: Wed Jan 31, 2007 11:54 am Post subject: |
|
|
| jegner wrote: | Ah, MDF. Gotta love that stuff. Safety is #1, and the dust from MDF can make you sick, so a good respirator is tops on my list of shop equipment.
The MDF sandwich method is simple to do, easy to shape, and durable for most of our costume hobby needs, and for me, living in a small town with limited vac-forming resources, is easy to find. Just be sure to add a sanding sealer before you do any final coat!
Jim |
Sanding sealer? Is that similar to a laquer or primer? Its amazing how much MDF I need to just make this one piece, so far about two, and a third sheets, at 1/2 inch thick. Aside from the chest and abb pieces, I knew that this would use the most MDF, because the FX buckets are massive....
-tubachris
_________________
|
|
| Back to top |
|
|
tubachris85x
Master
Joined: 15 Jan 2007
Posts: 351
Location: Ft. Lauderdale, Florida
|
| Posted: Wed Jan 31, 2007 9:25 pm Post subject: |
|
|
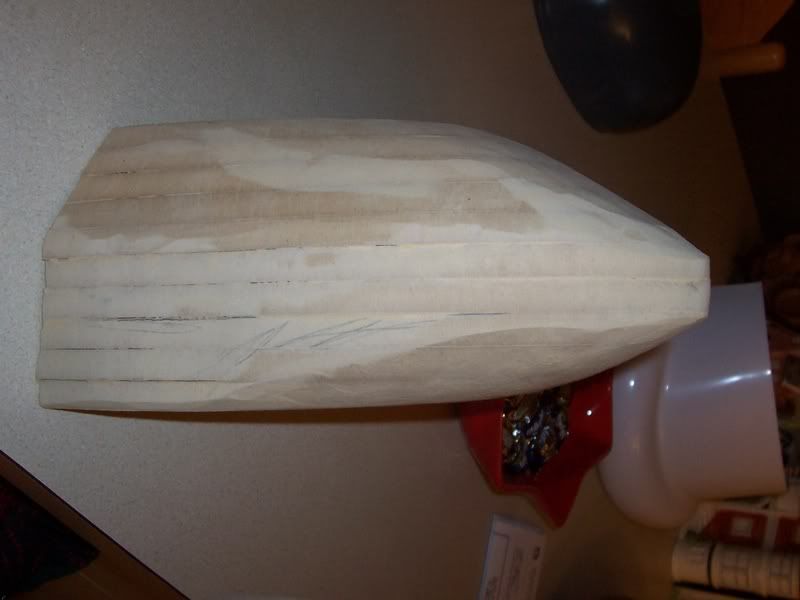
Getting there, 2 sanding belts, wrist cramps and looking like a tusken raider, got me to 8 layers so far. Im thinking i may need to make at least 2 more, then i'll just add one or two layers of the semi-circle "wall" pieces..
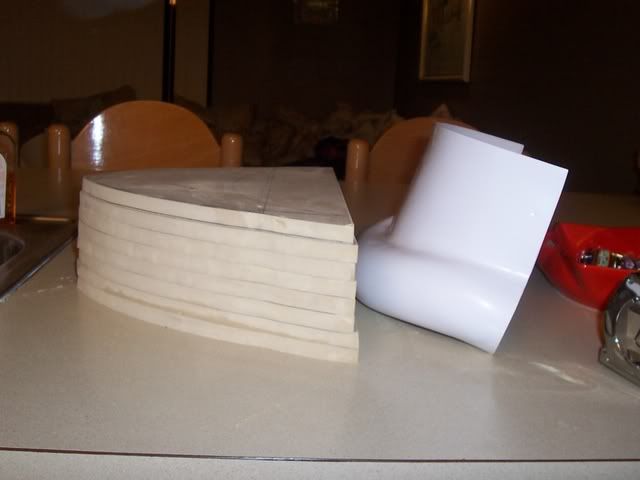
On top of this taking longer than it should be, seeing that my current jigg saw does not work, I covinced my parents to get me a new one, but I will have to wait till next week or so. Starting to take some shape.
-tubachris
_________________
|
|
| Back to top |
|
|
tubachris85x
Master
Joined: 15 Jan 2007
Posts: 351
Location: Ft. Lauderdale, Florida
|
| Posted: Thu Feb 01, 2007 8:11 pm Post subject: |
|
|
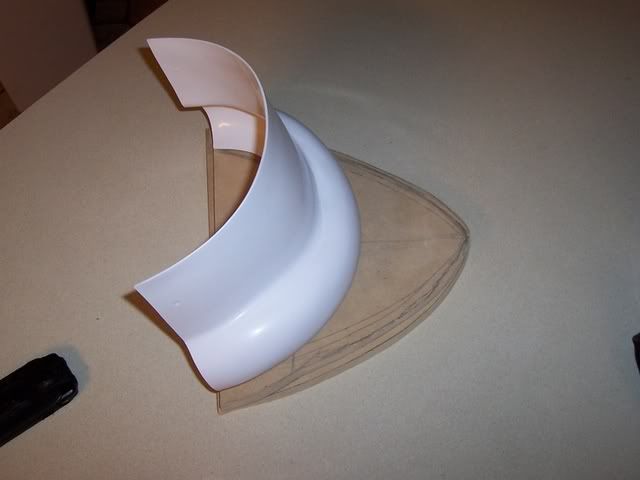
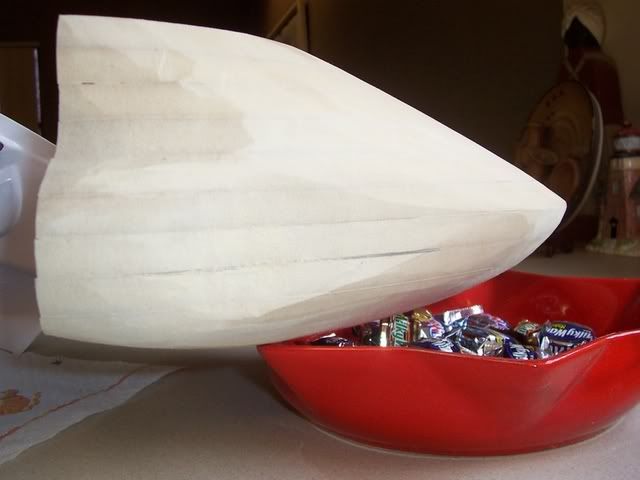
Another update as I wrapp up tonights work.
Im showing alot of this mold only because this you might say would be the Darktrooper's most unique piece of armor, despite the jumpjet pack. Tonight, I added 2 more layers, glued them together, and began to shape it out. I got alot of it done, but theres more sanding to do. I mainly started on the top left (if your looking at it from behind) As you can see, I put it next to the FX pieces to show a really rough preview of what its gonna look like in the end.
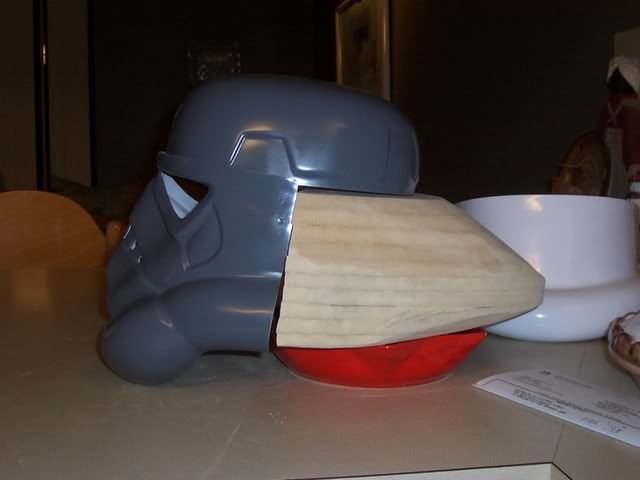
On a side note...MDF sawdust smells like cat piss.....
-tubachris
_________________
|
|
| Back to top |
|
|
badger
Novice
Joined: 03 Sep 2006
Posts: 63
|
| Posted: Fri Feb 02, 2007 3:11 pm Post subject: |
|
|
What tools are you using for shaping the MDF?
badger |
|
| Back to top |
|
|
tubachris85x
Master
Joined: 15 Jan 2007
Posts: 351
Location: Ft. Lauderdale, Florida
|
| Posted: Fri Feb 02, 2007 11:56 pm Post subject: |
|
|
As of right now, just my circular saw to cut the pieces, and a belt sander. I should be getting a new jigg saw this week, which will save me alot of time with cutting and trimming the layers.
-tubachris
_________________
|
|
| Back to top |
|
|
tubachris85x
Master
Joined: 15 Jan 2007
Posts: 351
Location: Ft. Lauderdale, Florida
|
| Posted: Tue Feb 06, 2007 11:49 am Post subject: |
|
|
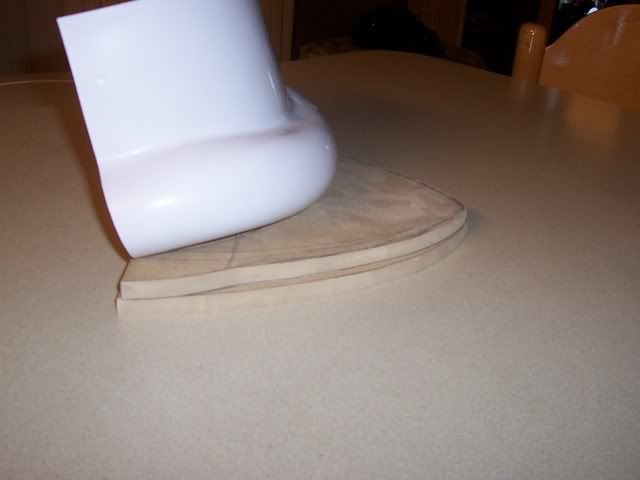
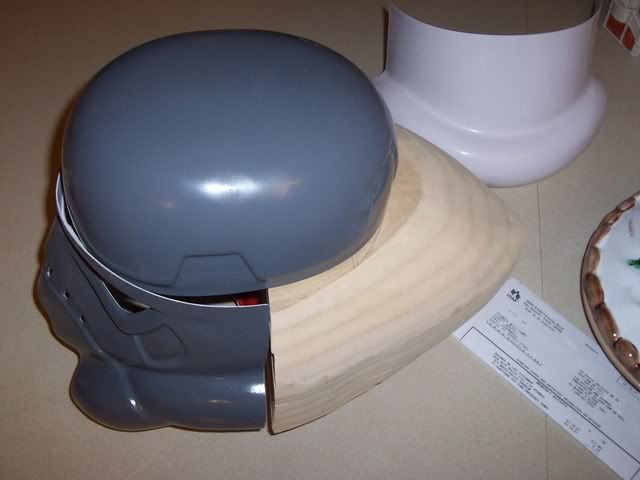
I spent all morning working on the mold, and can say that Im almost done with the helmet mod. Whats left is a little bit of touch ups, the tubular section that meets with the face piece is just a pain in the butt because It needs to match almost perfectly. The good thing about the FX helmet in this case, is the ear pieces covers the edges of each side, so it dosnt have to be perfect on the edges which is good, but I still need to make it fit around the ear piece. After doing that, all I have left is to get some bondo or something of the sort that dosnt stink, and finish forming the tube section. I want that part to merge with the point smoothly, so that it curves in either side into a point. Hard to explain, but you'll know what Im talkin about when its done. After that, I just need to prime it, smooth it out just a bit more, and she's ready to be casted. Please give feedback if you feel something can be improved or done to better shape this piece. I am only using CG reference from the game, and evrything cannot be seen perfecty, so if you notice anything, let me know. Thanks.
-tubachris
_________________
|
|
| Back to top |
|
|
badger
Novice
Joined: 03 Sep 2006
Posts: 63
|
| Posted: Tue Feb 06, 2007 5:43 pm Post subject: |
|
|
| can we see your reference pictures? I'm curious, as I'm not familar with the "Dark Trooper" |
|
| Back to top |
|
|
tubachris85x
Master
Joined: 15 Jan 2007
Posts: 351
Location: Ft. Lauderdale, Florida
|
|
| Back to top |
|
|
tubachris85x
Master
Joined: 15 Jan 2007
Posts: 351
Location: Ft. Lauderdale, Florida
|
| Posted: Wed Feb 07, 2007 10:02 pm Post subject: |
|
|
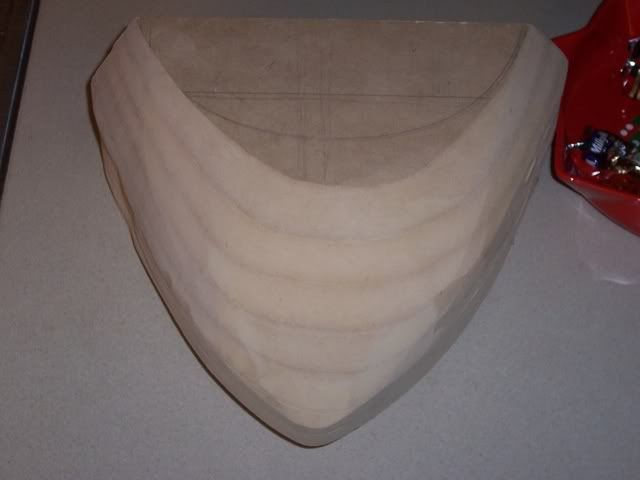
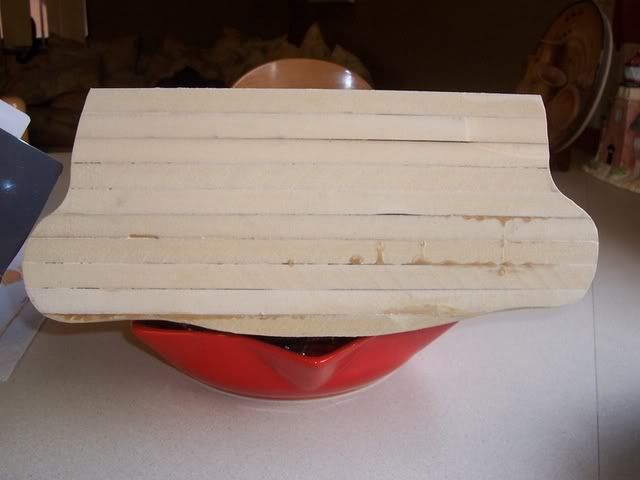
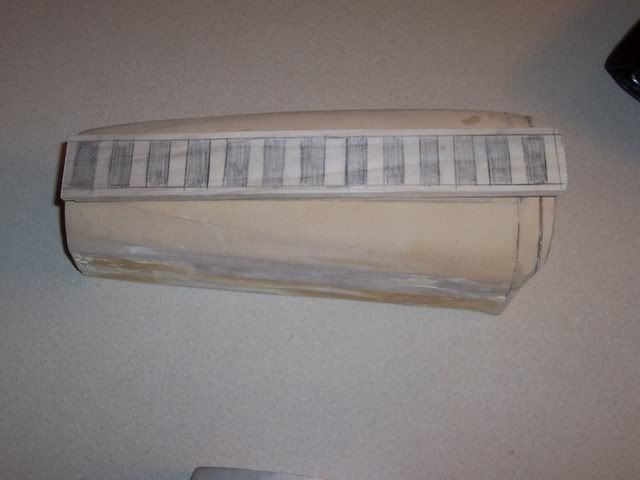
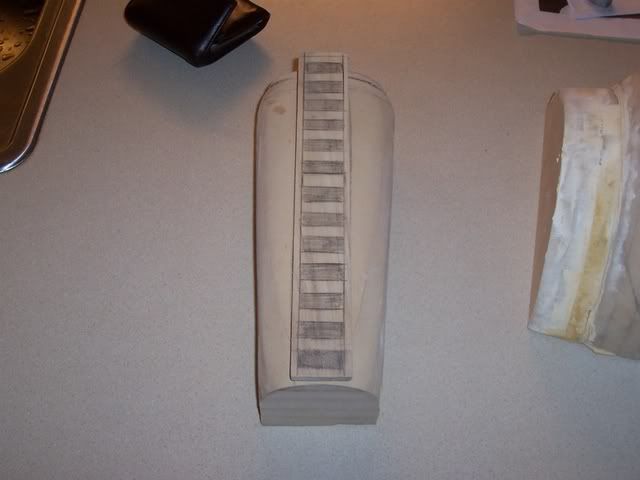
Well this is tonights daly grind. I can say that im almost done with the first two molds. I rode my bike to lowes to get that bondo putty, except, I saw that Durham's putty, and decided to go ahead to try that, since it has no odor, since my mom already hates the fact I turned 3 different parts of the house into my workshop. Im almost done with the first half of the guant, but im having an issue with the appropriate measurements for the boxes. Im sopposed to have 12 all together, but I cant seem to figure it out properly. Plus, I was experimenting trying to cut out the boxes, but my tools are inadequet to cut them out properly. Any suggestions would help imensly. Also, as you can see, the putty already dried, and partially sanded to show you what I was talking about. Also, the tube sections now match almost perfeclty with the face plate. Finnaly learned to use the traceing technique. Note: the section of wood with the boxes drawn are not attached to the guant half yet. Note: the section of wood with the boxes drawn are not attached to the guant half yet.
-tubachris
_________________
|
|
| Back to top |
|
|
tubachris85x
Master
Joined: 15 Jan 2007
Posts: 351
Location: Ft. Lauderdale, Florida
|
| Posted: Thu Feb 08, 2007 7:57 pm Post subject: |
|
|
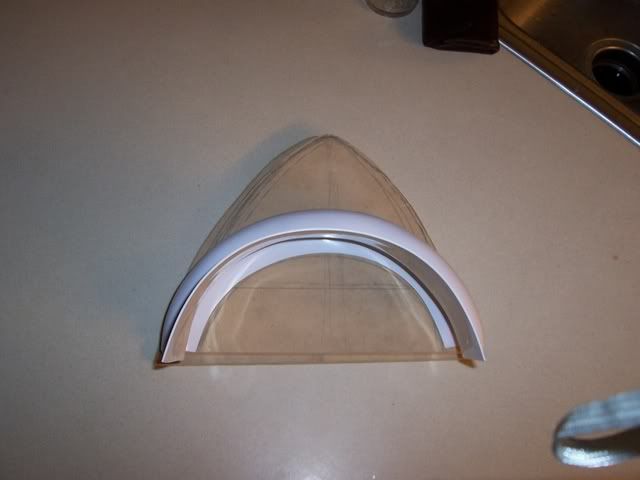
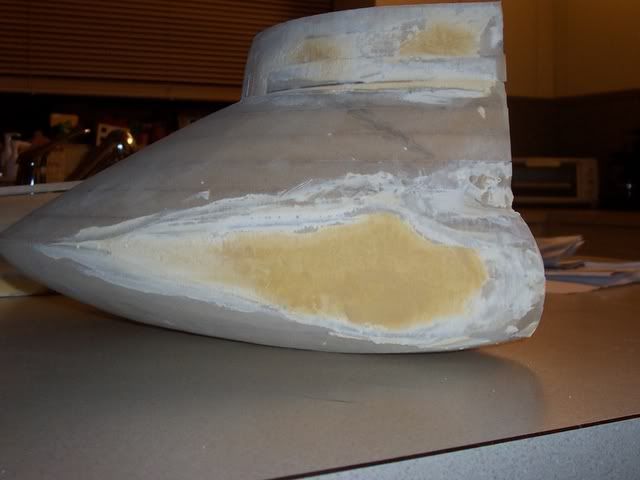
Alright, well here's the 2nd piece to final product. The helmet mold is done! I can start to move onto other pieces. LMK what you guys think.

-tubachris
_________________
|
|
| Back to top |
|
|
|
|
You cannot post new topics in this forum
You cannot reply to topics in this forum
You cannot edit your posts in this forum
You cannot delete your posts in this forum
You cannot vote in polls in this forum
|
Powered by phpBB © 2001, 2005 phpBB Group
|

