 |
www.TK560.com
Vacuum Forming, Movie Prop, Sci-fi and GIjOE Forum
|

|


|
| View previous topic :: View next topic |
| Author |
Message |
tubachris85x
Master
Joined: 15 Jan 2007
Posts: 351
Location: Ft. Lauderdale, Florida
|
 Posted: Mon Sep 22, 2008 7:27 am Post subject: Posted: Mon Sep 22, 2008 7:27 am Post subject: |
 |
|
Oh boy, I dont know what I got myself into..
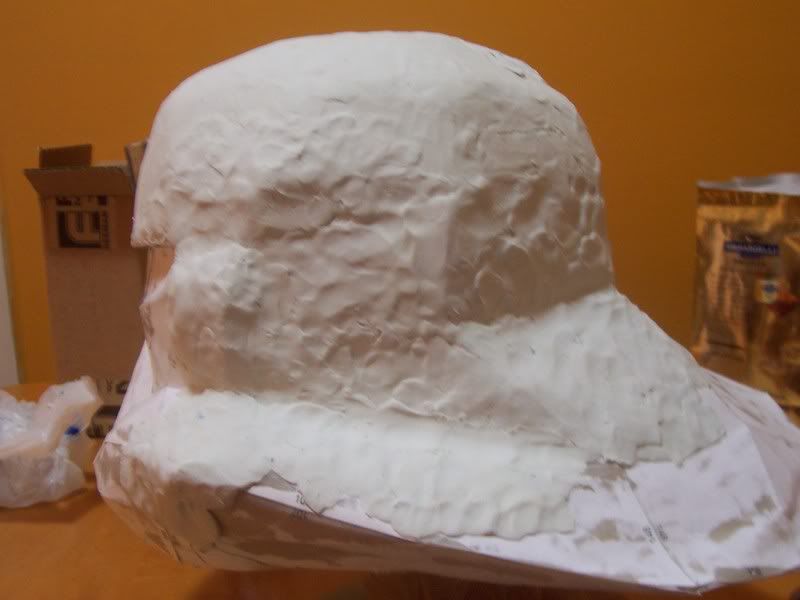
I added more clay to try to level out the dome
lol this takes awhile to put on
_________________
 |
|
| Back to top |
|
 |
tubachris85x
Master
Joined: 15 Jan 2007
Posts: 351
Location: Ft. Lauderdale, Florida
|
| Posted: Tue Sep 23, 2008 7:05 pm Post subject: |
|
|
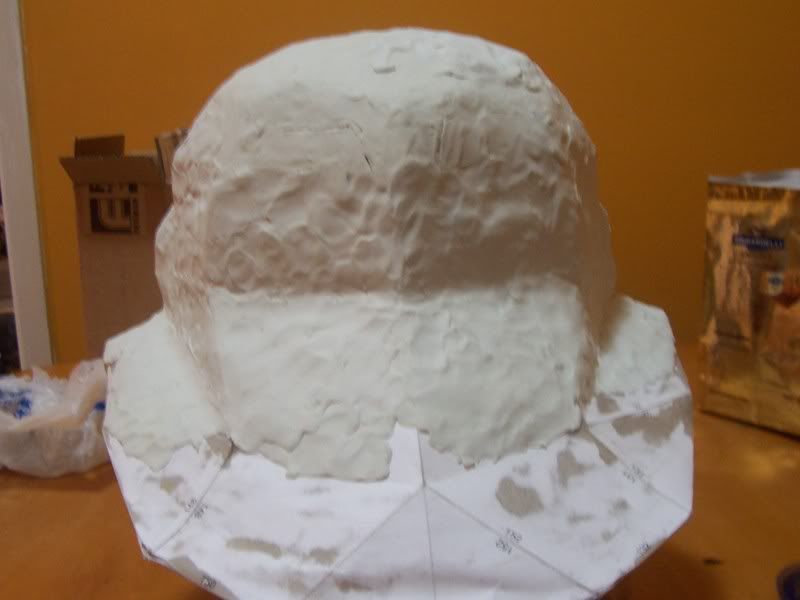
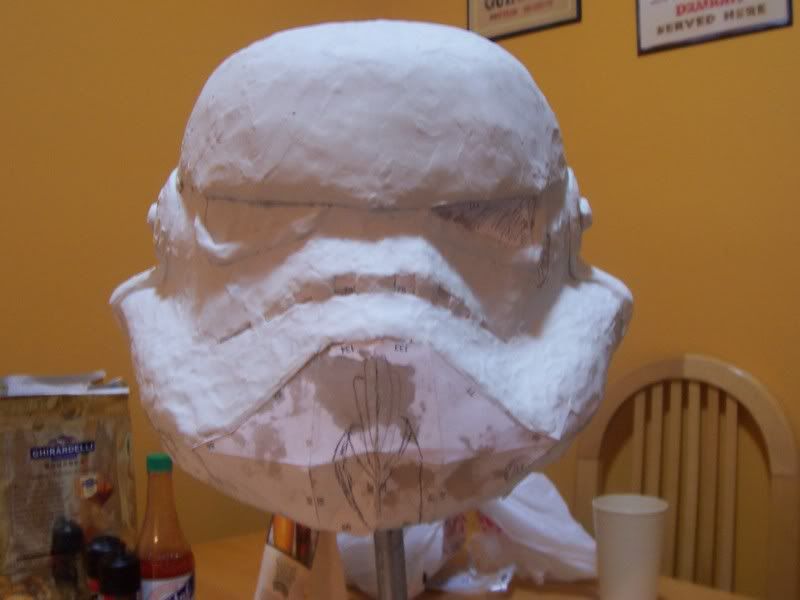
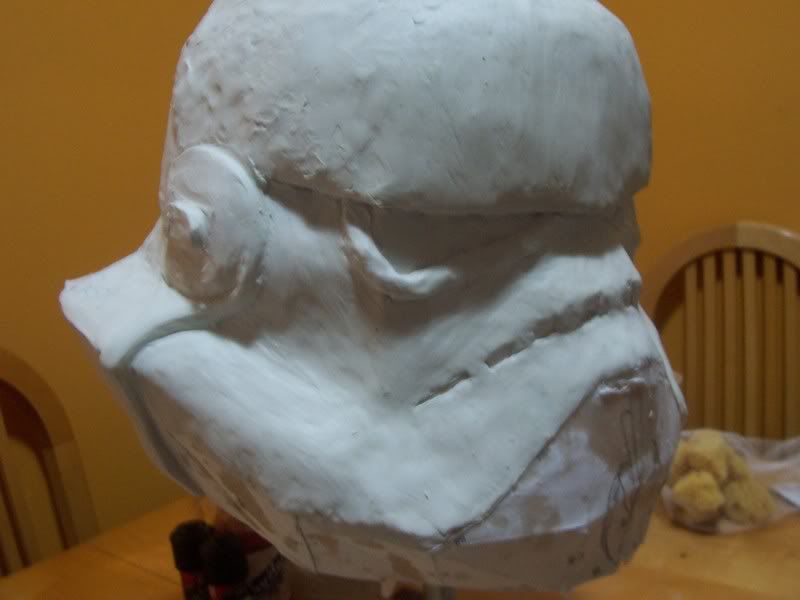
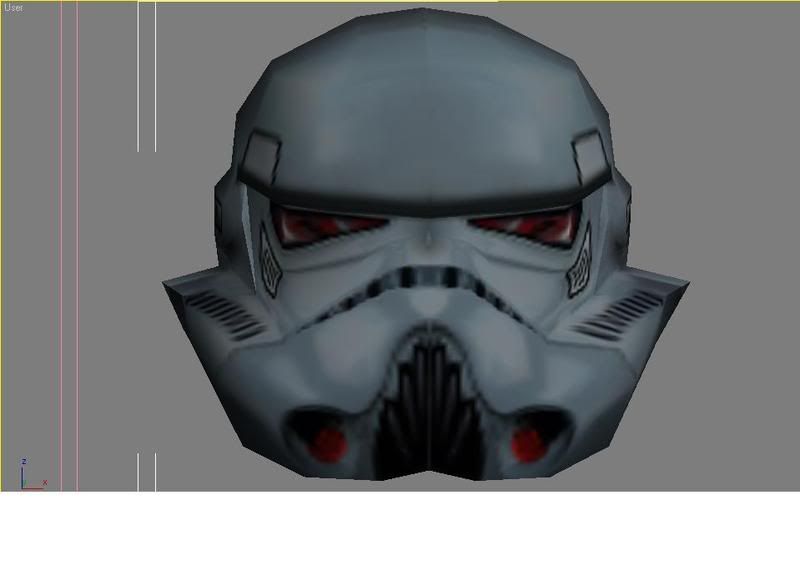
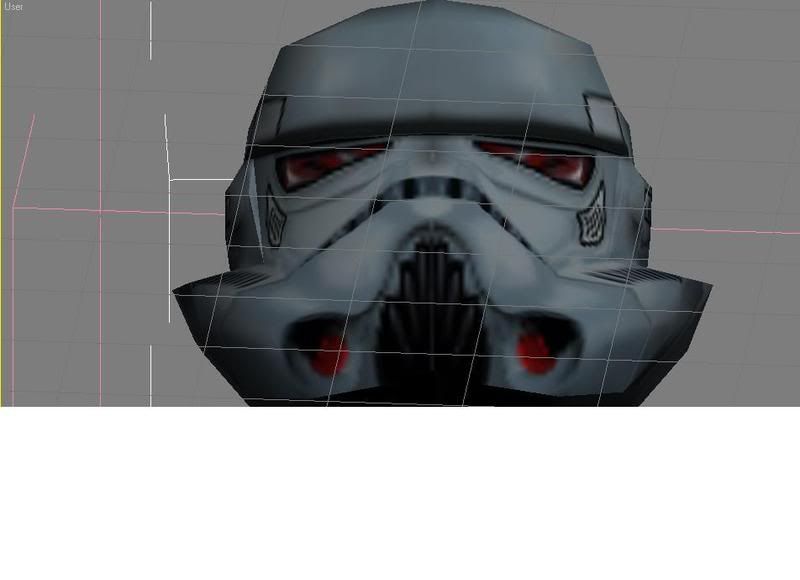
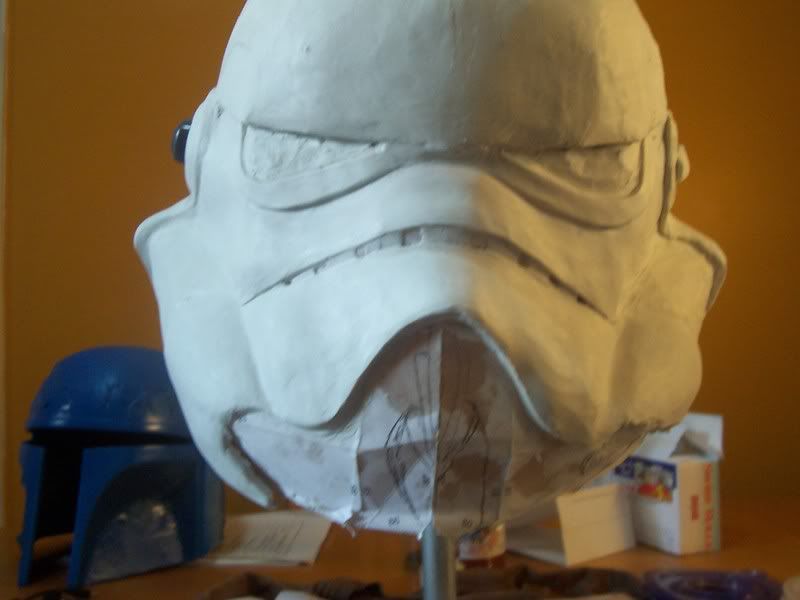
Just some pics of the helmet sculpt progress. I think it's actually starting to shape up a bit. Just need to try out the various smoothing techniques, and I'll be good to go from there.
In this, I started the face, added some rough details, such as under the eyes, the teeth, and really worked on the ears tonight as well

-TC
_________________
|
|
| Back to top |
|
|
TK 109
Guru

Joined: 11 May 2007
Posts: 712
Location: Galena, Ohio
|
| Posted: Wed Sep 24, 2008 1:22 pm Post subject: |
|
|
WOW WOW WOW!!! 
_________________
-Alex
-------------------------------------------------------
 |
|
| Back to top |
|
|
tubachris85x
Master
Joined: 15 Jan 2007
Posts: 351
Location: Ft. Lauderdale, Florida
|
| Posted: Wed Sep 24, 2008 8:26 pm Post subject: |
|
|
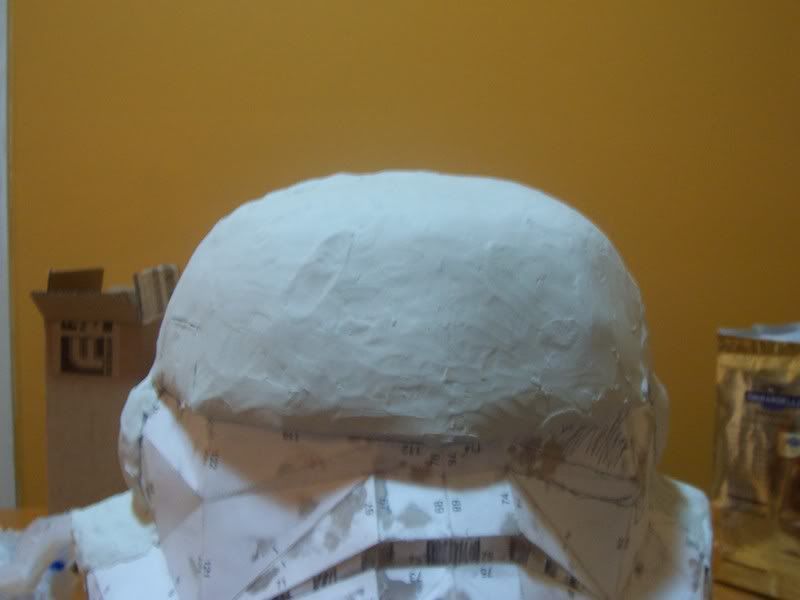
Heres some more nightly progress. I started smoothing out the clay a bit. Its not where I want it, but it's alot better then before. Seems to work best with water and sponges.

-TC
_________________
|
|
| Back to top |
|
|
tubachris85x
Master
Joined: 15 Jan 2007
Posts: 351
Location: Ft. Lauderdale, Florida
|
| Posted: Thu Sep 25, 2008 12:15 am Post subject: |
|
|
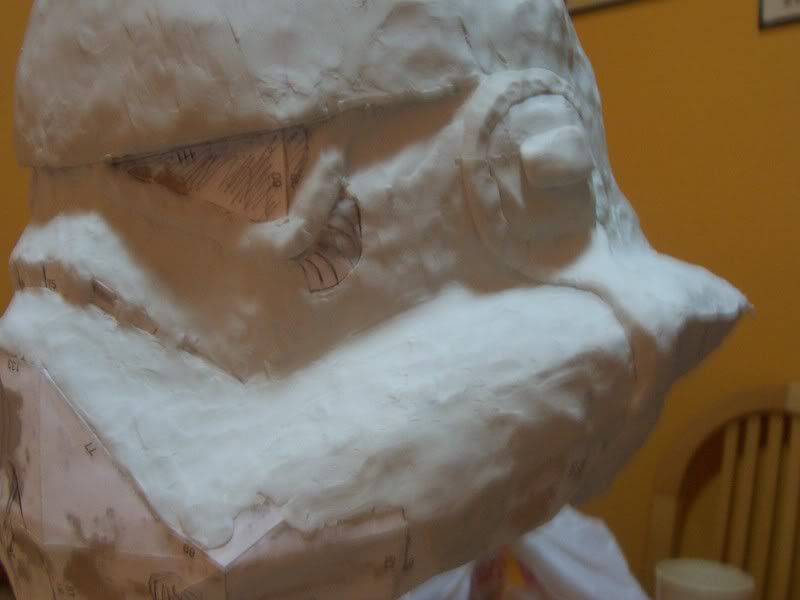
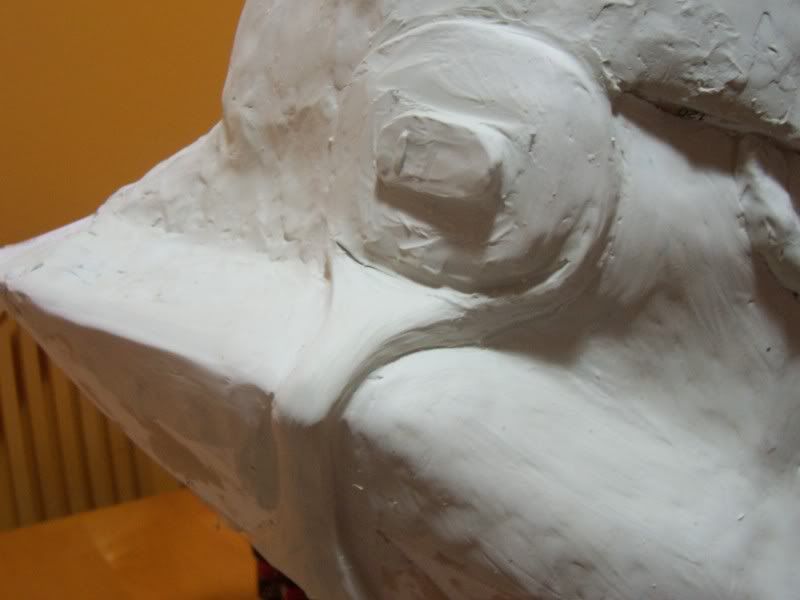
I couldnt sleep, so I did a bit more work, trying to detail and shape the left eye, and giving the "overlap" detail, thats present on stormtrooper helmets. I also started building up the upper nose area, between the eyes. The tear drop is just there, a rough version. Im hesitant to cut out the lower chin piece until I really have to.
-TC
_________________
|
|
| Back to top |
|
|
tubachris85x
Master
Joined: 15 Jan 2007
Posts: 351
Location: Ft. Lauderdale, Florida
|
| Posted: Fri Sep 26, 2008 6:54 pm Post subject: |
|
|
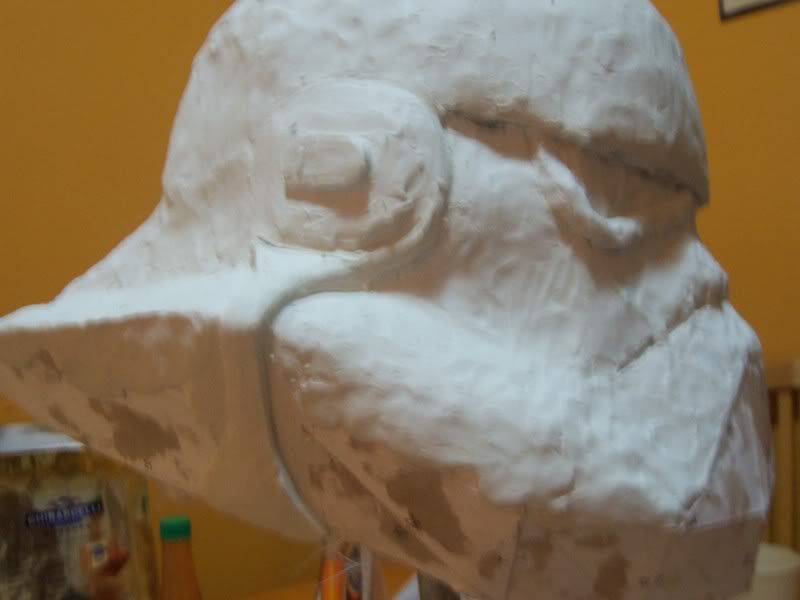
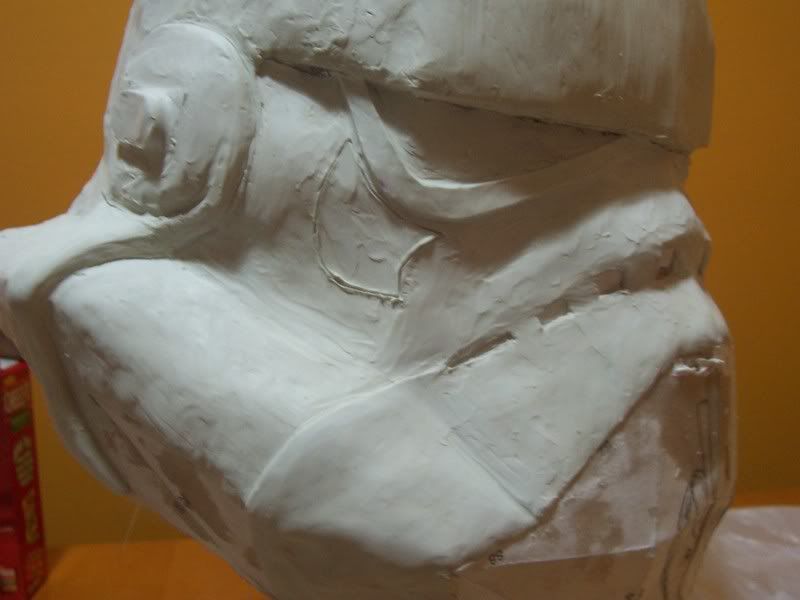
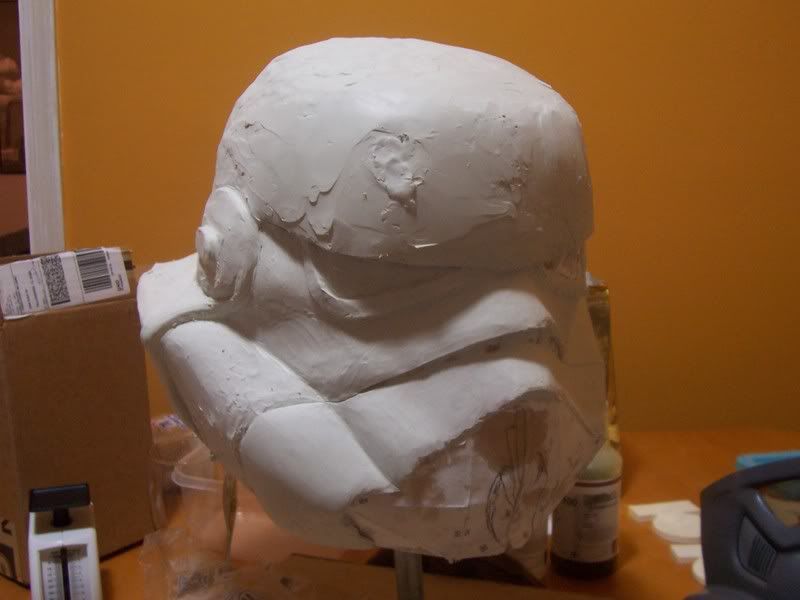
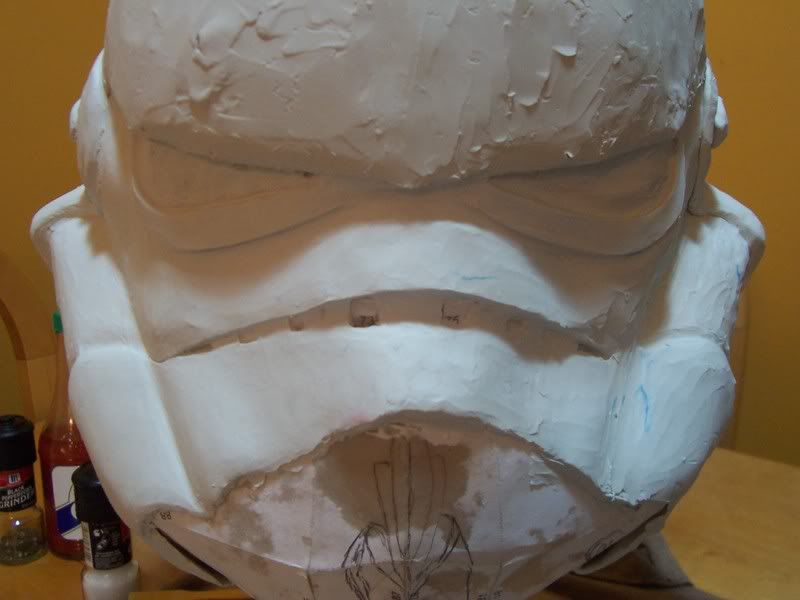
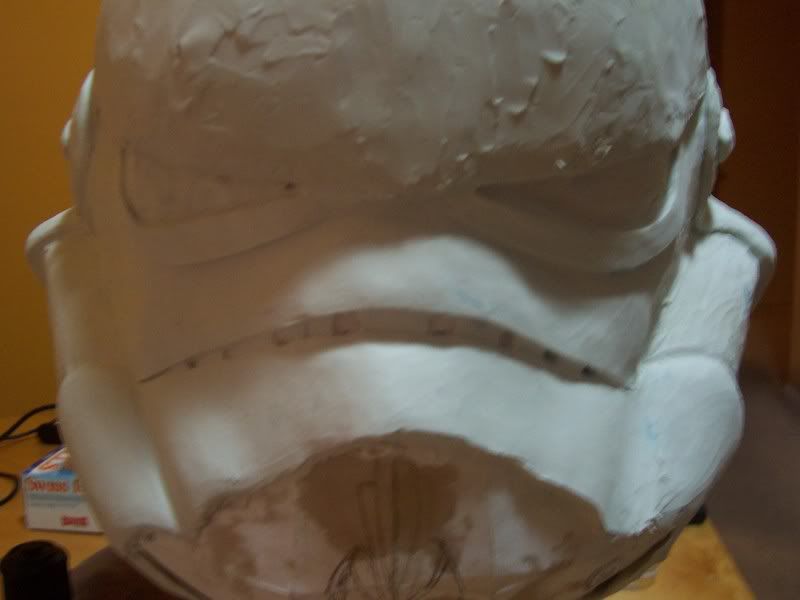
Some more progress on the sculpt. Man, I tell ya, once I started today, I just lost track of time! lol
Im using my FX faceplate as a reference for how it *should* look. I gave one side the correct depth, that is present on TK helmets. I also started to shape up the mouth or "grin" as well. These pics are at certain angles to show you those details.
I also found a somewhat good smoothing technique, using a flat piece of styrene plastic..however, its very difficult lol You can see, I used it for the newer sections, and I feel that I will leave those smooth sections alone unitl molding.
-TC
_________________
|
|
| Back to top |
|
|
CJanssen
Expert

Joined: 17 Feb 2007
Posts: 215
Location: Beaverton OR
|
| Posted: Fri Sep 26, 2008 7:06 pm Post subject: |
|
|
Thats coming along nicely, good job.
CJ
_________________
"What, you think your some kind of Jedi?" |
|
| Back to top |
|
|
jegner
Site Admin

Joined: 30 May 2003
Posts: 2144
Location: Texas, USA
|
| Posted: Mon Sep 29, 2008 10:53 am Post subject: |
|
|
Looking good! Keep us posted!
Jim |
|
| Back to top |
|
|
tubachris85x
Master
Joined: 15 Jan 2007
Posts: 351
Location: Ft. Lauderdale, Florida
|
| Posted: Tue Sep 30, 2008 4:23 pm Post subject: |
|
|
Thanks guys! I really appreciate it!
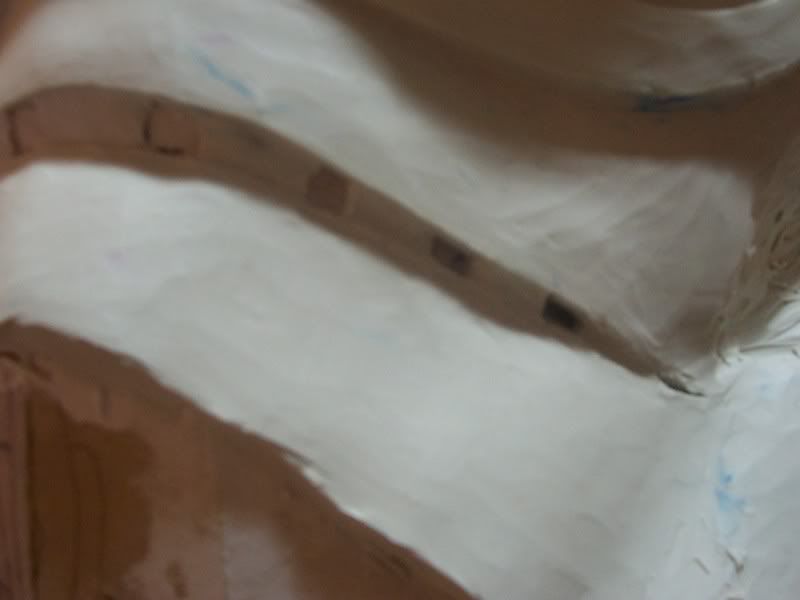
So get this. All this time, I thought that when I built the pep helmet base, that I accidentally warped the right side face (from the front) It's *lower* then the left, in that the grin angles down more, and at the point of where the tip of the grin meets the tube portion, it's indented in more then the left. Like I said, I thought this was a mistake that I had made, and it's frustrating.
Well, it actually turns out that the actual 3d model is warped, therefore, this imperfection is technically accurate. Im not a 3d renderer by any means, but you'd think that they'd be able to make a perfectly symetrical helmet, unlike the screen used TK helmets rofl
Here are some pics. It's very subtle to see, but it's there:
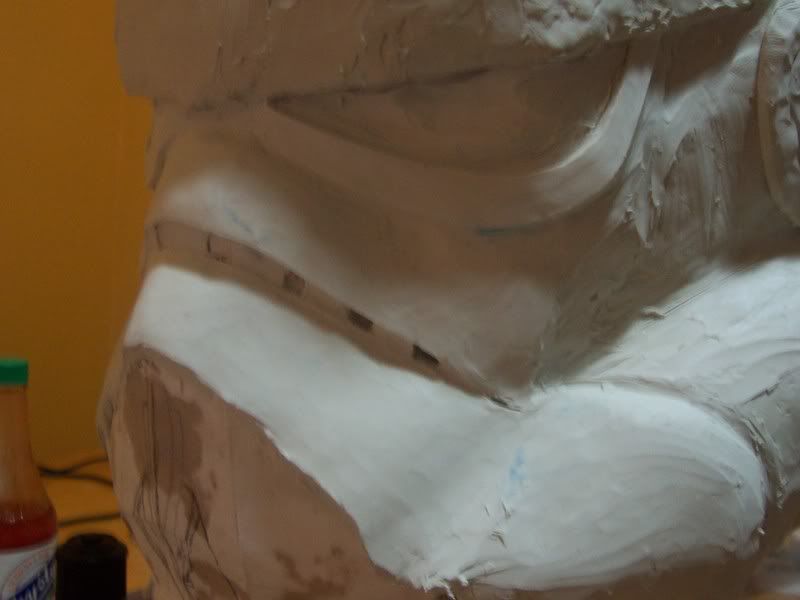
Primary view, can see it very slightly, the grin on the right has a lower angle then the right:
And now, a view from a different angle, which makes it much more visible:
I guess it makes it a bit easier for me lol
Will post some more pics later tonight
-TC
_________________
|
|
| Back to top |
|
|
tubachris85x
Master
Joined: 15 Jan 2007
Posts: 351
Location: Ft. Lauderdale, Florida
|
| Posted: Tue Sep 30, 2008 6:51 pm Post subject: |
|
|
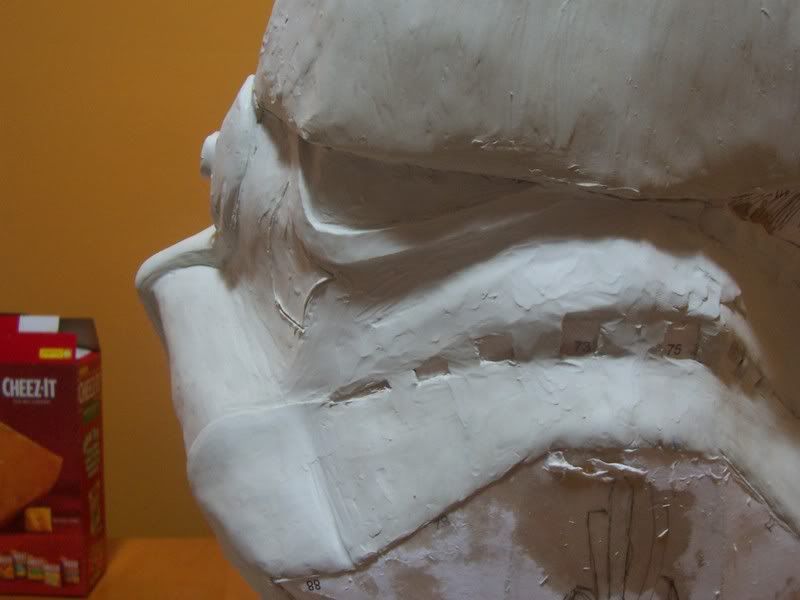
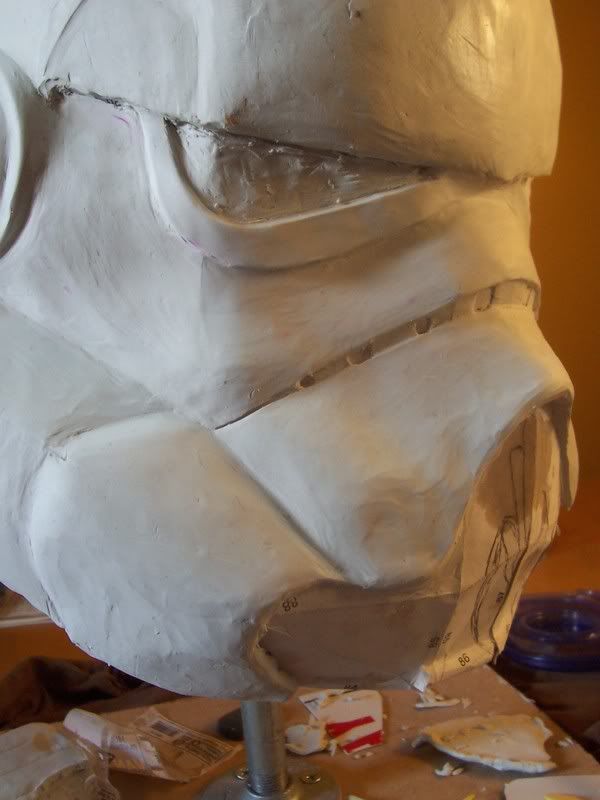
Did a bit more accurizing work. Primarily on the eye's and the nose portion. The way it was previously, the rim around the eyes were too thin. So I went back, and widened it up a bit more, and I feel it is much more accurate and overall looks better then before.
The second part was the nose. Was just too thick the way I made it originally. The side profile of the helmet shows the nose is flush with the grin/frown. I am doing a sort of cross between that and a "real world," so there has to be some kind of seperation. So I cut off chunks of clay there, as well as the sides, to help give that depressed look thats prominant in TK helmets. Hard to explain, but lol thats what I mean.
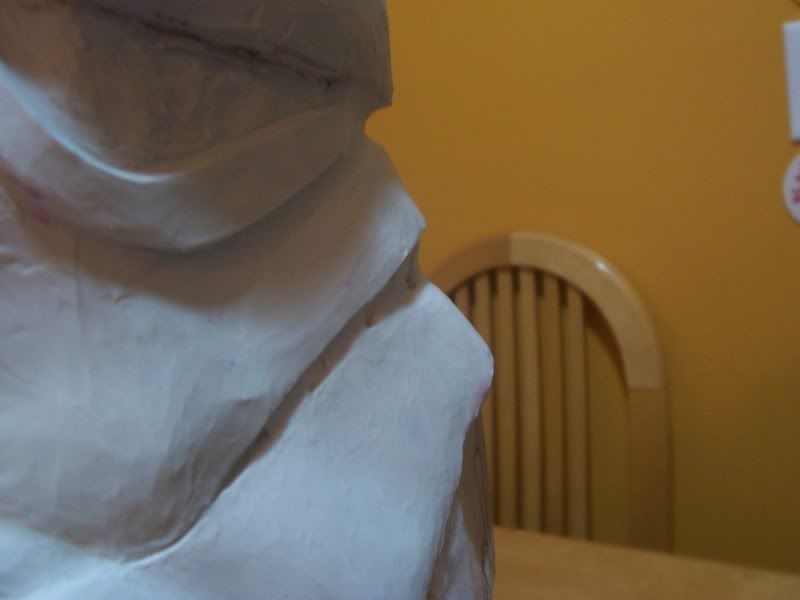
As you can see, Ive started the right side, really, I worked both eyes tonight, and I feel that they look pretty symetrical. The rest though, well, in good time.
-TC
_________________
|
|
| Back to top |
|
|
tubachris85x
Master
Joined: 15 Jan 2007
Posts: 351
Location: Ft. Lauderdale, Florida
|
| Posted: Wed Oct 01, 2008 10:01 pm Post subject: |
|
|
Okay, more work done tonight. Ive decided to try and do my best to make it symetrical. So, this meant that I had to make the right side much thicker, as far as the clay. I think it's actually looking pretty good. Cleaned up and got around to making the frown more defined and finished off the ends of them.
Unfortunatly, I am comming across an issue which I was afraid of initially-at the very edge, where the clay has nothing to hold onto but the paper base, it's starting to detach itself and will hang off. Not sure what Im going to do about that yet, but it's not incredibly serious at the moment.
-TC
_________________
|
|
| Back to top |
|
|
tubachris85x
Master
Joined: 15 Jan 2007
Posts: 351
Location: Ft. Lauderdale, Florida
|
| Posted: Fri Oct 03, 2008 7:49 pm Post subject: |
|
|
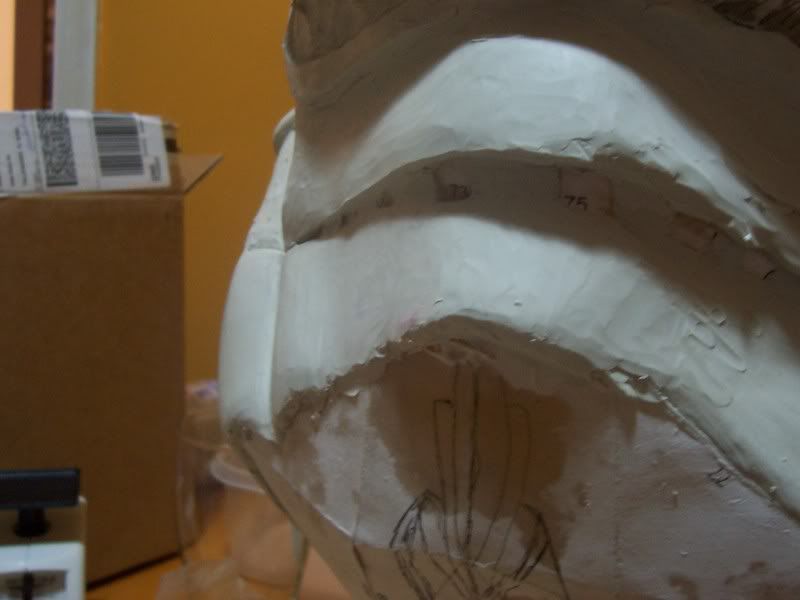
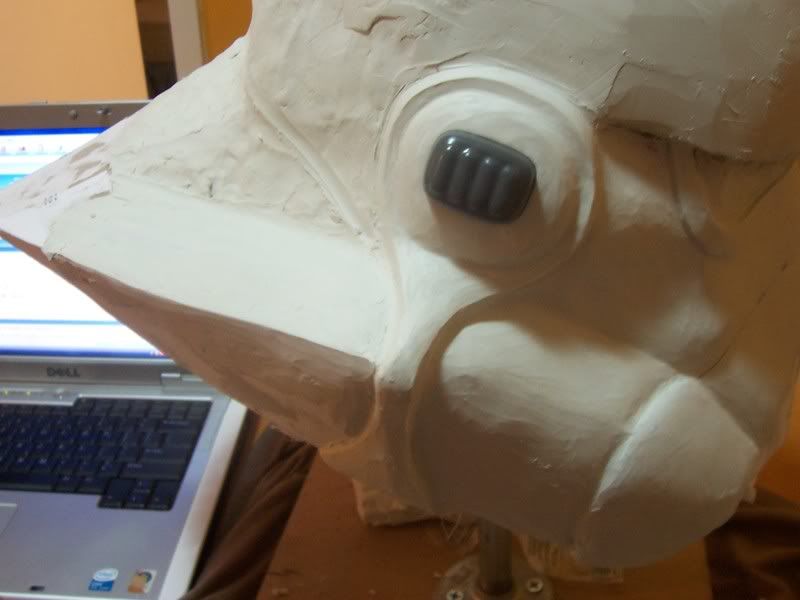
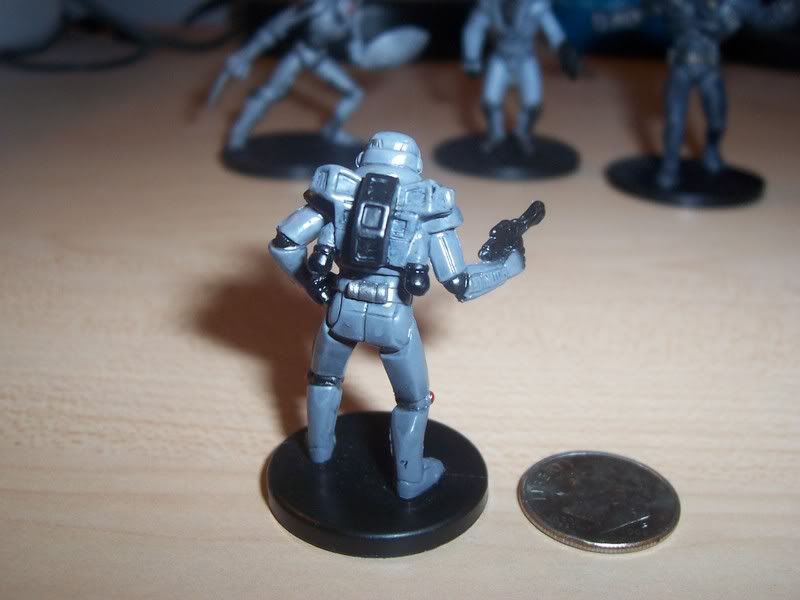
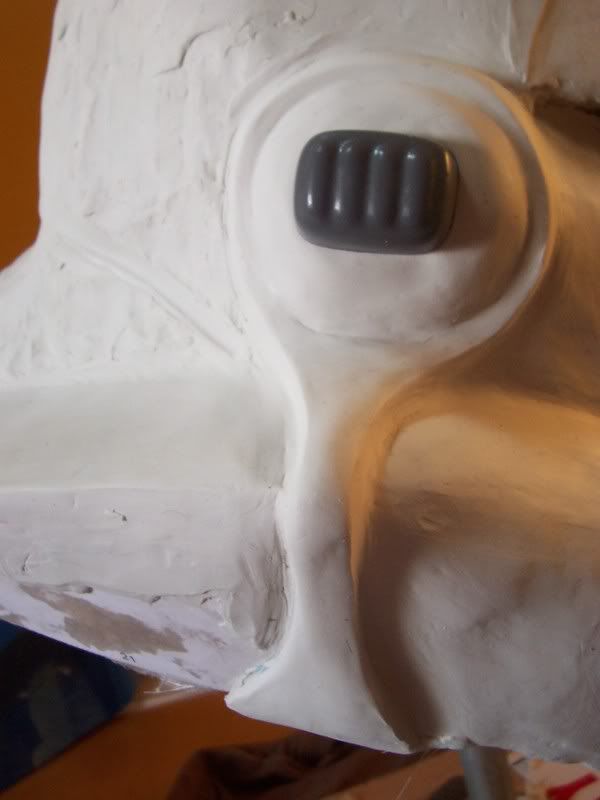
Okay, a bit more work on the sculpt tonight, started to move more towards the back on the more completed left side, mainly on the ear cap. Upon further observation, the "com box" has only 4 stubs, where as I originally thought there was 5. The shadowing on the image made it appear as such. So becuase of this, instead of sculpting the box, Im going to be using the one's that came with my FX TK for obvious reasons.
I also started to clean up the back portion, where it merges into the swoop. The lower portions that are not covered by clay, are areas that need to be reinforced with more fiberglass, which Im going to try and do tomorrow. Maybe begin to cut the lower chin portion and make a reinforced wall to begin that section.
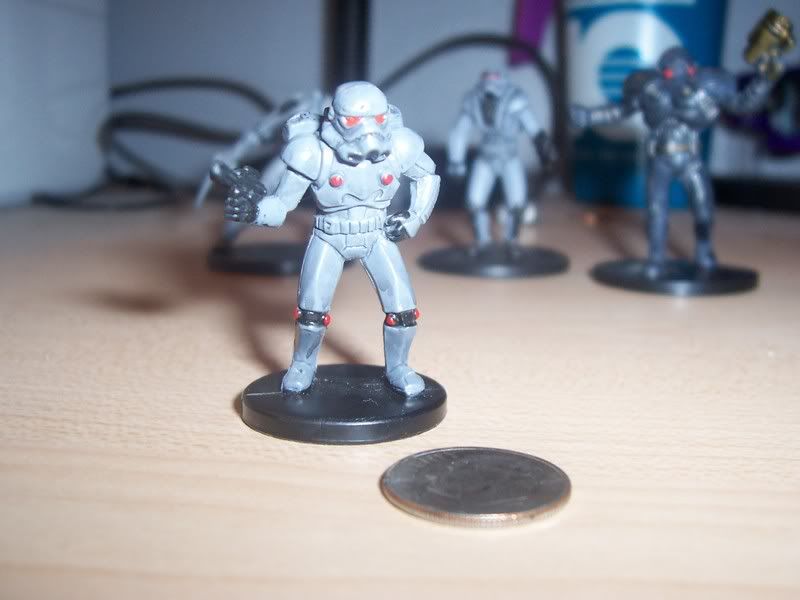
I got these in the mail today. I figure I should have these for part of my collection
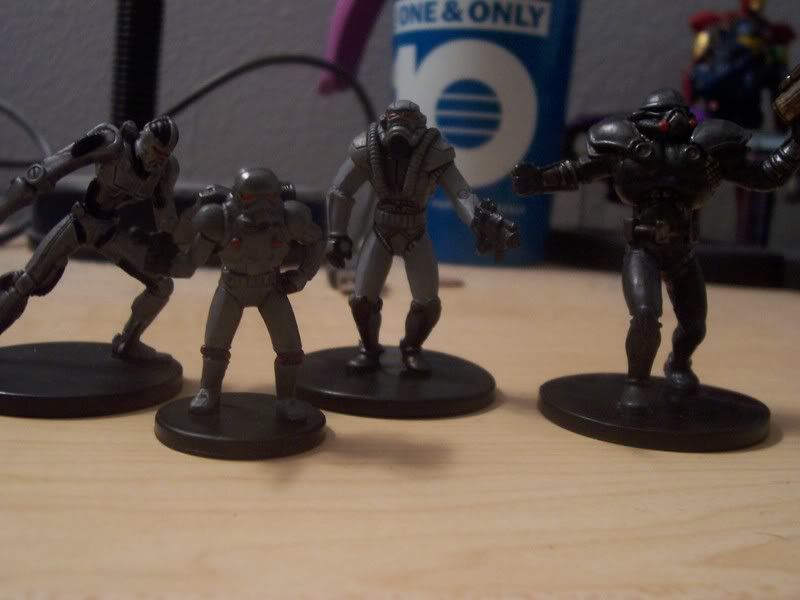
The newer one is my main focus for obvious reasons. I didnt realize how small this was lol. Although having only a few differences, being the lack of helmet swoop, and a different chest piece, it's pretty much a battlefront DarkTrooper, and the jetpack gives that away, being the same exact design. I *think* the only other DarkTrooper that has the same JJP, is the star wars galaxies version.
For size reference, that's a Dime
-TC
_________________
|
|
| Back to top |
|
|
tubachris85x
Master
Joined: 15 Jan 2007
Posts: 351
Location: Ft. Lauderdale, Florida
|
| Posted: Sat Oct 04, 2008 4:43 pm Post subject: |
|
|
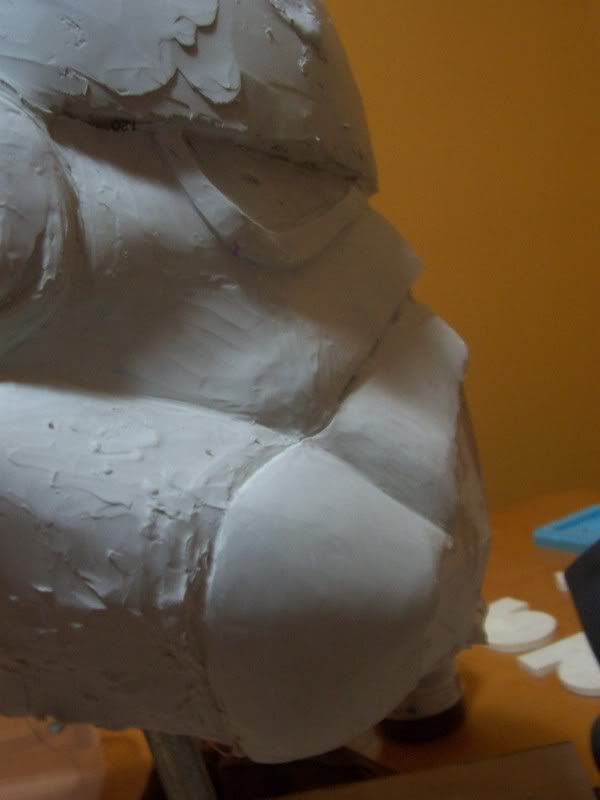
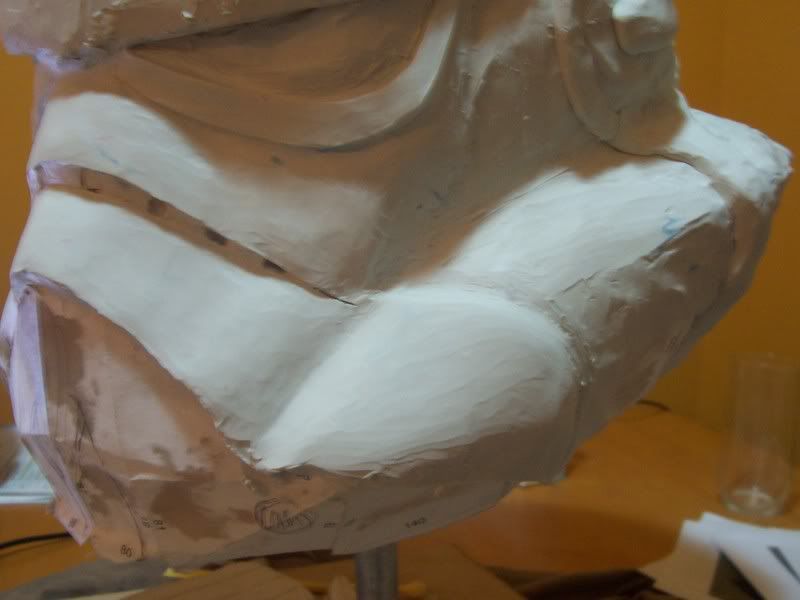
Tried using rubbing alchohol today for smoothing. I originally wanted to get some citri solve, but I couldnt find any at the store. I really wish I did cause, lol it smells BAD.
It actually seems to work pretty effectivly, but I should try to use a heat gun or blow dryer to soften it up a bit. Used a hankerchief, didnt have an old t-shirt to spare, left it looking a bit dirty..oh well
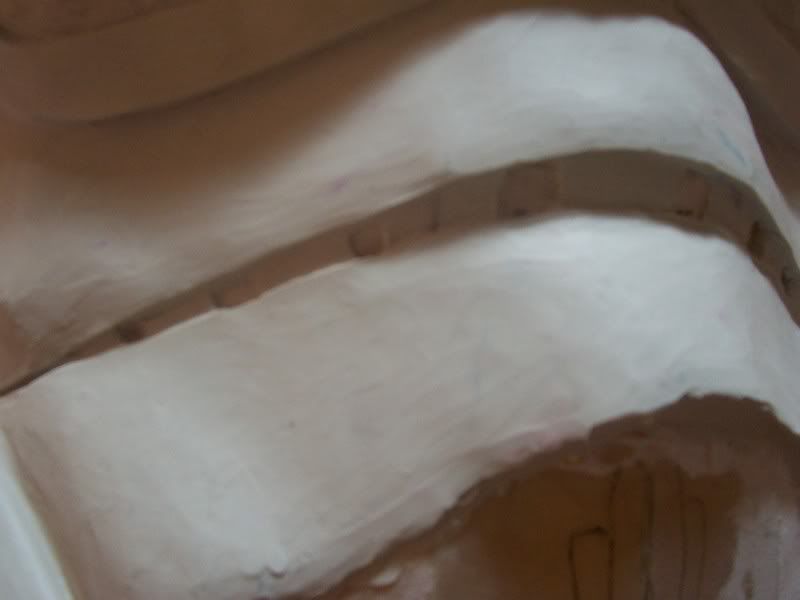
I can say that I feel the left side ear cap is pretty much finished as of right now. The com box in this pic appears higher, but thats due to the angle. I also decided to begin the chin portion. Right now, the left side being more accurate. I may not have to cut the section off, but I will have to for the depression needed for the areators.
For other such details, such as the boxes along the dome and the tear drops, Im having a bit of an issue getting them sculpted into the clay. Im deciding wether or not I will even physically put those details in at the moment.
Anyways, some more pics for ya'll
-TC
_________________
|
|
| Back to top |
|
|
jegner
Site Admin
Joined: 30 May 2003
Posts: 2144
Location: Texas, USA
|
| Posted: Sat Oct 04, 2008 7:08 pm Post subject: |
|
|
Hey, thats looking great! Keep up the good work!
Jim |
|
| Back to top |
|
|
TK451
Joined: 17 Oct 2008
Posts: 2
Location: Houston, Texas
|
| Posted: Sun Nov 09, 2008 12:02 pm Post subject: Pepakura Templates |
|
|
tubachris85x,
Do you think you can post the templates your using for the Pepakura software?
thanks,
Good work, I've been following your progress. You've come a long way in just a short time. |
|
| Back to top |
|
|
|
|
You cannot post new topics in this forum
You cannot reply to topics in this forum
You cannot edit your posts in this forum
You cannot delete your posts in this forum
You cannot vote in polls in this forum
|
Powered by phpBB © 2001, 2005 phpBB Group
|

