 |
www.TK560.com
Vacuum Forming, Movie Prop, Sci-fi and GIjOE Forum
|

|


|
| View previous topic :: View next topic |
| Author |
Message |
badger
Novice

Joined: 03 Sep 2006
Posts: 63
|
 Posted: Thu Feb 08, 2007 8:33 pm Post subject: Posted: Thu Feb 08, 2007 8:33 pm Post subject: |
 |
|
| Good work! Thanks for sharing the progress photos. |
|
| Back to top |
|
 |
tubachris85x
Master

Joined: 15 Jan 2007
Posts: 351
Location: Ft. Lauderdale, Florida
|
| Posted: Thu Feb 15, 2007 3:52 pm Post subject: |
|
|
Ah ha! First piece of the hand armor! ANH version of course...

-tubachris
_________________
 |
|
| Back to top |
|
|
tubachris85x
Master
Joined: 15 Jan 2007
Posts: 351
Location: Ft. Lauderdale, Florida
|
| Posted: Thu Feb 15, 2007 3:54 pm Post subject: |
|
|
From a picture standpoint, its done as far as the look is concern, really, I just need to do a little more durhams work and some sanding. Other then that, I just to drill holes on the inside of the boxes so that the vaccum can pull the plastic into it so it appears better. Its not perfect however, but thats how we get better...

-tubachris
_________________
|
|
| Back to top |
|
|
tubachris85x
Master
Joined: 15 Jan 2007
Posts: 351
Location: Ft. Lauderdale, Florida
|
| Posted: Wed Feb 21, 2007 4:21 pm Post subject: |
|
|
I have managed to finnaly get some time and fix the helmet mod (hopefully for the last time!) to make it more accurate. If you look at the older pics, you can see that it came to a point. Well, upon further review, I found that it was inaccurate to the game, and instead, is more round. Those of you who play regularly, at least in the first battlefront where the DT is a better playable character then the DT in BF2, can see that this correction is much better and alot more accurate. LMK what you guys think!

-tubachris
_________________
|
|
| Back to top |
|
|
jegner
Site Admin

Joined: 30 May 2003
Posts: 2144
Location: Texas, USA
|
| Posted: Wed Feb 21, 2007 8:24 pm Post subject: |
|
|
Looking great! That forearm looks better thant he one I made. When patching MDF, bondo, or plain old wood putty will also get the job done. A few coats of paint will also help reveal any flaws in the molds. A sealer and primer coat really helps spot the flaws.
Jim |
|
| Back to top |
|
|
tubachris85x
Master
Joined: 15 Jan 2007
Posts: 351
Location: Ft. Lauderdale, Florida
|
| Posted: Wed Feb 21, 2007 9:29 pm Post subject: |
|
|
| jegner wrote: | Looking great! That forearm looks better thant he one I made. When patching MDF, bondo, or plain old wood putty will also get the job done. A few coats of paint will also help reveal any flaws in the molds. A sealer and primer coat really helps spot the flaws.
Jim |
Thanks, theres still imperfections, and im sure everyone doing this tye of thing does, but yea, the primer ive be using really brings out the tiniest flaws. Durham's works great too. Gonna finish the gaunts and the hands. Want to start the biceps this week too.
-tubachris
_________________
|
|
| Back to top |
|
|
tubachris85x
Master
Joined: 15 Jan 2007
Posts: 351
Location: Ft. Lauderdale, Florida
|
| Posted: Tue Feb 27, 2007 8:51 pm Post subject: |
|
|
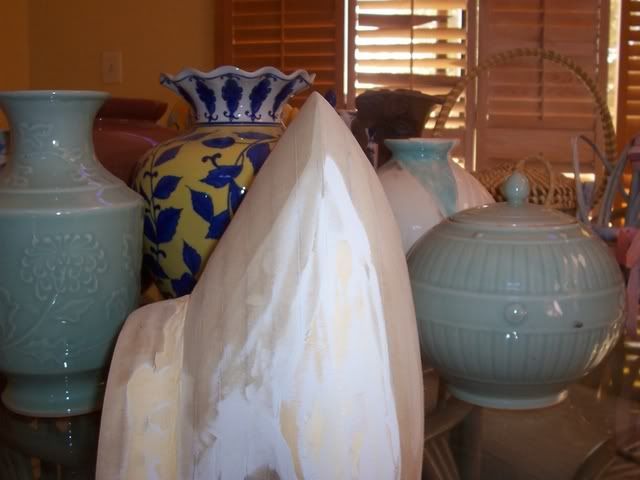
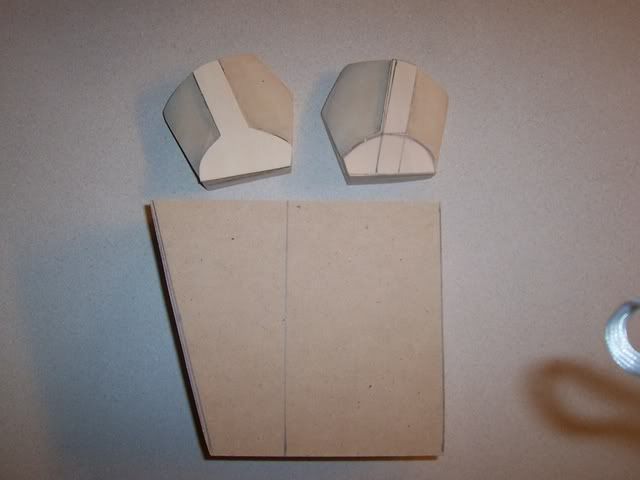
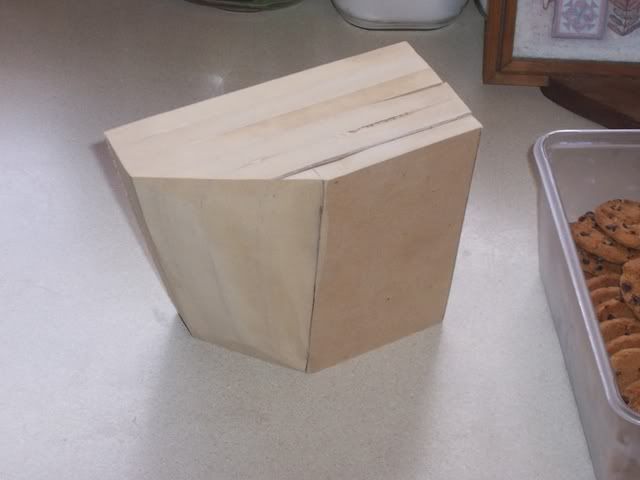
Aleight, well, here's tonight's work. I went to mcheals, and found some thin wood and cut out the shapes, and attached them to the rest of the hand guards. I just need to add a little durham's and its done. I finnally got over the initial shock that comes with starting any mold, and began the biceps. This is only the first half and I think that it came out very well, as far as its initial shape, and relative size to my biceps on my arms. I did some more finnal sanding of the helmet mold, and I promis I will not show more pics of the dang thing until after its casted just because Im getting sick of hearing about it, as Im sure you guys are too. Anyways, heres what I got.
The penciled line is where I will sand it to an angle. This would be the front of the left bicep if your looking at a DT.
-tubachris
_________________
|
|
| Back to top |
|
|
tubachris85x
Master
Joined: 15 Jan 2007
Posts: 351
Location: Ft. Lauderdale, Florida
|
| Posted: Wed Feb 28, 2007 12:02 pm Post subject: |
|
|
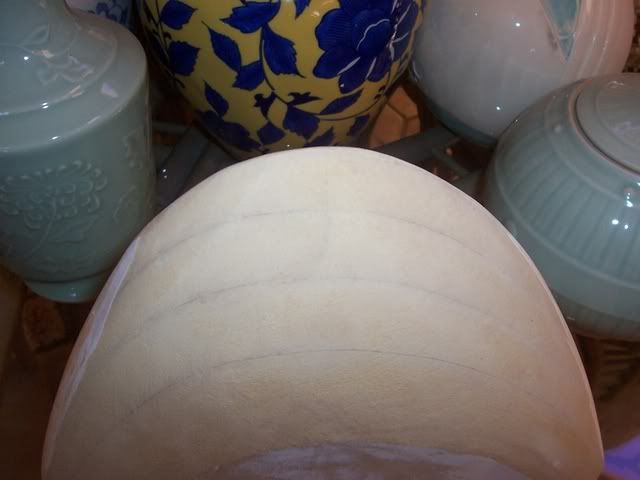
I finnally managed to get up and do work before noon for once, and got down to shaping the bicep for about an hour. Good thing too, cause I also got to get some more "practice" with the sanding/sculpting, and was getting used to working with different grit sand paper for the belt sander.
Well here it is to give you guys a better idea.
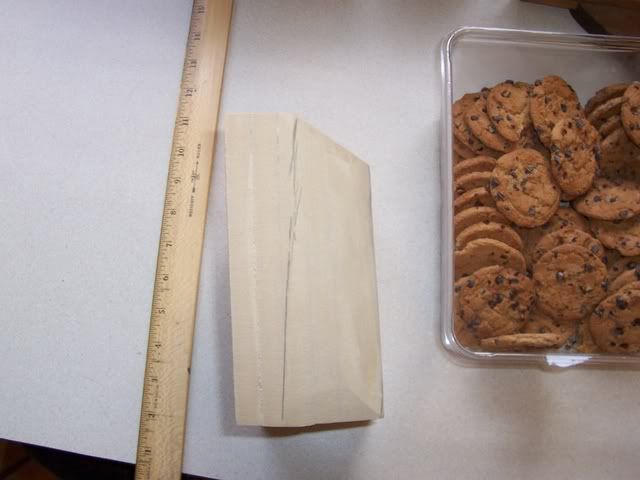
I drew the line where it angles to show where its at, cause it didnt show the first time.
-tubachris
_________________
|
|
| Back to top |
|
|
jegner
Site Admin
Joined: 30 May 2003
Posts: 2144
Location: Texas, USA
|
| Posted: Wed Feb 28, 2007 12:18 pm Post subject: |
|
|
Keep up the good work!
Jim |
|
| Back to top |
|
|
tubachris85x
Master
Joined: 15 Jan 2007
Posts: 351
Location: Ft. Lauderdale, Florida
|
| Posted: Thu Mar 01, 2007 4:27 pm Post subject: |
|
|
Just a heads up, there may not be any updates the rest of this week or the weekend, but next week. I was "told" to fix up my room, i.e., completlty revamping everything minus the bed. Just got a whole new desk, cabinets and night stand, which I painstakenly built all bymyself in a matter of around 6+ hours I think though that I have alot more floor space now, and I finnally got to put my Jango Helm. where I wanted to display it, on my un-official "dedication to Jango" glass/silver shelves. Well, thats been it though, my whole room is pretty much a display of everything star wars, and I cant complain
-tubachris
(Who has neck pain from having to sleep on the couch cause the bed had every star wars product he owns on it...)
_________________
|
|
| Back to top |
|
|
tubachris85x
Master
Joined: 15 Jan 2007
Posts: 351
Location: Ft. Lauderdale, Florida
|
| Posted: Wed Mar 14, 2007 6:26 pm Post subject: |
|
|
Alright, well just to hold you guys up till the nxxt major progress, heres where its at right now. I had to cover that nasty looking line where I glued the halves together, so i added panels to cover it up, and did the same to the other side to make them even in height. I then added some durham's to cover the gaps between pieces. After its done drying sometime soon, I'll go ahead and sand it down, then attach the surface details, once again, put on some durham's for the seems, and then I can paint the base grey. I will have to say, the painter's touch paint is really durable, it hasnt scratched or flaked or anything, and I have put some of it through heck, and nothings happend yet.
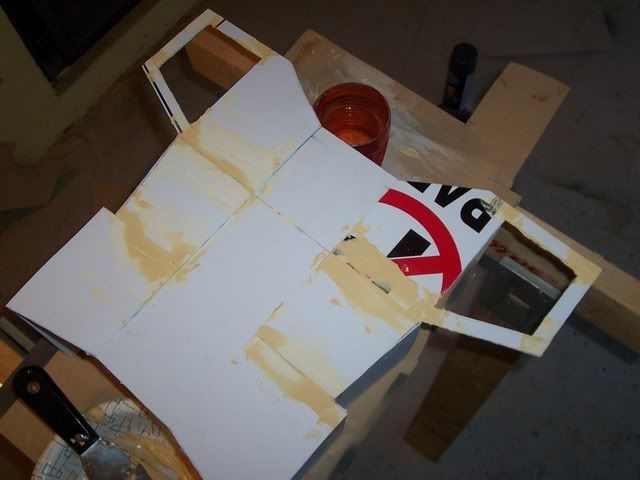
Dont laugh at my work bench, despite the fact its only two saw horses and an old cut up shet of MDF....
-tubachris
_________________
|
|
| Back to top |
|
|
tubachris85x
Master
Joined: 15 Jan 2007
Posts: 351
Location: Ft. Lauderdale, Florida
|
| Posted: Thu Mar 15, 2007 5:31 am Post subject: |
|
|
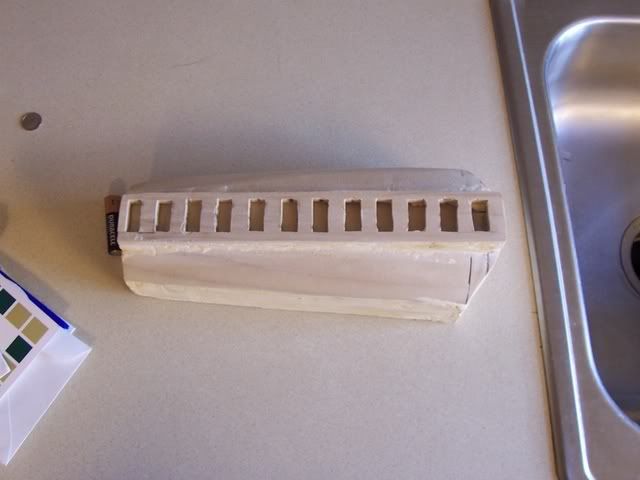
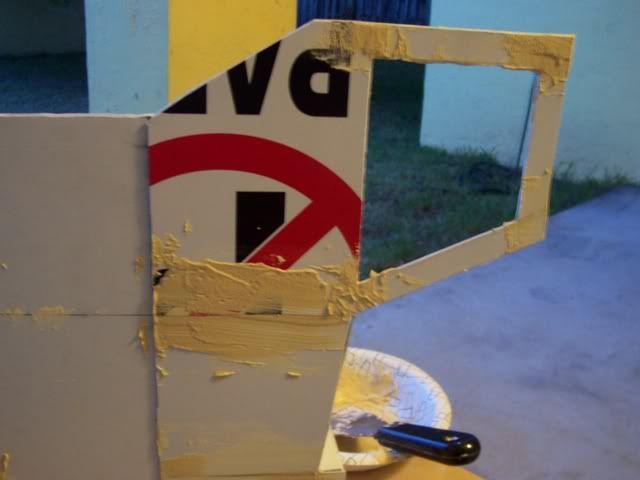
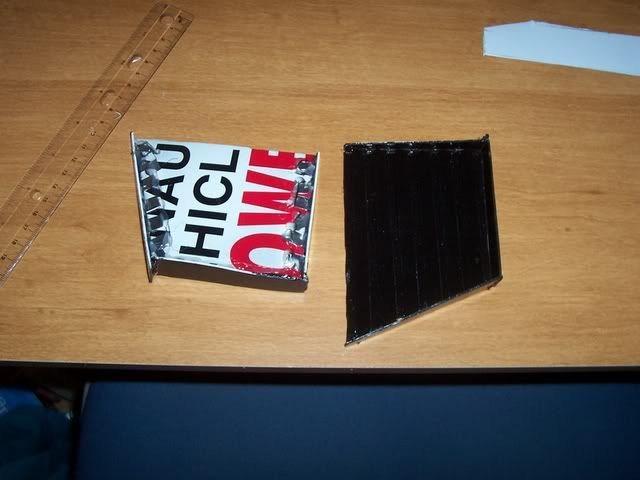
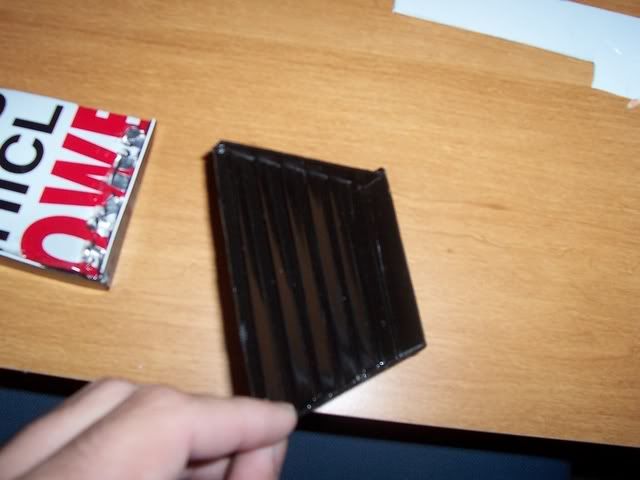
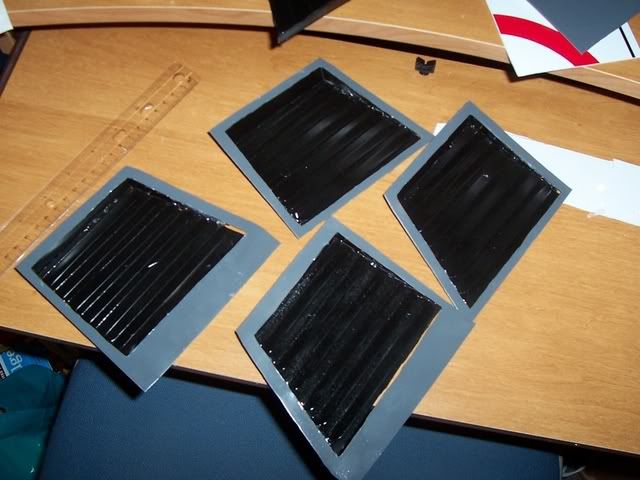
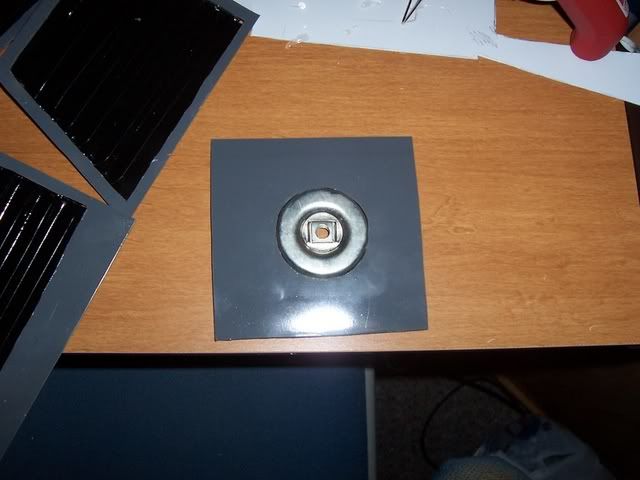
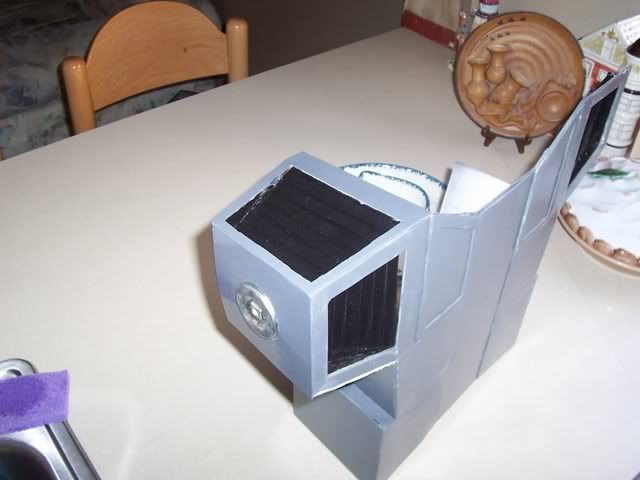
Well, good thing I got batteries early enough. Here are the vents that took forever. Its hard to see, but there are walls that surround the piece so that once its attached to the main body, it will angle inwards as you can see. I also finished one of the side of the boxes witht the circular greebly thing on it. Its smaller then I waned it to be, but I could not find any other object that match it's shape as well as this one.
-tubachris
_________________
|
|
| Back to top |
|
|
tubachris85x
Master
Joined: 15 Jan 2007
Posts: 351
Location: Ft. Lauderdale, Florida
|
| Posted: Sun Mar 18, 2007 12:06 pm Post subject: |
|
|
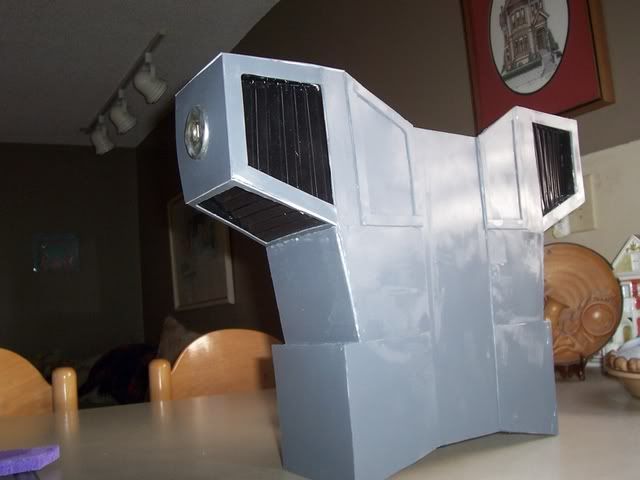
Alright, I spent my morning working on the boxes that I wasnt able to finish last time. Took me awhile to get this one side done, but im still not done with it, still need to bondo and re-paint the grey around it so it will look cleaner than it is. Im also getting concerned about the accuracy of the jp now. I spent countless hours trying to get the right look to everything as much as possible, but im starting to wonder if the box looks "stubby" or too short. Let me know what you guys think.

-tubachris
_________________
|
|
| Back to top |
|
|
jegner
Site Admin
Joined: 30 May 2003
Posts: 2144
Location: Texas, USA
|
| Posted: Mon Mar 19, 2007 7:43 pm Post subject: |
|
|
| I did the scratch built method, and it is looking great. Can you post some comparison pics? Hard for me to know if it is too 'stubby' without a reference or a scale. |
|
| Back to top |
|
|
tubachris85x
Master
Joined: 15 Jan 2007
Posts: 351
Location: Ft. Lauderdale, Florida
|
| Posted: Mon Mar 19, 2007 8:46 pm Post subject: |
|
|
| jegner wrote: | | I did the scratch built method, and it is looking great. Can you post some comparison pics? Hard for me to know if it is too 'stubby' without a reference or a scale. |
ea, I originally was going to put a few with the post, but my file with all my better reference was accidentally deleted, but I printed a few of them out, but Im afraid the scanner wont do it much justice for quality. Im going to try and recover a few of them for you to overview.
-tubachris
_________________
|
|
| Back to top |
|
|
|
|
You cannot post new topics in this forum
You cannot reply to topics in this forum
You cannot edit your posts in this forum
You cannot delete your posts in this forum
You cannot vote in polls in this forum
|
Powered by phpBB © 2001, 2005 phpBB Group
|

