 |
www.TK560.com
Vacuum Forming, Movie Prop, Sci-fi and GIjOE Forum
|

|


|
| View previous topic :: View next topic |
| Author |
Message |
DarthVader1
Expert

Joined: 04 Nov 2007
Posts: 193
Location: Phenix City, AL
|
 Posted: Sat May 10, 2008 2:52 pm Post subject: "SECRET-SECRET" Progress Thread Posted: Sat May 10, 2008 2:52 pm Post subject: "SECRET-SECRET" Progress Thread |
 |
|
I am working on a "SECRET-SECRET, I GOT A SECRET" costume, but NOT-SO secret after this point and some few people who knows about it already....but this is celebrating the 25th anniversary of such character......I just want to share the talent and the progress so far within the forum.
Here are some "TEASER-PICS" of my SECRET project in progress so far:
"SUPER-TEASER" pic:
and a bigger perspective, yet from another angle...
========================================
WHERE IS THIS CHARACTER COMING FROM???
Just for good ol' times memories...
http://www.spike.com/video/2788348
Mini-Movie that led to the creation of the video above, played before the concert...
http://www.youtube.com/watch?v=b--lOyp45z4&mode=related&search=
and the concert version of the video
http://www.youtube.com/watch?v=io5HHGnemVg
Enjoy! 
=============================================
UPDATE:
Just like the post's title....this is a "SECRET" costume (namely to prevent being sued by COPYRIGHTED stuff), and I'm considering doing a short (and REALLY limited) run of them within the group, but that's something to think about and discuss sometime after Dragon*Con. I will send a copy to STYX's agents in California (yes, I have the address and info). I have to wait for an opinion from them first before making the replicas to the general public. (Either way, PM me. )
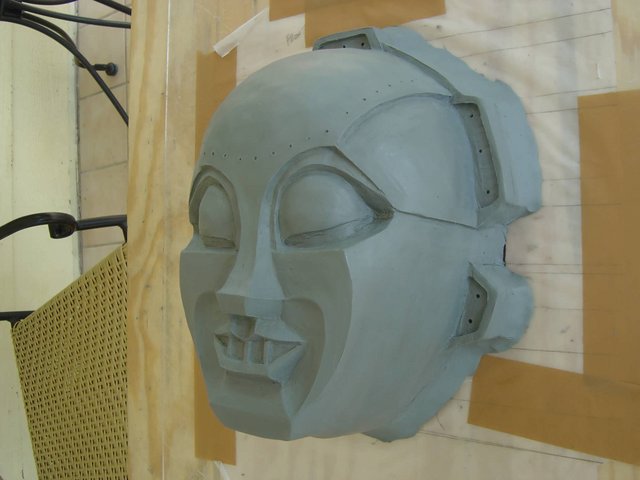
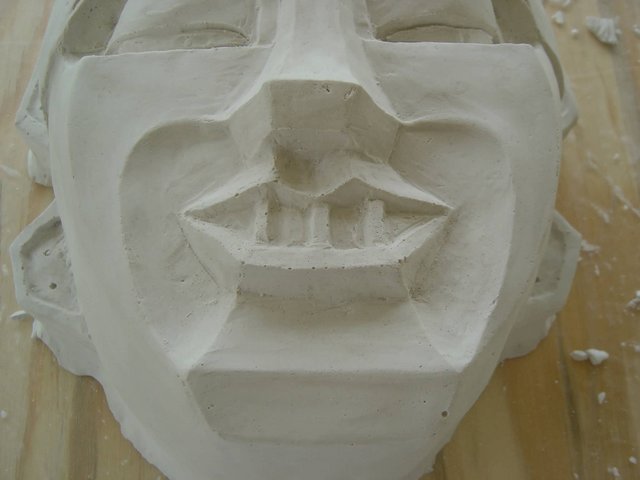
About my progress this past weekend, I had to redo the cheeks, basically cut some of them (they had quite too much), and still working on them since I don't have an original mask and just having reference pics. Working hard on the eyes area, and the nose. As we speak I am in the process of sculpting the mouth area. Once I finish with the face, the rest will be a piece of cake (three more pieces (top-back, back-neck, neck piece). Damn, somehow I feel like a PLASTIC SURGEON! 
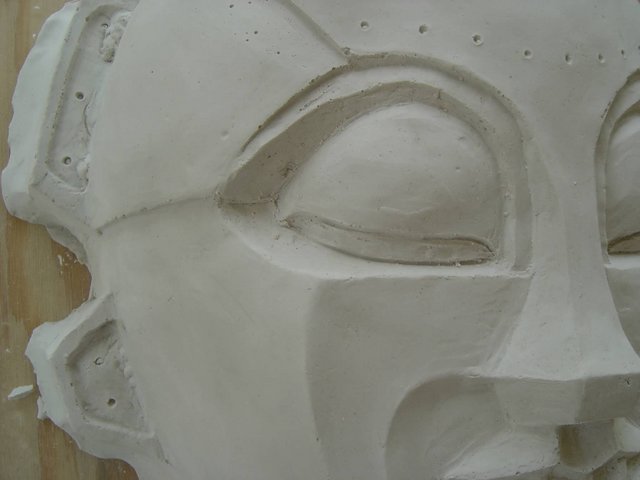
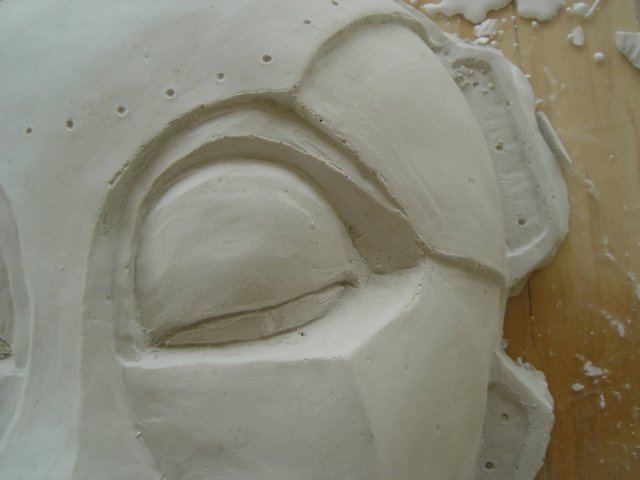
Here's another progress pic: eyes detail (not complete, since once I finish I have to do the comparison progress, fix discrepancies, and then the "smoothing process" by "shaving" lightly some of the rough surfaces, and then a brush-and-alcohol treatment before molding (the rubbing type of alcohol, not the drinking type)...LOL.
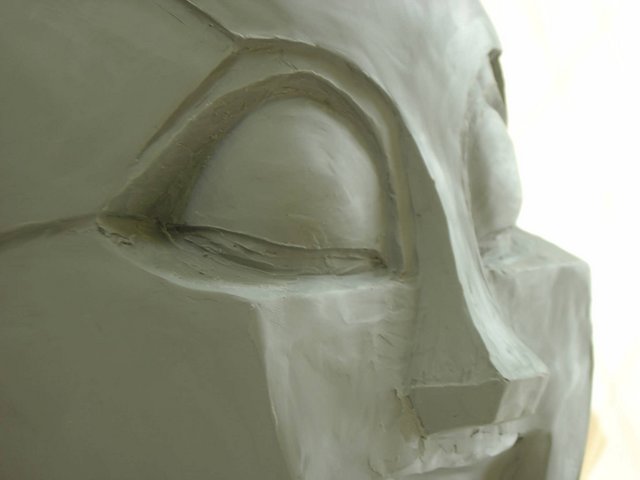
I got to fix some discrepancies with the eyes, where they meet with the nose, and reduce the profile of the cheeks (too "squared"/paralleled like the ones in Vaders helmet). 
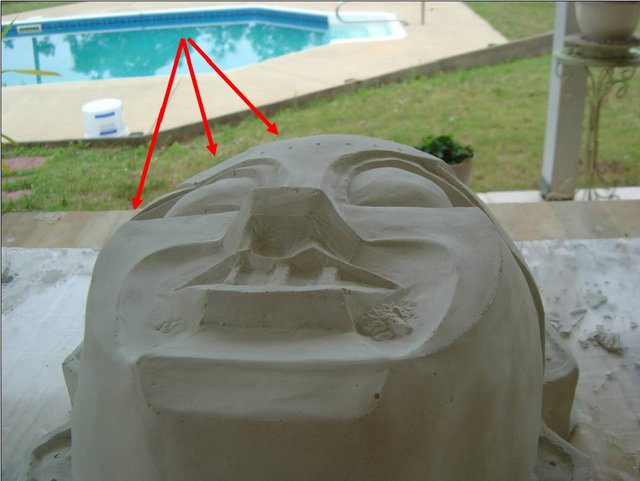
Best angle so far...
Here's a progress of my work so far...
I have improved and completed the last details. Not 100% accurate as I wanted it to be, but really close.....based on the short time and resources I have. (I don't have a job yet), and time is running fast before Dragon*Con. 
Here is a pic of the clay sculpture ready to make a mold of it
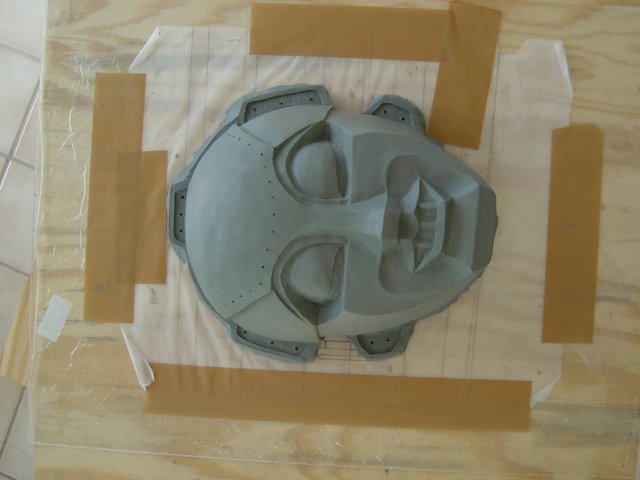
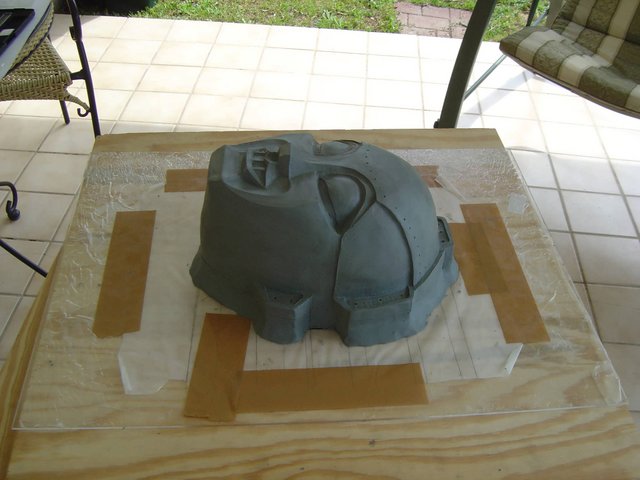
One side....
and the other side.....
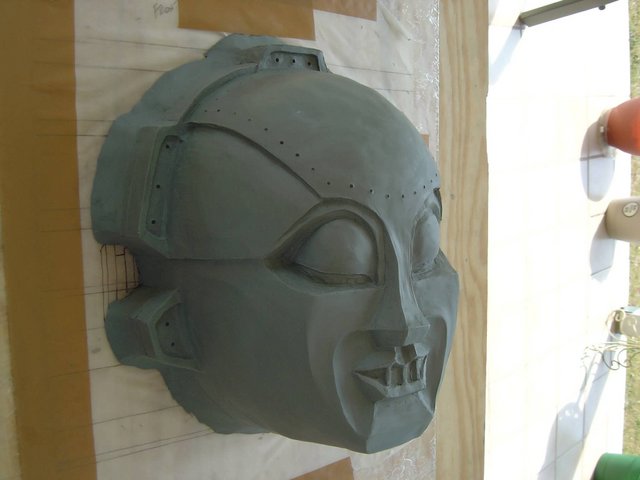
From the distance, since pics taken close don't look as good....
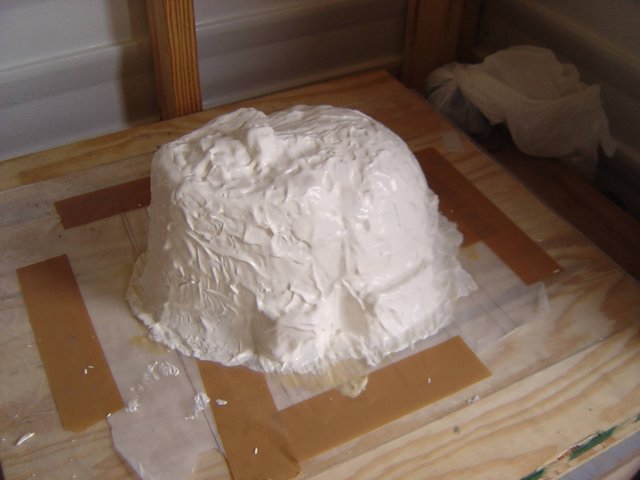
I am making a silicone rubber mold, reinforce with plaster bandages, to then cast in PLASTER, which will be the MASTER MOLD for the Vacuuforming table. This process will take a LOT OF TIME!!! (since it's about 10 coats of the brushable silicone rubber) 
More progress photos to come soon.
_________________
Robert
BH/TK/TB/TS 060
 |
|
| Back to top |
|
 |
TK 109
Guru

Joined: 11 May 2007
Posts: 712
Location: Galena, Ohio
|
| Posted: Sun May 11, 2008 4:28 pm Post subject: |
|
|
hmm, i have know idea, i'm stumped.
looking good! gotta see the final part, this outta be cool.
_________________
-Alex
-------------------------------------------------------
 |
|
| Back to top |
|
|
jegner
Site Admin

Joined: 30 May 2003
Posts: 2144
Location: Texas, USA
|
| Posted: Sun May 11, 2008 5:03 pm Post subject: |
|
|
| Hey, I have that Styx record on vinyl! LOL. Loved the video back in the 80's. Your Kilroy helmet mold sure looks good to me! |
|
| Back to top |
|
|
DarthVader1
Expert
Joined: 04 Nov 2007
Posts: 193
Location: Phenix City, AL
|
| Posted: Sun May 11, 2008 5:18 pm Post subject: |
|
|
Thanks guys.
Ive got to finally do the plaster bandages shell, but had to reinforce it again, since it ended up too flimsy.
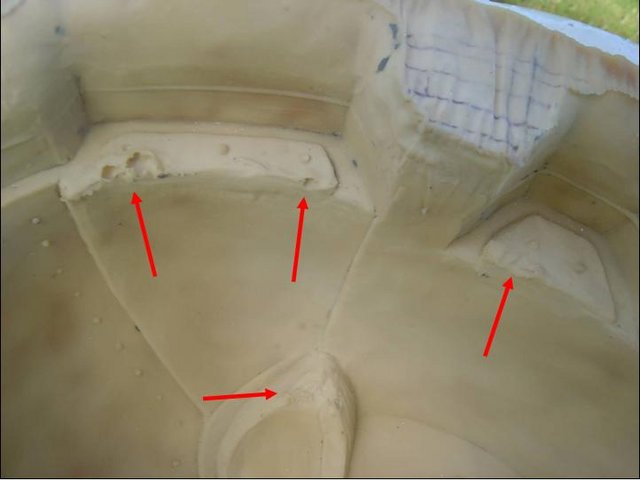
Then to my surprise, when I removed the clay underneath and the rubber mold, Ive noticed that some areas of the rubber were not completely dry yet, and some of the detail got lost.
But I will solve the mishaps when I do the plaster casting. Here are the areas that got messed up, normally, the corner of the eyes, part of the cheeks, but mostly in the side details where they got the most problems.
I will be doing my first plaster casting this week. I have to make a run to Home Depot and get some plaster first.
_________________
Robert
BH/TK/TB/TS 060
|
|
| Back to top |
|
|
DarthVader1
Expert
Joined: 04 Nov 2007
Posts: 193
Location: Phenix City, AL
|
| Posted: Tue May 13, 2008 5:33 pm Post subject: |
|
|
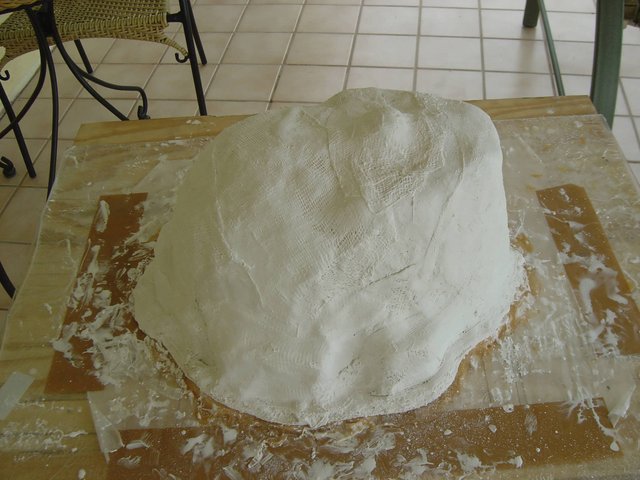
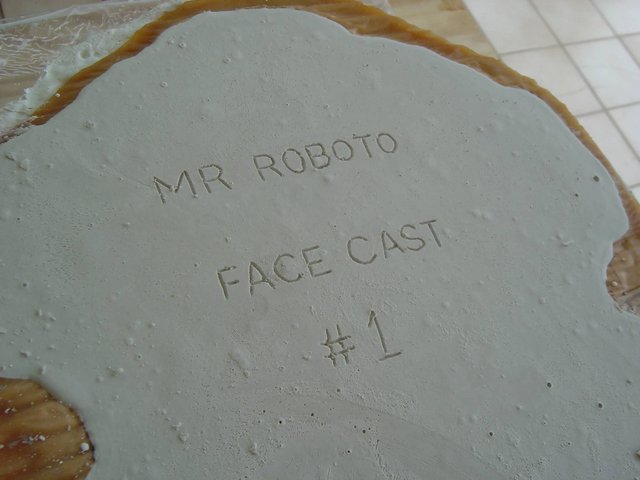
First view of the plaster casting
Another view of the plaster casting process.
I had to add the description, just in case, which has my nickname inscribed at the bottom left (not shown here, though)
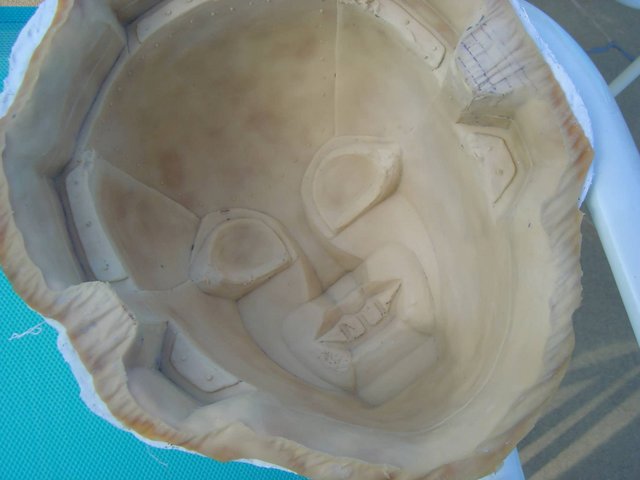
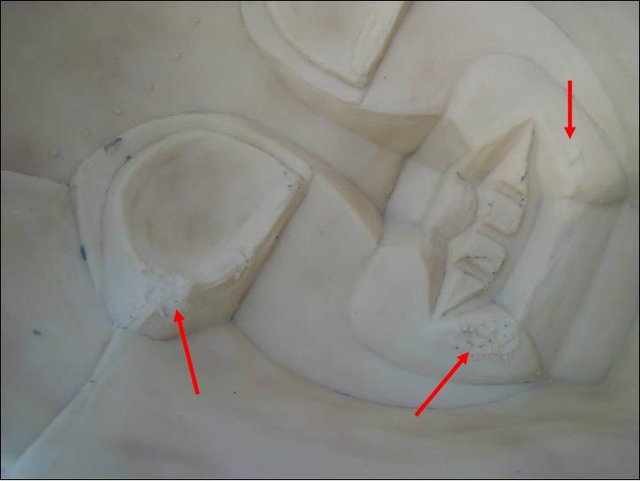
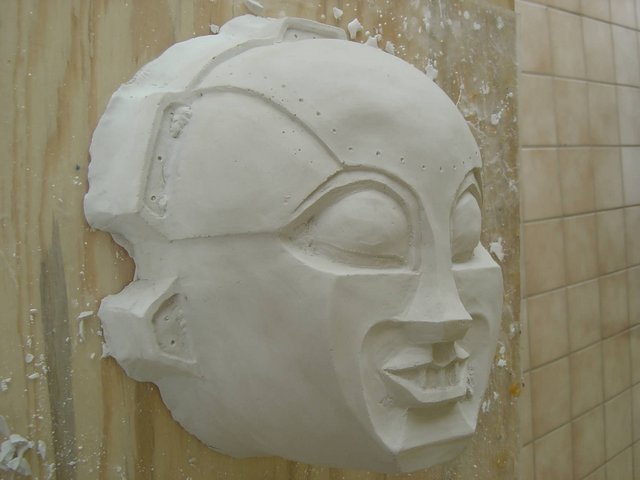
Plaster casting result. As expected, all the deficiencies found in the mold are reflected in the cast, but easy to deal with...
...specifically these areas, not counting the squared-shaped details from the sides and top....
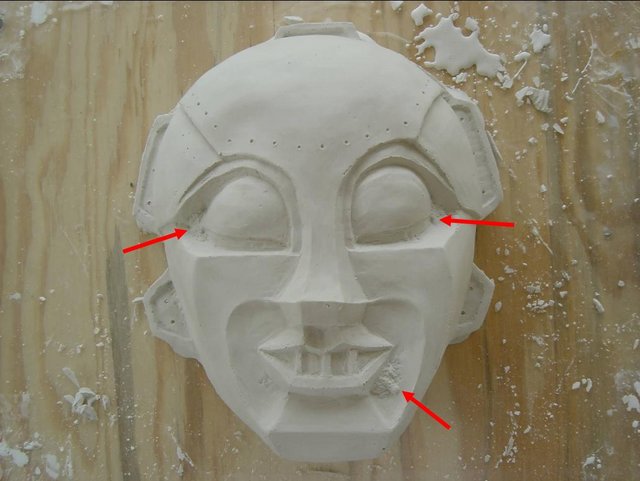
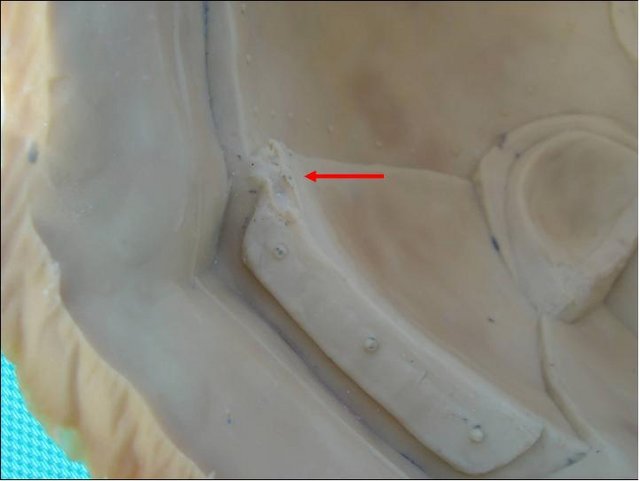
...but I wasn't counting about this one: an imperfection on the cast, due for the fact that the plaster bandage shell was not strong enough, and the clay that was supporting the shell in place, was pushing THAT area due to the weight of the plaster, when I poured it in the mold completely.
Here's a better area of the damage. Easy to fix....reinforce the shell, and redo the casting in some other method, stronger than just plaster.
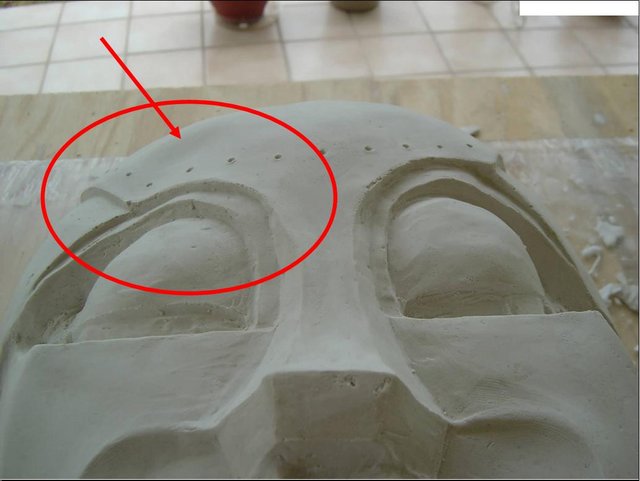
One of the areas affected by the mold, cleaned up. (just fixing the casting, and practice for next time).
The other eye corner, fixed as well....just practicing.
As well as the "venereal-decease-looking" thing in the mouth area. Cleaned up.
More updates coming soon.
_________________
Robert
BH/TK/TB/TS 060
|
|
| Back to top |
|
|
TK 109
Guru
Joined: 11 May 2007
Posts: 712
Location: Galena, Ohio
|
| Posted: Wed May 14, 2008 2:38 pm Post subject: |
|
|
yup, no problem. very nice work.
_________________
-Alex
-------------------------------------------------------
|
|
| Back to top |
|
|
DarthVader1
Expert
Joined: 04 Nov 2007
Posts: 193
Location: Phenix City, AL
|
| Posted: Sun May 25, 2008 8:22 pm Post subject: |
|
|
Thanks.
Ok folks, I've being fighting with this project since I've started, and all due to real-life reasons, plus some failures in between. So far I got success today, since I've changed the plaster type for a stronger one, and made some changes for a lighter version, and also to help with some holes I have to make to obtain detail of the face.
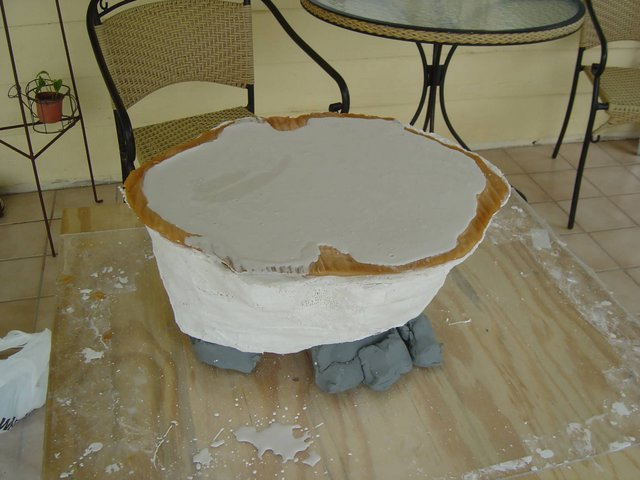
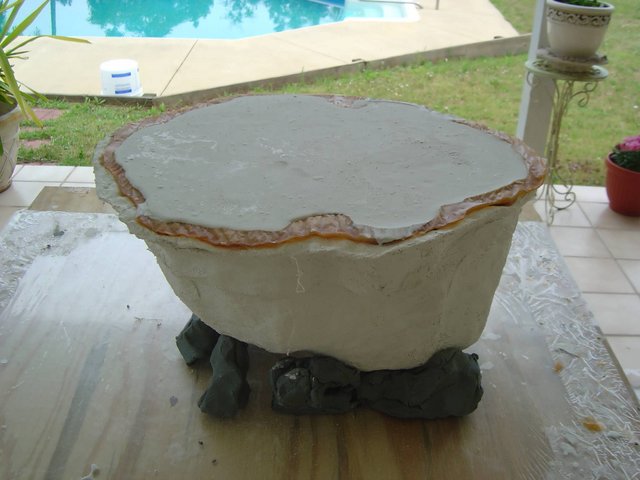
Here's what I got so far,
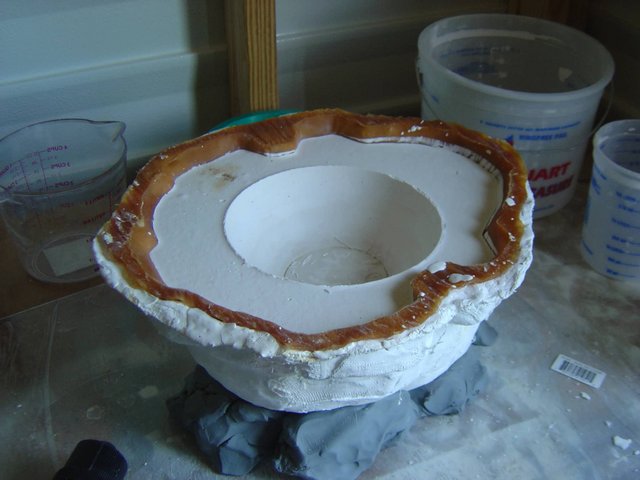
That hole was made by a bowl I pushed while pouring the HYDROSTONE plaster to save in material and weight, thanks to an idea from CRASHMANN (thanks dude!).
I will post more progress pics by tomorrow, since I was kind of busy today.
_________________
Robert
BH/TK/TB/TS 060
|
|
| Back to top |
|
|
chefhawk
Novice

Joined: 15 Sep 2007
Posts: 56
Location: Redditch uk
|
| Posted: Mon May 26, 2008 6:32 am Post subject: |
|
|
Great progress,
the secret is to keep at it with breaks in between
cheers
_________________
 |
|
| Back to top |
|
|
DarthVader1
Expert
Joined: 04 Nov 2007
Posts: 193
Location: Phenix City, AL
|
| Posted: Mon May 26, 2008 5:00 pm Post subject: |
|
|
Thanks chefhawk.
This is the part I like about, when you change materials and the result is almost as you was told....PRICELESS! The plaster is HYDROSTONE, and I love it!!! I was taking the casting for cleanup the areas that got messed up with the mold defects, and I've spent a good 5 hours cleaning it up and ready it up for vacuuforming.
Cleaning it up with the clay-sculpting tools was relatively easy, but harder in areas. I was feeling like if I was working as a dentist or a dental technician, since I was scraping the hell of that casting in all the areas that has great detail, and really got messed up like the area by the left side of the lip/cheek, that was looking like a "venereal-dicease thing".
I've covered the defects with Durham's Water Putty (I love it too), but when it gets hard....it REALLY gets hard. I had a really good deal of time trying to sand down those areas. Here are a couple of pics of the casting so far before the sanding process. I've drilled the holes for better vacuum and have more details. I have to accept that it looks a little CREEPY, though.
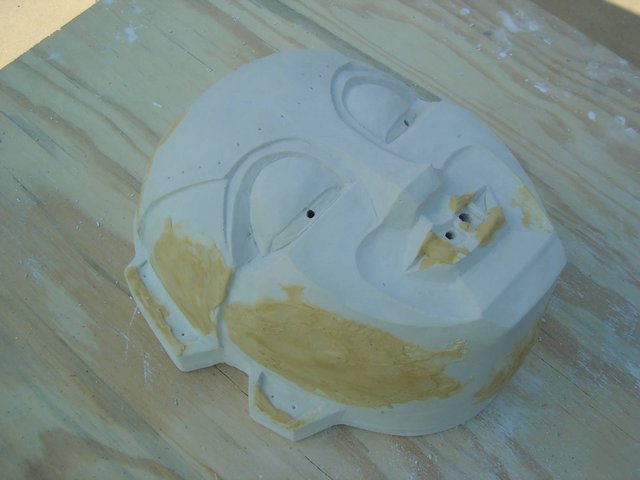
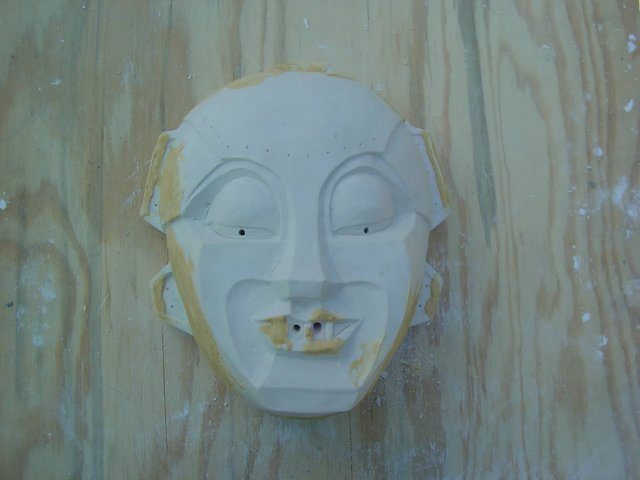

One of the two holes in the mouth actually went through the other side, since the tip of the drill bit I was using, got stuck inside, and couldn't cut through it, and the areas in the mouth that has DWP is due that the drill messed up the detail of the mouth a little, and I had to fix it now. Well, just a little more cleanup, and it will be ready for vacuuforming.
Now I am ready for PART # 2: The top/back of the helmet....it should be easy, since it doesn't have much details.
_________________
Robert
BH/TK/TB/TS 060
|
|
| Back to top |
|
|
TK 109
Guru
Joined: 11 May 2007
Posts: 712
Location: Galena, Ohio
|
| Posted: Mon May 26, 2008 8:16 pm Post subject: |
|
|
beautiful, i love it!
looking good. hydrostone, gotta keep that in mind...
_________________
-Alex
-------------------------------------------------------
|
|
| Back to top |
|
|
DarthVader1
Expert
Joined: 04 Nov 2007
Posts: 193
Location: Phenix City, AL
|
| Posted: Thu May 29, 2008 4:32 pm Post subject: UPDATE - PART #2 |
|
|
UPDATE - PART #2
Just to let you know, I've finished sculpting the second piece of the mask after 3 days, (and that was fast), which I will call PART #2 (it consists at least of 3 parts, but will do it in 4 parts.
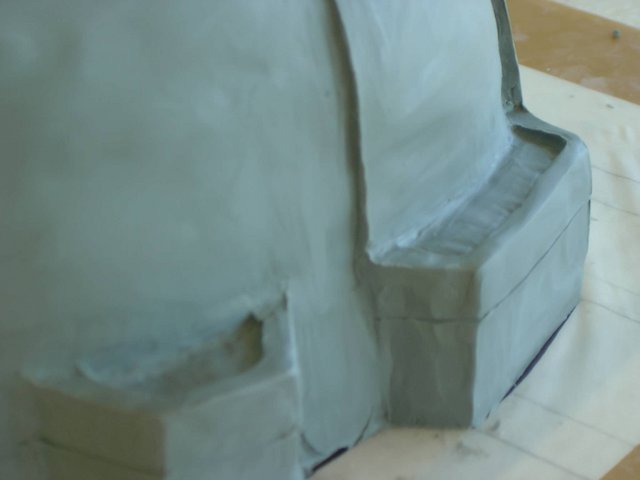
This is the part I've just sculpted and finished today (the RED area):

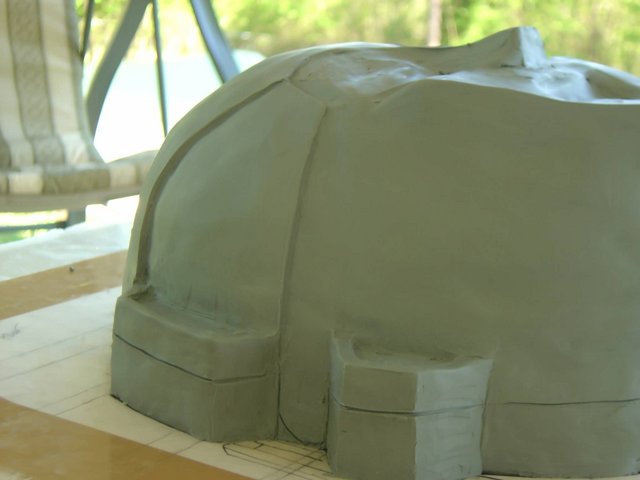
Now, this is the start of the sculpting process...a really rough basic shape.
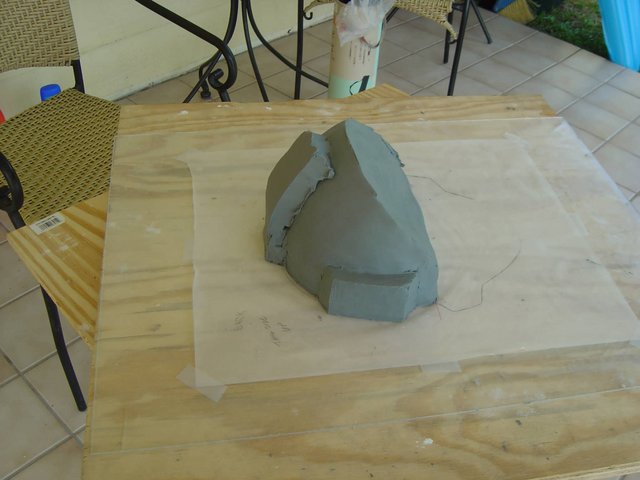
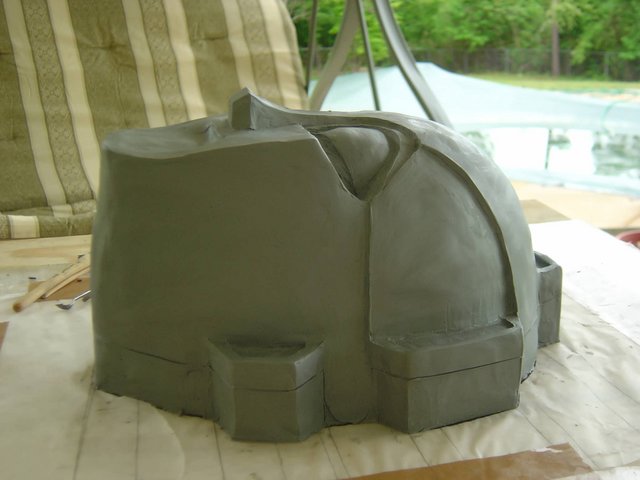
And with the finished details and cleaning:
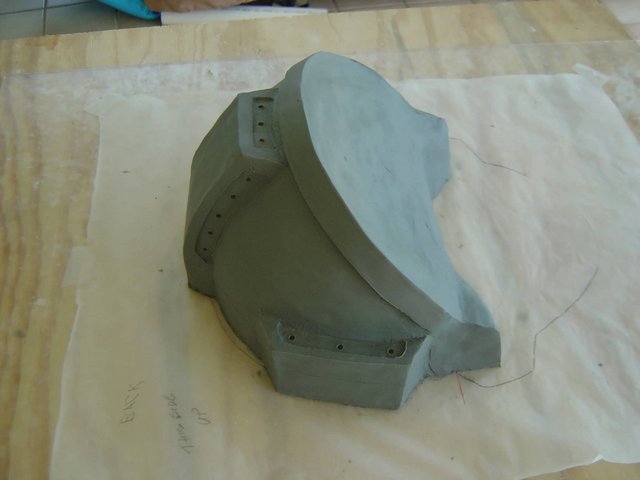
Now three different angles,
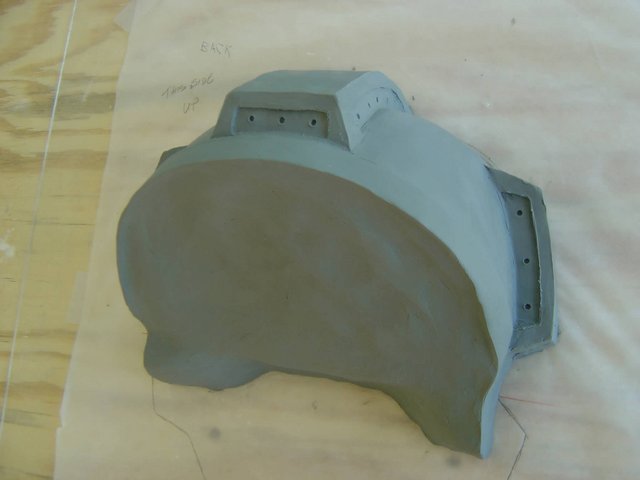
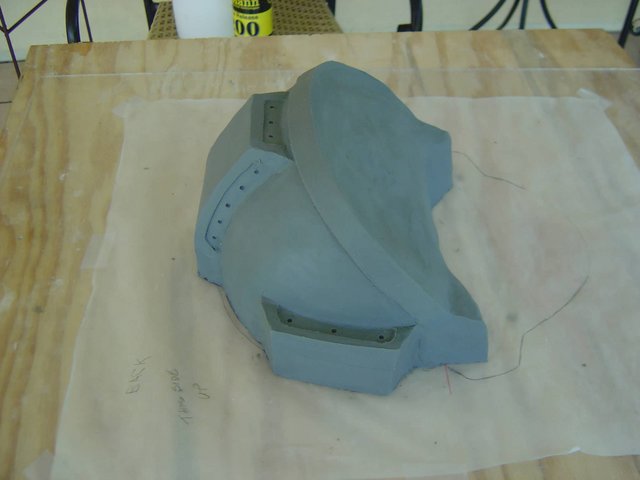
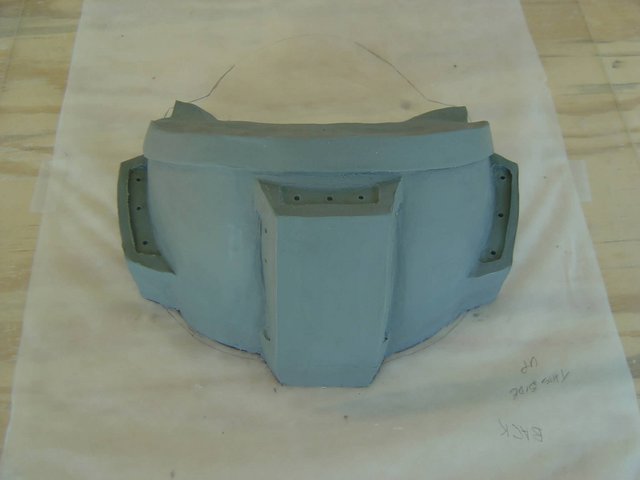
And now straight from the top.
I've just started the silicone rubber mold making progress, and THAT is the tedious one. This time I will let it dry and take my time, since I don't want any mistakes this time from the first attempt with the face part. My next report will be when I finish the silicone rubber mold....probably by next week.
_________________
Robert
BH/TK/TB/TS 060
|
|
| Back to top |
|
|
TK 109
Guru
Joined: 11 May 2007
Posts: 712
Location: Galena, Ohio
|
| Posted: Fri May 30, 2008 1:42 pm Post subject: |
|
|
man, this is going to be cool! that's spot-on, very accurate! 
_________________
-Alex
-------------------------------------------------------
|
|
| Back to top |
|
|
DarthVader1
Expert
Joined: 04 Nov 2007
Posts: 193
Location: Phenix City, AL
|
| Posted: Fri May 30, 2008 8:39 pm Post subject: |
|
|
Thanks Alex for the compliments, and humbled (and shy) by your opinion, but I am just doing the best, out of the really few references out there so far. I really appreciate it.
That's the reason I mentioned at some point, "not 100% accurate", since there area some details lost in the images, not real accurate references from the real props, plus the mishaps I've had in the process....but I'm trying to make it the BEST it's ever done all these years, regardless of the materials involved and process.....no matter what.
Anyway, I will be posting progress by next week about the casting of Part #2, and how it came out...learning from the last experience
_________________
Robert
BH/TK/TB/TS 060
|
|
| Back to top |
|
|
CrazyFool
Expert

Joined: 07 May 2008
Posts: 203
|
| Posted: Fri Jun 06, 2008 8:11 pm Post subject: |
|
|
Wow Vader. How cool. You brought back some memories too. My best friend loved Styx and dragged me to four of five of their concerts in the late 90's. Actually, he only had to drag me to the first one as I was a fan after that. Funny thing, I never owned a Styx CD until last month. It's the only CD I've bought in 2008.
Great job. I wonder what clay you're using? I only have (limited) experience with Super Sculpey... but your project looks bigger than what I would imagine people use SS for, since it gets a little pricey.
CF |
|
| Back to top |
|
|
DarthVader1
Expert
Joined: 04 Nov 2007
Posts: 193
Location: Phenix City, AL
|
| Posted: Sun Jun 08, 2008 5:53 pm Post subject: |
|
|
CRAZYFOOL, my pleasure! That's the reason it inspired me to do this project, just look at my signature for the answer, besides to be original, and to better than some predecessors, which I haven't seen a better replica EVER to come to surface.
NEW UPDATES
Well, I've been working with Part #2 of the helmet, now I just need to sculpt part #3 (and last one)....and I will do that this week or weekend....too much ongoing this whole past week and weekend as it is.
Anyway, I've just finished the sculpt last weekend for part #2, but I didn't post any pics of the progress, since it's the same process as part #1. I've just finished part #2, and these are the pics so far for the piece to be vacuuformed on top. Can't wait until I start (and finish) Part #3.
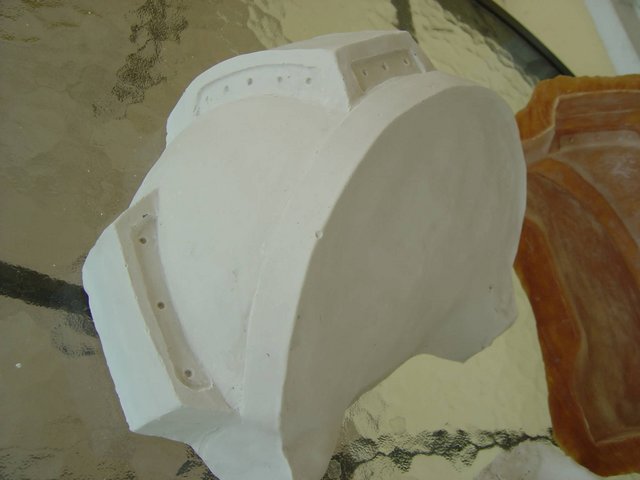
The three parts together: Mold, plaster-bandage shell, and HYDROSTONE casting.
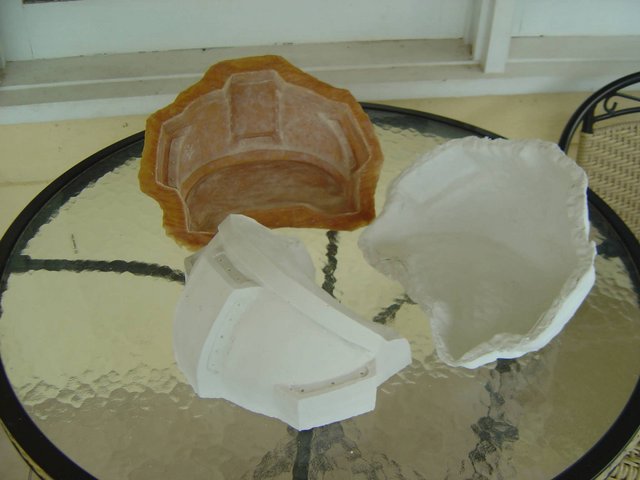
Part to be vacuuformed with, just need a little few minor fixes here and there, but nothing biggie.
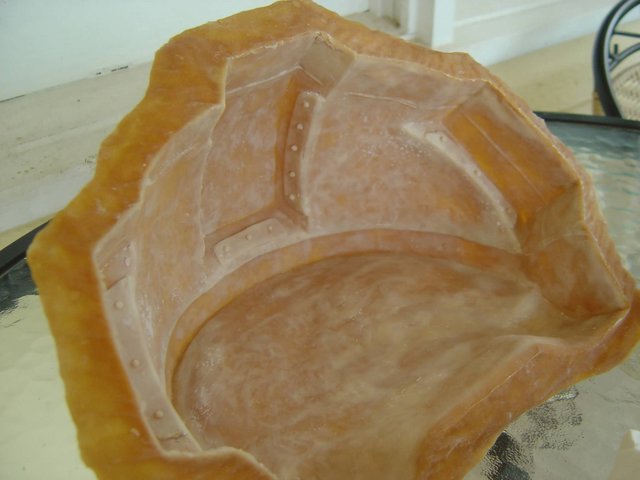
Pic of the silicone rubber, which came out....PERFECT! Even the studs that makes the little holes, came out in PERFECT shape, IMHO.
_________________
Robert
BH/TK/TB/TS 060
|
|
| Back to top |
|
|
|
|
You cannot post new topics in this forum
You cannot reply to topics in this forum
You cannot edit your posts in this forum
You cannot delete your posts in this forum
You cannot vote in polls in this forum
|
Powered by phpBB © 2001, 2005 phpBB Group
|

