CONTENTS:
TK560 Main
Star
Trek TOS Props |
Communicators
Phasers
Tricorders
Star
Wars EP IV-VI Props |
Helmets
Blasters
Stormtrooper Armor
Lightsabers
Astro-Mech Droids
How-to Guides
Misc.
Sci-Fi Props |
Cylon
Centurion
Viper Pilot Helmet
M41-a Pulse Rifle
Motion Tracker
B5 PPG
1964-1976
GIjOE Figures |
Retro
Box Designs
Repair/Restoration
Replica Parts
40th Anniversary
World
War II Militaria |
Replica
Weapons/Gear
Reenactment Units
ME262 Project
Civilian
Marksmanship Program |
M1
Garand Rifle
M1903 Springfield
Rifle
M1 Carbine
Other
Stuff |
Discussion
Board
Lauren Photo Albums
Egner II
Design
Please
note, that the images, logos, and respected artworks, are property of
the original copyright owners. TK560 has no affiliation with any of the
intellectural property owners. This is a fan site dealing with movie and
television replica props, original GIjOE action figures, World War II
memorbilla, and marksmanship/ firearms interests. Most of the images used
on this site are photgraphed by the site owners. Official logos are used
to identify specific products/ manufacturers.
|
|
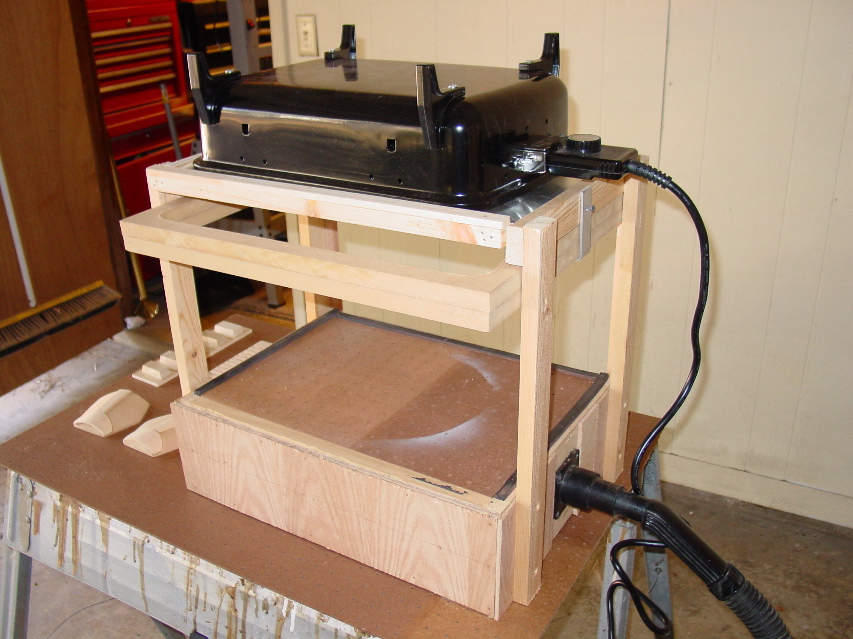
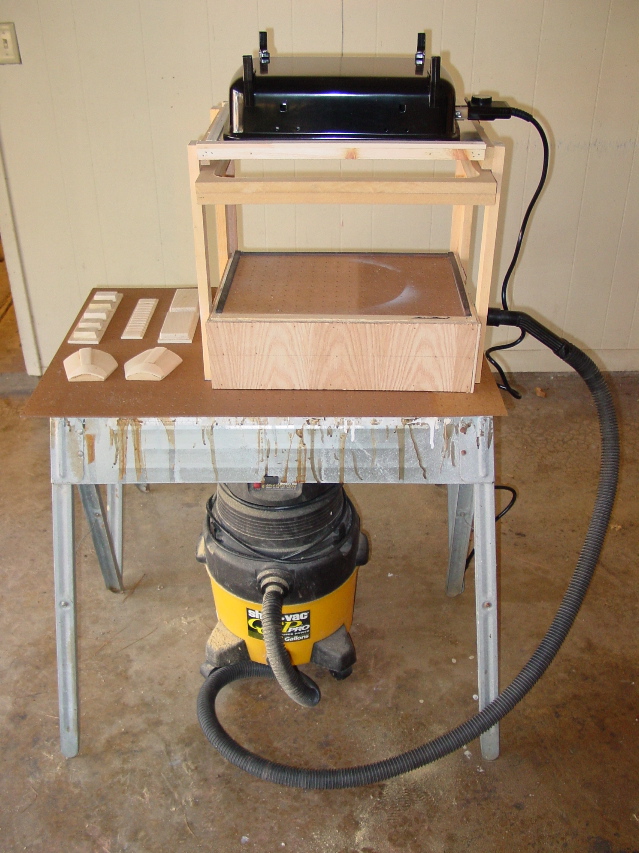
Mark II design: This is the Mark II design. Again, I used the same 12"x18" vac-table from the Mark I. But this time, I mounted the heating grill upside down and about 10 inches from the vac-table surface. Also, I installed an aluminum sheet between the heating element and the work surface. I hope this will diffuse the heat and make it more even. Finally, I made a new frame, larger with rounded sides. I hope this will give me more surface area. Now, the inside area is the same as the vac surface of the table. No wasted space lost to the frame dimensions. After a series of test, the aluminum heat deflector did not work so it was removed.
In this image you can see the whole station. This rig is very portable. The mark II has a simple construction:
|
|
|
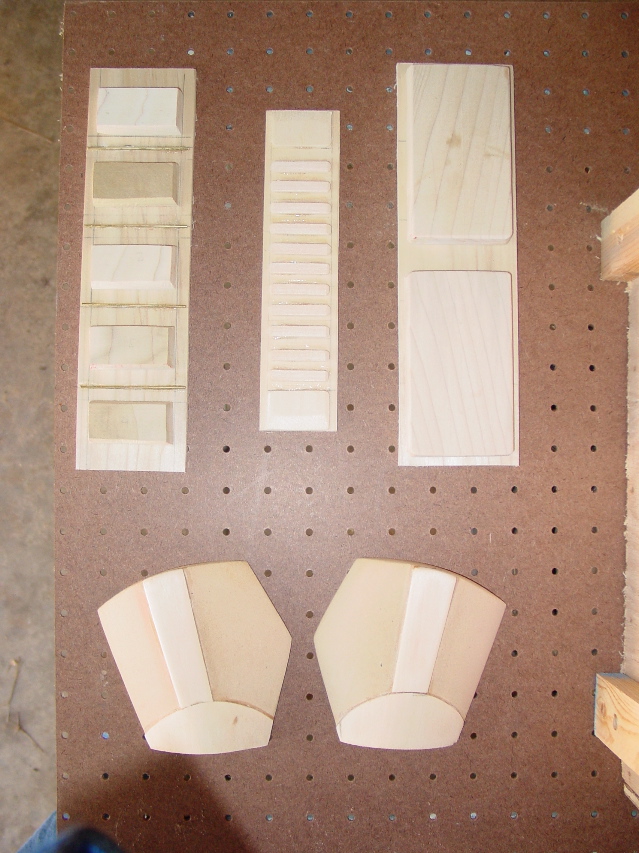
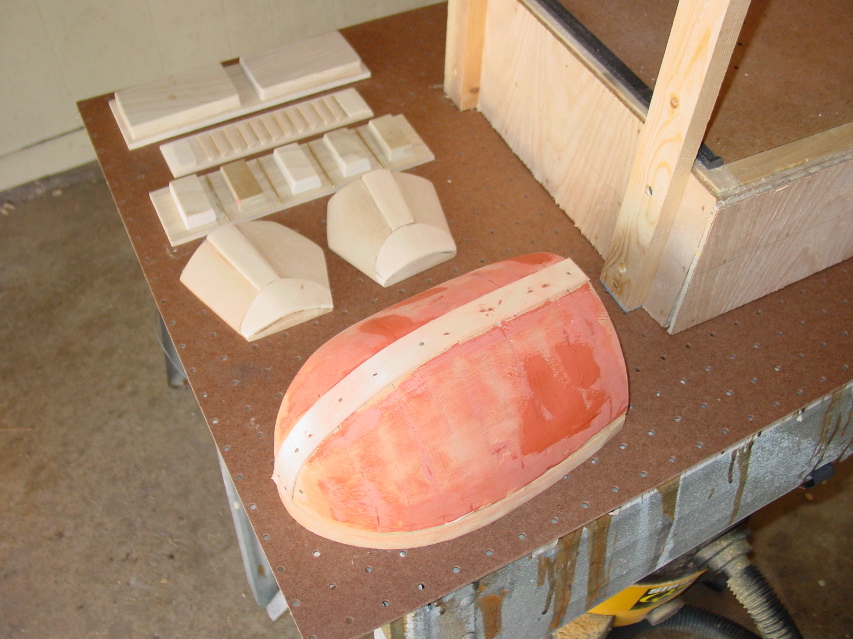
Molds, "Moulds" or Plugs: Here are some of the Stormtrooper molds or "plugs". Made of MDF and basswood hobby boards. These will need to be sealed with a sealer and some more sanding and risers with cut marks will need to be added. The hand pieces are hand sanded using a rasp. No power tools here! [Although a bandsaw was used to rough-cut the shapes.] I used my existing FT/FX trooper set as a basic guide but with my own interpretations added. The shoulder bell will be the largest mould that I can use in this rig. If all goes well, A larger 24"x30" or 24"x36" unit will be constructed. This larger production table will need more heat, [3 or 4 units total, and a power strip] and a better shop-vac, but should be large enough to make the entire trooper suit. This all depends on how the MKII prototype performs.
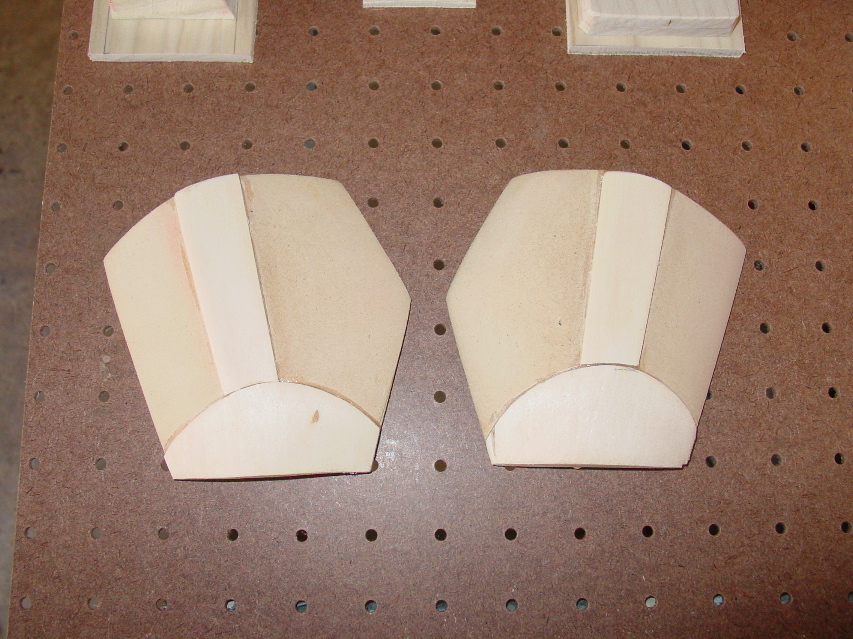
Here is a shot of the "hand" molds. Note, each part needs to be elevated above the vac-table surface in order to have the correct contours once it has been trimmed out.
And a view of the shoulder bell still being worked on. The correct contour is a little tricky. |
 |
The Frame: Here is a detail shot of the frame that will be used to hold the melted plastic sheets. Not quite finised, I hope it will provide the necessary structure to hold the sheet of styrene for its trip to the vac-surface. |
 |
The First Test Pull: In my initial trials, I used what polystyrene I had on hand, an old "Garage Sale" sign. While functional as a test subject, I really needed to find a good styrene source. I eventually found "US Plastics Corp." and ordered the .060 styrene in a 40" x 72" sheet. Cost is $14.39 plus shipping. Not too bad. I am optimistic that this will work out well. HIPs is just a short name for High Impact Polystyrene. #43334. a 12" x 18" sale sign will run $5.00. The paint on the sale signs seem to cause some weird distortions too. |
 Click on the image for a larger view. |
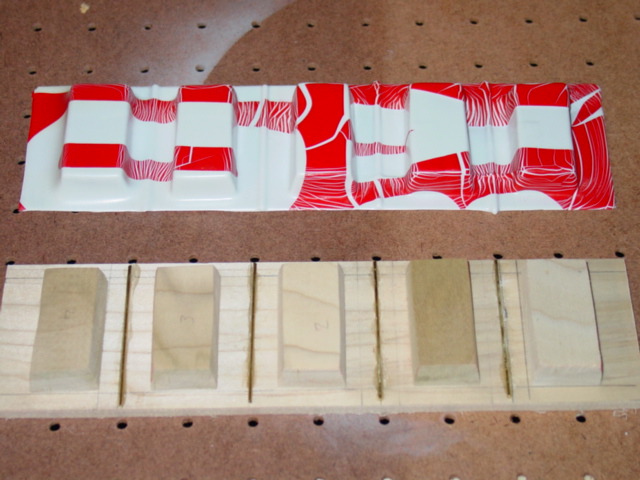
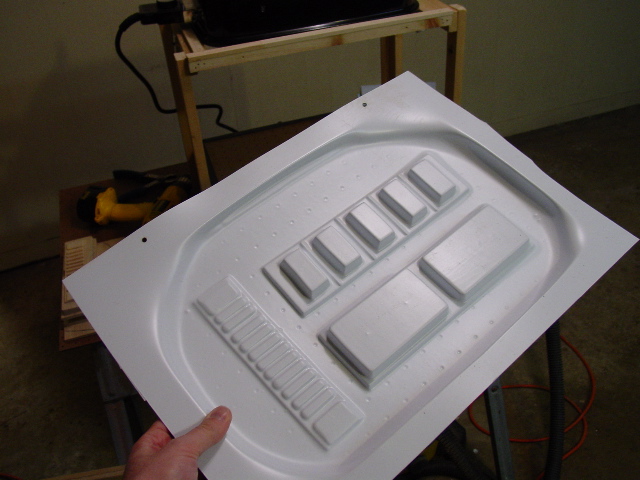
Upgraded Pulls: Here is the "US Plastics Corp." .060 styrene in a 40" x 72" sheet. Cost is $14.39 plus shipping. Not too bad. I measured the the frame, scored it with a knife and slipped it into my frame. Two holes were drilled and thumbscrews were slipped in. The plastic is held securely during the heating and vac process. Here you can see the hand sections and the collar strips being formed. Notice that around the corners the plastic did not get hot enough. Also, I need to add risers with cut marks to indicate where to trim the parts. |
 Click on the image for a larger view. |
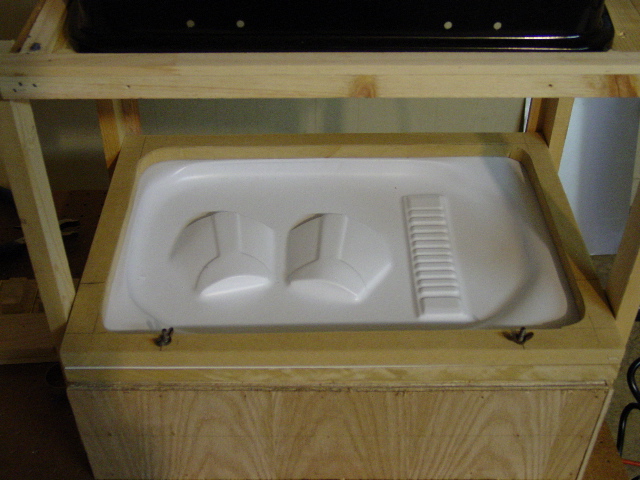
Here is another view of the second set of molds being vac-ed. I re-oriented the heater, and got better results with this pull. I still need to figure out some risers with cut marks on the "drop boxes" as the "bottoms are too curvy. |
 Click on the image for a larger view. |
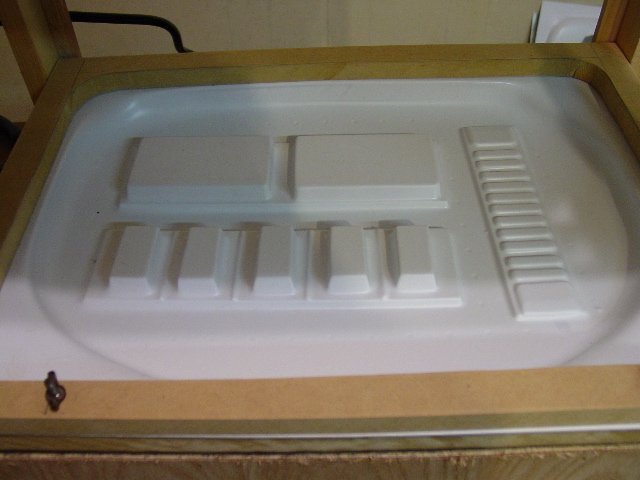
Here is the final test pull, removed from the frame. You can see, this is about the best I can expect from the current heating set-up. Not bad, I'd say 80-85% coverage. The 3 hp Shop-vac seems to suck just fine. I do have some extended heating issues with the cheap-o Sunbeam grill that I am using for the heat source. Adding a second unit should fix the problem. Also adding magnetic catches to hold the frame during heating should make the transition smoother. |
Test Pull Anaylsis After studying the first batch of pulls, I made some minor modifications to he heating elemet. I removed the perlite/furnace refractory from under the heating elemet. This did not seem to have any heats reflecting benefits. I inverted the stock metal heat shield. The built-in thermostat seems to "cut off" about the time the plastic is ready to vac. In addition, I've added a magnetic cabinet catches to the frame to hold the platic in the heating position. This seems to work very well. Also, final study of the .060 styrene tells me that it is a little bit too thin. I think I'll try .080 when I run out of this test material. |
|
More on the Molds So far, the moulds made for this stormtroopr project are the following:
Moulds that can be made with this vac-table are:
The parts that might work in this machine but are unsure due to the size/shape are the buttocks armor, and codpiece. Molds that will require a larger vac-table rig:
Since I have a GT/FX armor set, and I know of some of its inaccurate elemets, I have decided to "base" this project with those modifications in mind, but using the GT/FX as a scale guide. |
|
| This
project was last update on June 1, 2004. |
|